Although not a navy troop, Bondo nevertheless has had a lifelong
fascination with flying boats, maybe because his dad had long ago owned a
Chris-Craft Riviera runabout which seemed, at least to an impressionable
twelve-year-old, to “come up on the plane” and “fly” over the waters of new
York’s Lake Chautauqua.
This boy modeler’s been accumulating flying boat and amphibian kits for at least
thirty-five years, from the WWI Felixstowe through WWII’s Coronados, Catalinas,
Mariners and Mars, from the Korean War’s Albatrosses, all the way to the Marlins
and (again) Albatrosses of the Southeast Asia conflict. In between the Korean
and Vietnam wars came the unarguably piece de resistance of flying boats and,
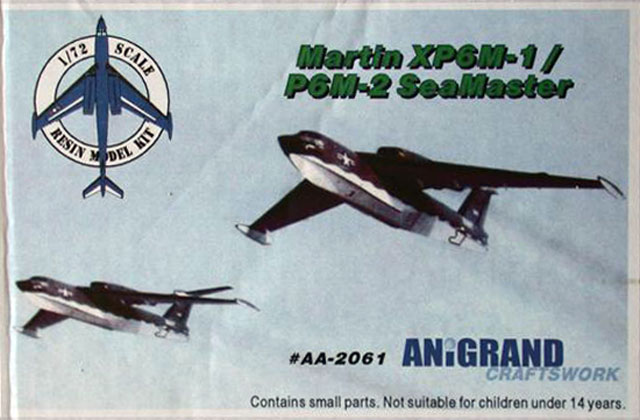
sadly, pioneering Martin Aircraft’s last gasp, the all-jet, cutting edge P6M.
Conceived as a high speed mine layer, the SeaMaster suffered the agony of being
conceived, designed and tested at a time of very high strategic planning flux
among U.S. armed services. The Air Force strongly objected to a sophisticated,
large, multijet-engined navy airframe treading on its sacred “turf,” strategic
bombing. Even within the P6M’s own service branch, nuclear-powered, ICBM-armed
submarines, and the advent of long-ranging nuclear aircraft carriers were
obstacles that turned out to be showstoppers. The SeaMaster “died” on 21 August
1959. Although Martin Aircraft had other, non-aircraft projects in work, the
loss to its large flying boat manufacturing facility at Middle River, Maryland
was catastrophic. And, to top off a really grim situation, the Navy unbelievably
disregarded aviation history by directing that all P6M airframes, manufacturing
fixtures and blueprints be destroyed. No complete SeaMaster airframes remain
today; aviation enthusiasts, including us modelers, are also victims of that
same, shocking decision.
Kit Chronology
Although there might have been a Japanese injected model of the
SeaMaster, the most well-known kits today are an injected, “box scale” (1/136)
effort by Revell in the Fifties (H-244) and the 1/72 Seventies Airmodel vacuform
kit from Germany. The Airmodel kit is typical of vac technology of the time:
thin plastic, male molding, rounded edges, panel line “trenches”, poor clear
parts, etc. Granted, the kit is doable by a competent scratchbuildering modeler,
but prepare for a plastic “beating.”
Enter Arnold and the good guys at Hong Kong’s Anigrand Models, and now it’s a
whole new ballgame. I had for all intents given up hope that there would ever be
a 1/72 P6M kit to replace the Airmodel vac, and I had even cut out the parts and
sanded trailing edges. In fact, Matthias Simon, the niceguy new principal of
Airmodel has been slowly trying to upgrade the old, more desirable releases by
doing resin details and refinements, and he had already kindly sent me gratis a
redone canopy and seats for the SeaMaster. I’m very sorry for Matthias to have
to report that the, granted, much more expensive Anigrand version of the P6M
simply blows any previous efforts, by anyone, out of the water. Unless, that is,
“practice bleeding” is the modeler’s raison d’etre.
Anigrand’s all-resin release is perhaps the largest undertaking
yet by this firm, and that presages future releases of even more interesting
subjects, such as the C-124 that is to be released in October 2006. Woooweeeeee!!!
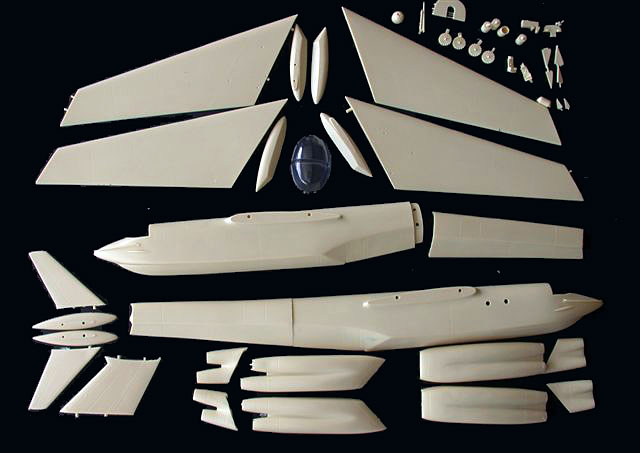
Molding
Smooth, clean castings, very reminiscent of Planet and other
Czech resin releases. Engraving is crisp, ever so slightly more aggressive than,
say, on 1/48 Tamiyagawa kits. But, I think we’re dealing here more with the
master modeler’s personal style than what the real scale panel line width/depth
would be. In any event, this machs nichs to this modeler. Some small bubbles
have occurred on my copy, especially at the aft edge of the canopy “hole”. Some
of the bubbles luckily have that tissue-thin covering over the bubble, so I plan
to merely fill in with CA+ on the bubbles’ backsides. A few additional bubbles
were also found at the end of the afterburner cones. The flying surfaces are
very thin and generally warp-free. Engine nacelle mounting holes in the top
surface of the wings should not be confused with bubbles!
Each half of the long fuselage is, in turn, broken into two
components, with the break well back on the empennage. Alignment holes and pegs
are provided, along with a substantial overlapping join area; no weak butt
joints, as is the custom with Collect-Aire kits! The delicate spray chines on
either side of the nose area are nicely represented, but you might want to
reinforce them with a thin fillet of CA.
Details
The builder is given the choice (and parts) of doing the
prototypical XP6M-1 with the prominently separated, long afterburner sections
and “cage-style” canopy, or the definitive production version, the P6M-2, with
the more outwardly canted, more faired-in engine nacelles and bulbous, “cleaner”
canopy. Cursory fitting of the separate bottom aft afterburner sections reveals
that this is a likely place for filling and sanding.
A note regarding the two possible versions: Anigrand seems to have missed the
fact that the production P6M-2 featured a revised wing with essentially no, or
very little, anhedral. That is, the wings no longer “drooped” as much as in the
XP6M-1s but were much straighter all the way out to the wingtip floats. This
change caused the whole P6M-2 airframe to, when at rest in the water, weirdly
cant to one wingtip float or the other depending on balance. Builders will have
to make their own changes in the wing joint to accommodate whichever version
they choose.
Additionally, Anigrand has made no provision for the XP6M-1's thinner “teardrop”
tailplane fairing at the top of the vertical fin, but has only addressed the
“fatter” profiled fairing of the production P6M-2. The early version builder is
on his own here.
Cockpit
Small parts consist of the aft bulkhead, seats (with cast-in
harnesses), consoles, instrument panel and control yokes. Both canopy versions (vacuformes)
are provided; they’re clear, clean, with petite engraving. When doing the
production version with the large, unframed canopy area on top, the builder
might want to “busy-up” the cockpit by adding some miscellaneous PE panels from
the spare parts box. Bondo’s copy unfortunately arrived with large portions of
the cockpit floor broken off and missing. Scratchbuild City; life’s too short!
Other Details
Included are engine compressor faces and exhaust tubes. Left out
are the late engine nacelle modifications such as intake fences, spoiler strips
and prominent intake splitter plates.
Beaching Gear
What beaching gear??
I’m surprised that so prominent an assembly has been ignored by
Anigrand. The builder is faced with just resting the model on a table or base,
doing the water jell bit, building a simplistic cradle ala a ship model, or
doing as employees of Bondo industries are: scratchbuilding the complicated,
“busy” gear from available color pix. To be fair to Anigrand, Arnold just may
offer the distinctive, large yellow rig in the future. I wish it had been
included up front, even at an increased price.......
Decals
No decals were in my kit, and a quick email to Hong Kong saw
said sheet at my door in less than two weeks. The sheet features the distinctive
prototype SeaMaster script logo, national markings and a few stencils for both
versions; I think I’ll go the aftermarket route.
Instructions
Both sides of an 8 1/2 X 11 inch sheet. Perspective parts blowup
with individual callouts and a short history. On the reverse side are two-view
B&W drawings of both versions showing color delineation and decal callouts.
A VERY welcome release and well worth the righteous bucks for everyone but
modeling masochists. No problems that can’t be handled tut suite by most
builders, the beaching trolley excepted. Arnold REALLY needs to offer this
feature!
Highly recommended.
Review Text and Images Copyright © 2005 by
Phil Brandt
Page Created 23 August, 2005
Last updated 25 August, 2006
Back to HyperScale Main Page
Back to Reviews Page
 Home | What's
New | Features
| Gallery |
Reviews | Reference
| Forum
| Search
Home | What's
New | Features
| Gallery |
Reviews | Reference
| Forum
| Search