|
C-124A/C Globemaster II
Anigrand Craftswork, 1/72
S
u m m a r y
|
| Catalogue Number: |
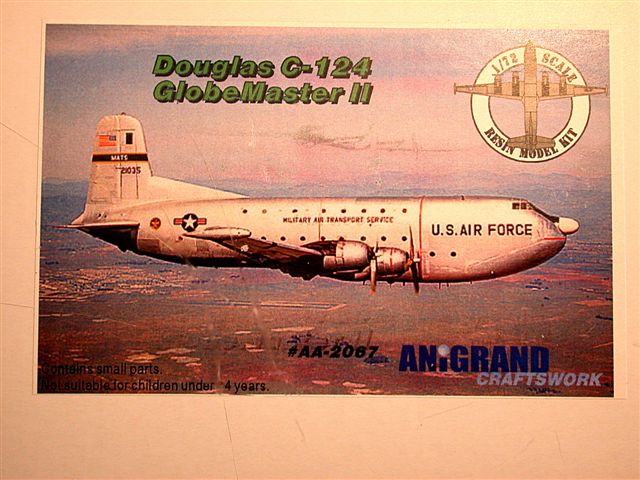
Anigrand Craftswork #AA-2067 -
C-124A/C Globemaster II |
| Scale: |
1/72 |
| Contents and Media: |
44 parts in cream-colored resin; 2
vac-formed parts; decals for two versions |
| Price: |
USD$148.00 (includes postage to the
USA) |
| Review Type: |
FirstLook |
| Advantages: |
Neglected
subject; good detail; high quality castings; good detail; impressive
size; recessed panel lines |
| Disadvantages: |
No tabs or alignment aids for major
components |
| Recommendation: |
Highly Recommended to modellers with some
experience working with short run kits. |
Reviewed by
"Bondo" Phil Brandt

HyperScale is proudly supported by Squadron.com
Retired MAC nav Bondo’s never forgotten his eighteen-month
recip romance in the late Sixties, that excellent worldwide adventure, from
Thule to Ethiopia to South Vietnam, in the gigantic-for-the-time “Douglas
Racer.” Three million rivets flying in formation in each C-124 formed the
backbone of USAF’s heavy airlift for over twenty-five years. As MAC’s
“go-to” trash hauler, C-124s could be seen at some of the most remote
locations on earth, hauling everything from cattle to bulldozers to nukes,
yes nukes.
This curmudgeon spent a quiet afternoon last summer at
Tacoma’s McChord AFB, communing alone with the nicely restored “Shakey Bird”
resting up on a gentle rise overlooking all those new C-17 Globemaster IIIs.
It was a sad-but-happy time, remembering all that had gone before and all
those great people, some of whom wore patches on their flightsuits that said
“25,000 hours.”
Kit Chronology
Bondo’s been waiting for this big chunk of resin for, oh
lessee, about twenty years since he bought the labor intensive, El Crude-o
Grande, 1/72 Airmodel vacuform kit, adding Jerry Rutman’s nice resin detail
set about eight years ago. This kit was followed in the Bondo Industries
stash by the 1/144 Welsh Models C-124 release, an overall excellent kit.
I had for all intents given up hope that there would ever be a 1/72 C-124
kit to replace the Airmodel vac, but kept putting off the inevitable plastic
beating I would have had to undergo. In all fairness, the Airmodel kit can
be built, but only through excruciating labor intensity and with the
significant help offered by Jerry Rutman’s resin detail set, as did master
modeler Pat Hawkey in the July 2006 Fine Scale Modeler. Fast forward four
months. Enter Arnold and those fearless master modelers at Hong Kong’s
Anigrand Models, and now it’s a whole new ballgame.
I thought the Anigrand P6M Martin Seamaster was large, but
this chunk of resin waters mah eyes! Each fuselage half is in turn cast in a
separate fore and aft section, the join area keyed for strength and positive
alignment. The wings are done in top and bottom halves. The vertical fin and
horizontal stabilizers are one-piece. Tip heaters and a radome are included
for building a “C” model Shakey.
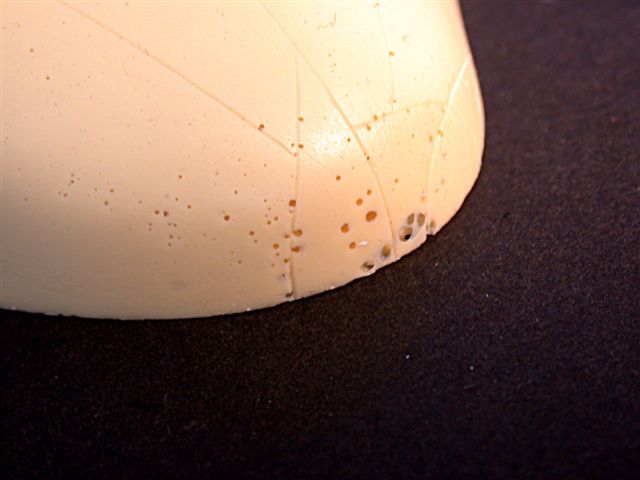
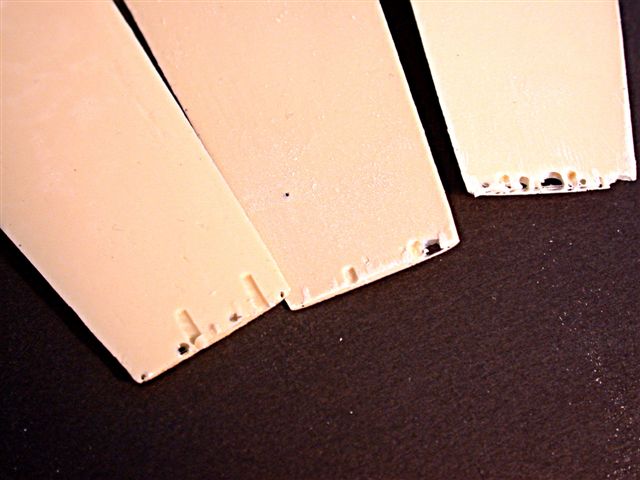
Molding
The fuselage/tail surface castings are smooth and clean,
very reminiscent of Planet and other Czech resin releases. However, the wing
surfaces have a decidedly rougher texture which will require some wet
sanding with 400 or finer grit. No warping was immediately evident.
Engraving is crisp, ever so slightly more aggressive than, say, on 1/48
Tamiyagawa kits. The only casting discrepancies that were immediately
noticeable are the many small bubbles immediately beneath the surface in the
extreme nose area and wingtips. The right fuselage has some very small pits
in the side of the front fuselage half, and the tips of the stabilizer and
vertical fin have larger pits. It’s all fixable, though; can you say, “Acryl
Blue”?
I do wish Anigrand had molded the large stabs and rudder separately, because
in the real deal the gaps between these components and their associated fins
are much more pronounced than the simple engraved parting lines of the kit.
To accurately depict these areas is going to take either some very careful
Dremelling of a “V” trench between the components, or, much better, the
separation via razor saw of said components and the rounding of the
rudder/stab leading edges.
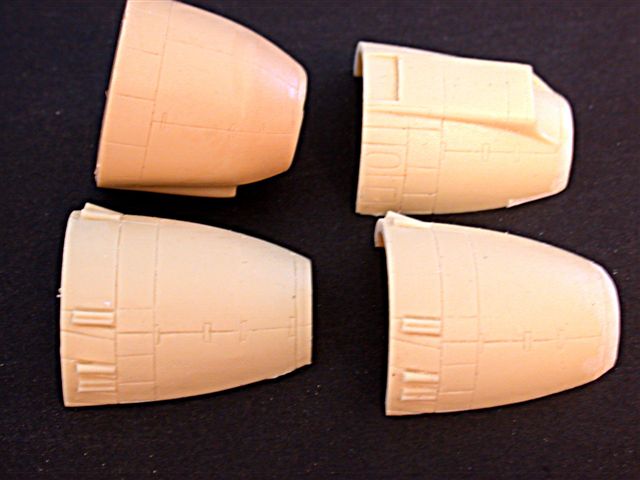
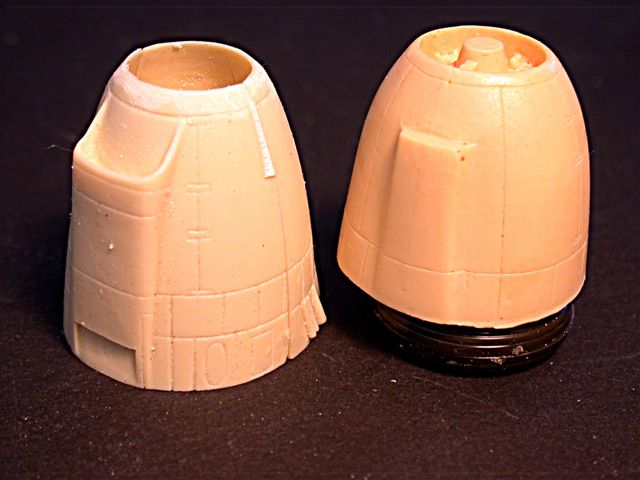
Engine Cowlings and Propellers
The two-piece cowlings are Bondo’s biggest complaint. In
short, they slope noticeably and too sharply toward the props, giving a more
streamlined appearance than they should; the real profile has a “fatter”
look toward the front. Having studied the full scale drawings that accompany
the elderly Airmodel kit, I note that the cowlings pictured have the
identical incorrect forward slope as do those of the Anigrand release; hmmm!
Jerry Rutman’s solid resin cowlings are much closer to the correct profile,
but unfortunately have a cast-in, nine cylinder radial engine face whereas
the R4360 is seven cylinders per row (Anigrand includes separately
installed, seven cylinder engine faces). Additionally, Jerry’s oil cooler
fairings are much less detailed (that is, solid tapered lumps) than Anigrand,
and Jerry’s cowlings don’t have protruding exhaust pipe detail as do the
Anigrand. So...there’s trouble in River City. I rounded the forward, sharp
lips of the Anigrand cowlings with sandpaper, and that does help appearances
somewhat, but not entirely satisfactorily for this MAC puke. I’ll probably
go the “Close enough for government work” route, and stay with the Anigrand
version.
The chord of the Anigrand props is noticeably too narrow
when compared to my personal pics and to those in the excellent C-124 Ginter
book. These props were beeg, wide hummers and had large cuffs, much more
prominent than those modeled by Anigrand. So..it’s back to ol’ Jerry’s props
which are much truer to form, albeit with pitted resin. Just leave out
Jerry’s prop hubs, which are much larger than the more correctly-sized
Anigrand ones.
Click the thumbnails below to
view images full size
Cockpit
Cast-in to the fuselage forward halves are rudimentary
cockpit components such as flight deck floor, rear cabin bulkhead and the
main instrument panel (no instrument detail included). A center console,
control yokes and the nav’s instrument panel/partition are furnished but,
strangely, no side consoles up front or engineers panel on the right side.
Granted, with all the windscreen/canopy framing, one will have to really
look to notice, but, without the side consoles, the flight deck sure looks
like a livingroom. Seats are not bad, but no harnesses or belts are
included. Aft of the nav station the vertical bulkhead with an engraved door
to the cargo compartment area completely disregards the real arrangement.
That is, the perpendicular (to the fuselage) crew bunk and sloped hatch
immediately in front, through which crewmembers exited, climbing down a long
ladder to the cavernous cargo deck.
Other Details
For those modelers planning to do the much more ubiquitous
124 “C” version Anigrand furnishes the distinctive, cartoonish radome and
gasoline-fired wingtip heater pods which some folks mistake for tip tanks.
Landing Gear
Main and nosegear struts are adequately detailed, but I
question whether they’ll remain unbent over long term support of such a
large, heavy model. I’ll probably drill out the resin axles and use brass
rod. Gear wells are extremely shallow, with a dab of structural busy-ness
meant to just give the impression to the casual observer that there’s really
something there.
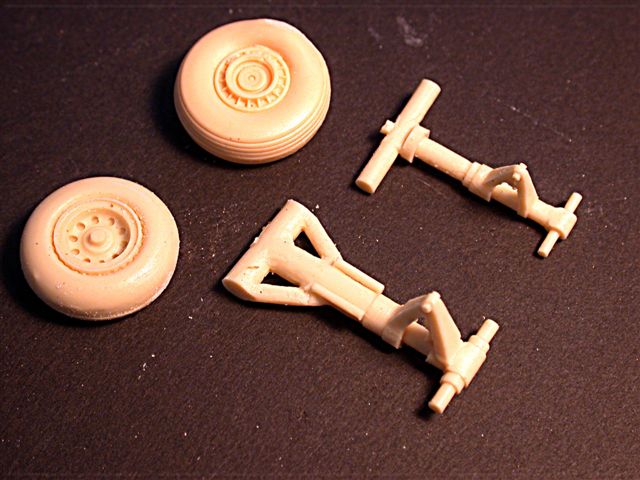
With the large tires and gear doors, I don’t see this
omission as a big deal. Jerry Rutman’s flattened (a bit too much, IMO) resin
wheel/tires are slightly more substantial, and have molded-in treads;
Anigrand’s have neither. Jerry’s set also includes metal gear struts, but
they’re not molded as well as the Anigrand resin ones. Your call......
Clear Parts
The large vacuformed windscreen/canopy is fairly thin and
very clear. Framing lines are VERY light, and may take extra effort to
accurately mask. The over fifty (!) Portholes may be even more of a
construction problem than cowls. To meet the challenge of myriad
transparencies, Anigrand merely provides a 1"x 2" clear sheet impressed
with, again, VERY faint circles and ovals. The cutting out and gluing-in
process looks to this curmudgeon like a whole lotta practice bleeding goin’
on. The quick-and-dirty answer may be to fill in the windows with thick
plastic rod stock, sanding and filling, and then using black decals. A
second method, perhaps more promising, is a procedure used by some inventive
modelers down here in CenTex: the outer fuselage area surrounding each
window is firmly taped over with high strength, clear packaging tape, and
clear casting resin is poured from inside the fuselage into each window
depression. If the taping is properly done, minimal, if any,
sanding/polishing will be needed when the tape’s removed after the resin is
cured. One extra detail with this method: if the inner circumference of each
porthole opening is not painted prior to pouring the clear resin, the
natural buff resin color may be what is seen when the job is finished, not
the proper interior green. I’m planning some experimentation here, because
with fifty windows, it better be right!
An alternate window solution would be to go the liquid Krystal Kleer route,
but that’s beaucoup white glue to dab onto the fuselage......
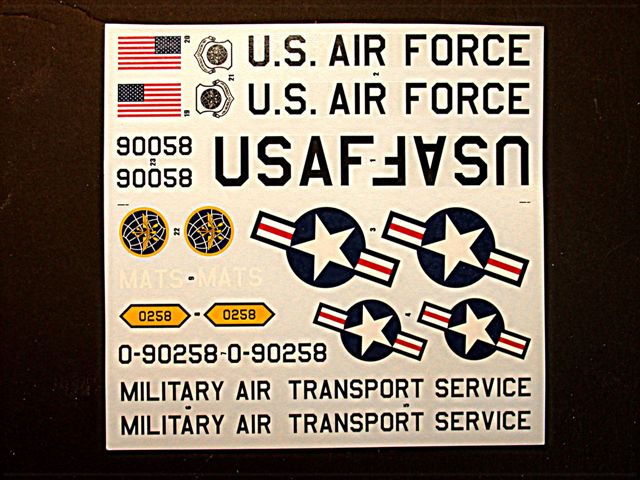
Decals and Color Schemes
A single, relatively small sheet includes markings for only
a MATS bird, whereas MATS changed to MAC in 1966, and Shakey kept flying
until 1975. Prop warning stripes/stencils are noticeably absent. For almost
$150, I would think that Anigrand could’ve made alternate color/markings
schemes available; even the 1/144 Welsh kit offers three schemes.
The MAC airframes which carried boy nav Bondo around the
world ‘67-‘70 were, by then, all NMF, which, even with panel shading, could
be somewhat boring. I will probably do an earlier MATS–we said it stood for
“Might Arrive Tomorrow Sometime”–scheme with the white fuselage topsides and
Arctic Red forward and aft fuselage stripes. For more MATS markings, check
out the Minicraft C-97 kit; it’s got prop warning stripes, too. And, for
those lucky enough to have acquired Jennings Heilig’s wonderful two-sheet
C/KC-97 release of five years ago, you’ve got it made!
Instructions
Only a single large B&W sheet, printed on both sides, is
provided: a no-text, exploded parts summary on the front and a two-view, all
NMF MATS bird on the back, with color callouts and decal locations.
Bondo and Shakey...together again! And, please don’t take my specific
criticisms the wrong way. I’m overjoyed to see this kit released, and I hope
Anigrand will do a companion 1/72 C-133. IMO there are no problems in
building this kit that can’t be handled by average-to-moderately-skilled
hobbyists.
Of course, if your idea of a showstopping kit flaw is when
two Tamiyagawa parts are misaligned by .005", I’d save your righteous bucks
and buy five more 109s or Mustangs!
Review Text and Images Copyright © 2006 by
Phil Brandt
Page Created 28 November, 2006
Last updated 21 February, 2007
Back to HyperScale Main Page
Back to Reviews Page
|
 Home | What's
New | Features
| Gallery |
Reviews | Reference
| Forum
| Search
Home | What's
New | Features
| Gallery |
Reviews | Reference
| Forum
| Search