|
North American B-25J
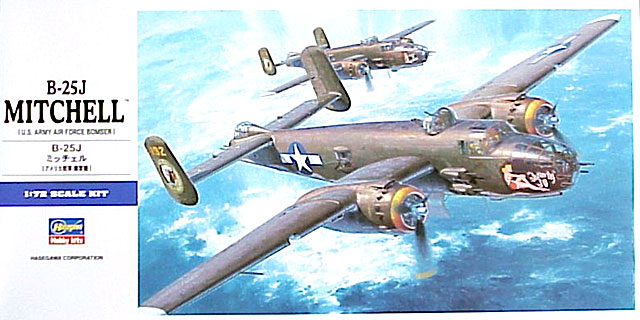
Hasegawa
S
u m m a r y
|
| Catalogue Number: |
E16 |
| Scale: |
1/72 |
| Contents and Media: |
Five sprues in grey plastic, one
clear plastic sprue, one decal sheet, one sprue of poly caps and an
instruction booklet. |
| Price: |
3200Ą (or
USD$34.97 from Squadron.com) |
| Review Type: |
QuickLook Preview |
| Advantages: |
Scribed panel lines with raised
details as appropriate; Open bomb bay; Detailed armament; Option for a
strafer or the standard three gun version; Decals with nose art for three
different aircraft; Will make a great out of the box model or a very good
start for a super detailing project. |
| Disadvantages: |
High cost is the principal
disadvantage. In the USA, the retail price is around $40.00 USD. For those
so inclined, some added detail and corrections will improve the finished
model. |
| Recommendation: |
Highly Recommended. A first class
1/72 kit of the B-25. |
Reviewed
by Don Fenton

Hasegawa's 1/72
scale B-25J may be ordered online from Squadron.com
At last we have a modern 1/72 kit of the famous B-25 Mitchell.
Hasegawa has chosen to produce the B-25J bombardier version of this famous
twin engined bomber. The kit parts are molded in a somewhat brittle medium
gray plastic.
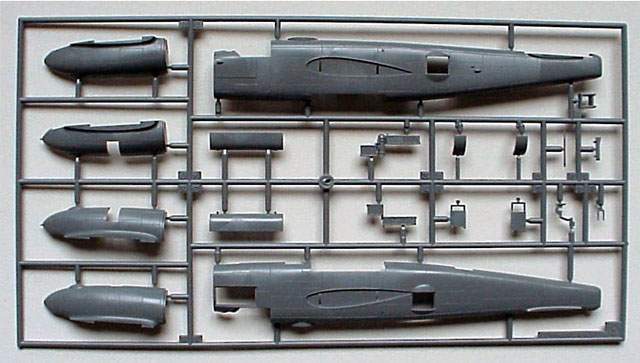
The first impression when opening the box is of a carefully made kit with
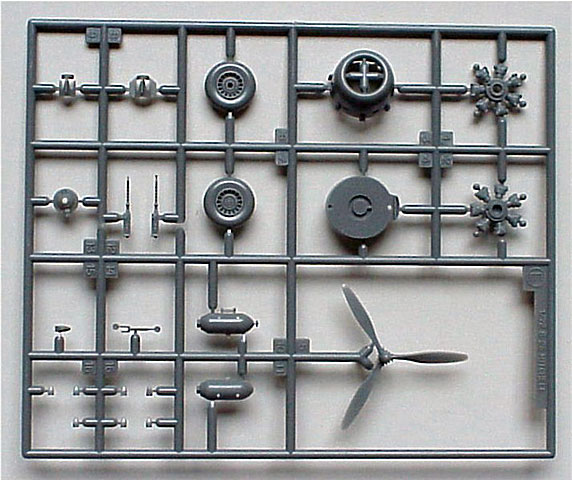
marvelous detail. Admiration for the Hasegawa team grows upon close
examination of the kit parts. Five medium gray sprues, one sprue of
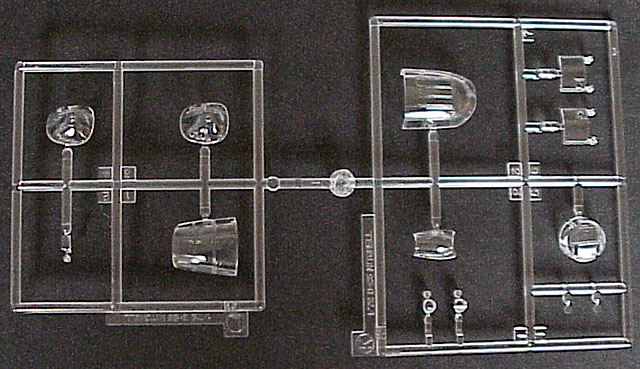
transparent parts and one of poly caps provide all of the necessary parts.
Recessed scribed lines with raised detail, when appropriate, and a parts
layout reminiscent of the 1/48 Accurate Miniatures kits of the B-25 are the
highlights of the kit.
Click the thumbnails below to
view larger images:
The fit of the parts is very good. Dry fitting of the parts indicates that
little filler will be required.
The kit provides the clear parts for a five nose gun strafer or the
standard three gun bombardier version. The transparent parts are crystal clear
and thin.
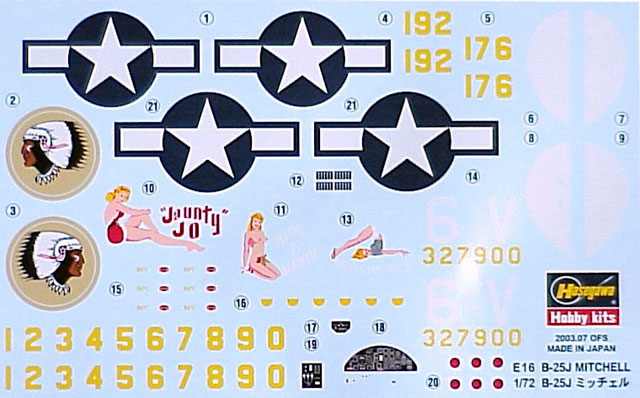
The decal sheet provides options for three different aircraft but national
insignia for one. These are “Jaunty Joe” 498BS, “Miss B Havin’ “ 498BS,
“Bottoms-Up II” 486BS.
General Comments
and Suggestions
|
-
Saw off the clear parts from the sprues. Sand
off the resulting stubs. The canopies are attached at the bottom edges.
Snipping these parts off is probably not a wise move.
-
If building the standard three gun nose, delete
parts M2 and J1. Use L4. The instruction sheet does not cover this version.
There are lots of aftermarket decals for the three gun version.
-
No provision is made for weights. Part A19
represents a step stair to be placed under the rear entry hatch. This is a
problem if you want a model standing on the landing gear only. The
instruction sheet does not provide the required amount of weight to be
added. If weights are added, the where is left up to the creative.
Here are some further observations about the kit:
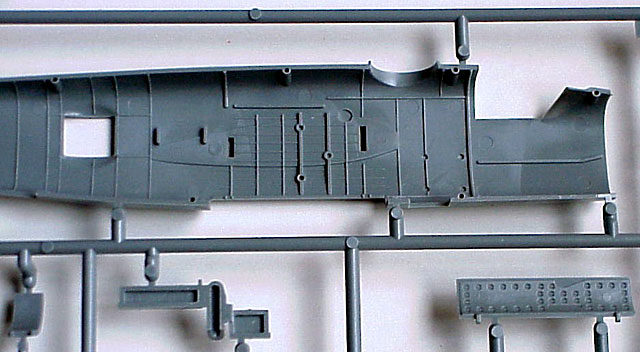
Fuselage
Profile of the fuselage compares well with the data published in Avery’s
book, B-25 Mitchell: The Magnificent Medium
Well represented waist gun positions, bomb bay, bomb bay doors and crew entry
hatches.
Option for the deletion of the side gun packs. Holes must be drilled to attach
them. Very thoughtful, this saves time and the effort to fill the holes if
your subject aircraft did not have these gun packs. This feature also
telegraphs the release of an early B-25H. These early H model aircraft had
side gun packs on the right side only.

Right side external fuselage armor plate is a separate insert. Again, a heads
up that a B-25H is coming.
The top turret correctly has the external collar around the turret. This is
contrary to the installation in the earlier B-25’s with the turret in the rear
fuselage. The “high hat” sloping turret is not provided. Check images of your
subject aircraft to verify top turret installation.
The bombardier’s compartment lacks detail. The seat is completely wrong. The
armor plate behind the seat is missing. But the shape of the nose in profile
conforms well with the data in Avery’s book.
The nose gear door needs attention. It should be 65” long and start about 24”
in front of the forward crew entry door.
The bomb bay features raised details and a pair of 1,000 lb. GP bombs.
The .50 cal. MG’s are very well detailed for the scale - with cooling jackets
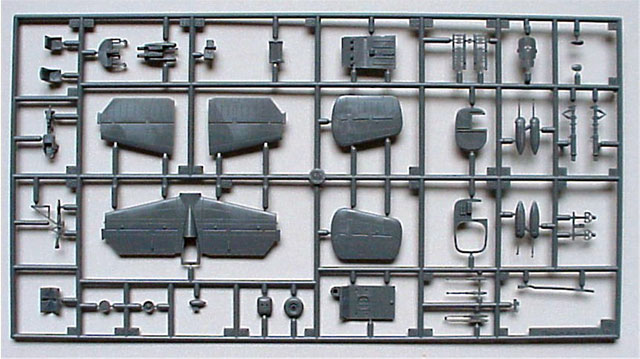
Cockpit
The seats have lap belts molded in place. The left seat is the normal
pilot’s seat but the right seat is more like the cannoneer’s riding seat of
the B-25H. Another hint.
Dual controls are provided.
Armor plate for the seats is omitted.
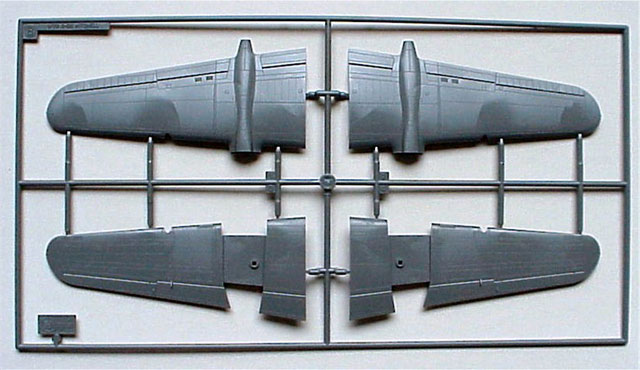
Wings
The rib tapings of the ailerons are very prominent. A little work with
sandpaper will fix this.
Right wing leading edge air intake is okay. The left wing intake needs to be
reshaped.
Attachment bolts on top and bottom of the wings are okay.
The wings fit into sockets in the fuselage. This leaves no gap between the
inner flap and the fuselage.
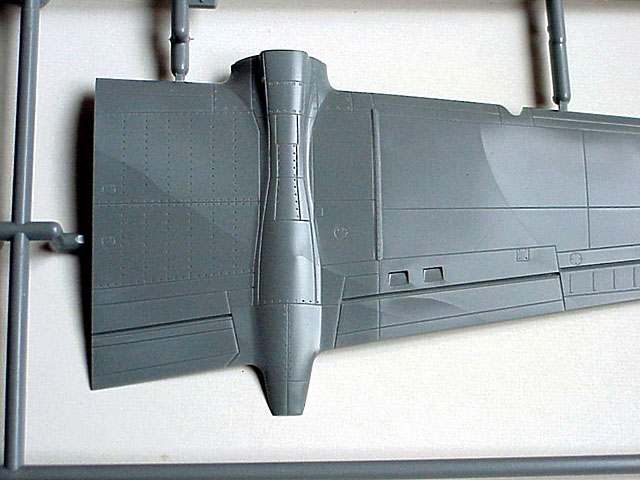
Engine nacelles need two drain lines at the rear. The kit has one.
Main landing gear doors lack any detail and are very thick.
Here we go again. The engine cowlings are oddly shaped. The opening is too
small and the cowling needs to be reshaped. Hopefully, the Radebaugh method
will work. The opening should be 36” in diameter. On the upside, the length of
the cowlings is correct. And the placement of the engines provides the correct
positioning of the propeller. The exhaust fairings are okay.
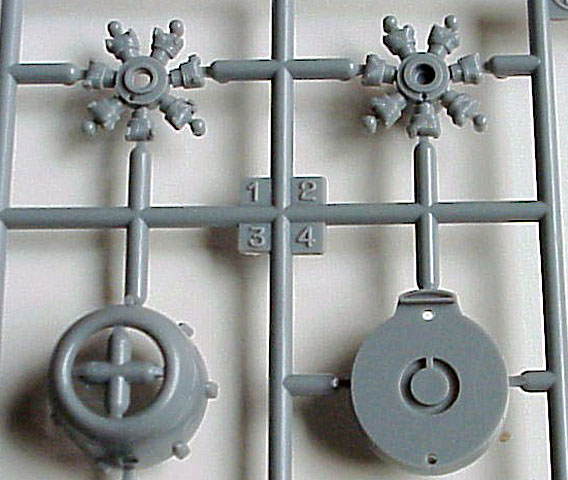
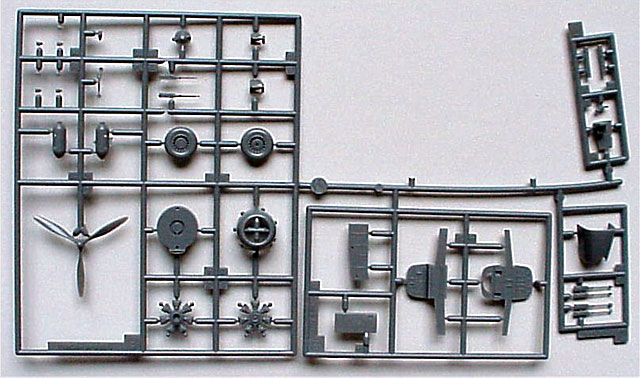
Engines
Okay for the scale but could have been better. Rotate the gear case to
place the oil sump vertical.
Tires and Wheels
All okay. The diameters of the tires are very close to the required 30”
nose and 47” mains. The nose wheel is provided as spoked or covered. The True
Details resin parts provide finer detail, if you can live with the almost flat
tires.
Elevators, Ailerons, Rudders
All okay. The rib tapings are very prominent. Sanding should take of this.
Take note that the elevators are correct in plan view using the drawing in
Avery’s book as a guide.
Enough typewriting!
I’m sure that I have overlooked much and will learn more when the parts are
assembled. Now to clear away the work table and build this gem of a kit.
Highly Recommended.
Text and Images Copyright © 2003 by
Don Fenton
Page Created 13 August, 2003
Last updated 15 August, 2003
Back to HyperScale Main Page
Back to Reviews Page
|
 Home | What's
New | Features
| Gallery |
Reviews | Reference
| Forum
| Search
Home | What's
New | Features
| Gallery |
Reviews | Reference
| Forum
| Search