|
Breguet 14A2

Hi-Tech
S
u m m a r y
|
| Catalogue Number: |
Kit No. HI0022 |
| Scale: |
1/48 |
| Contents and Media: |
33 plastic parts; 6 resin parts; 39
photo etched parts; markings for a single aircraft. |
| Price: |
USD$33.96 from Squadron.com
|
| Review Type: |
FirstLook |
| Advantages: |
Sound basis for an accurate Breguet
14A2 |
| Disadvantages: |
No detail under the fuselage. |
| Recommendation: |
Recommended for experienced builders
of WWI Aircraft. |
Reviewed by Robert Baumgartner

Hi-Tech's 1/48
scale Breguet 14A2 is available online from Squadron.com
With the release of the Hi-Tech Breguet 14B2 a few years ago, many
hoped that this would lead to a new kit of the reconnaissance version. As
it happens, this version is now available.
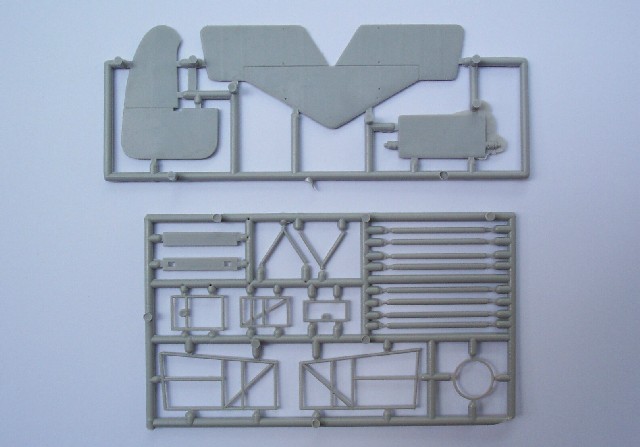
Contents
Naturally this kit owes a lot to the original release of the 14B2
bomber by this manufacturer. For this version we get four sprues
containing a total of 33 plastic parts. This is supplemented with five
white metal, six resin and 39 photo etched parts.
Click the thumbnails below
to view larger images:
A nicely printed decal sheet contains markings for a single aircraft.

The pieces compare very favorably with Ian Stair’s plans in a 1970 edition
of Scale Models and comparison to photos also reveals the overall accuracy
of the kit.
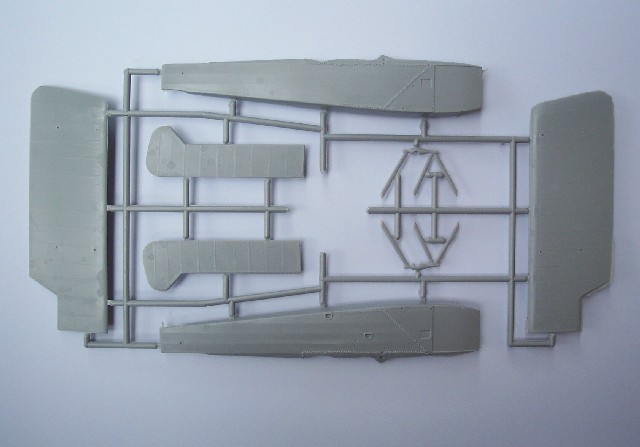
Wings
The upper wing parts come from the 14B2 kit and arrive in two main pieces.
Separate balanced ailerons are provided to replace the molded on
unbalanced ones. These were seen on later examples, and the instructions
show where to cut the top wing to add them. On an aircraft such as this,
separate ailerons are a good idea as pictures show a significant gap where
they attach to the wings.
Hi-Tech correctly supply new lower wigs to represent the shorter version
found on the 14A2. These did not have the flaps or leading edge extensions
for the bomb racks that were found on the 14B2.
All wings parts are very well molded with thin trailing edges, no warpage,
and fine raised lines representing the rib tapes. The only discrepancy
here is a slight mismatch of the lower wing with the aforementioned plans.
This involves the length from the trailing edge cutout to the fuselage,
but most modelers will choose to ignore it.
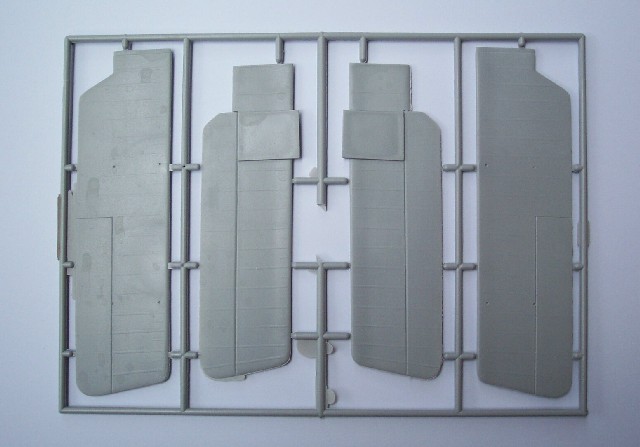
Fuselage
These parts are on the new sprue devoted solely to the 14A2. Each half is
fully molded although strangely, as with the 14B2, there is no detail on
the undersides of the fuselage halves. One would expect to see an opening
for the camera or transparency area for the observer. This detail will
have to be thought out by the modeller.
The stitching has been improved from the 14B2 parts but could still do
with a light sanding to tone it down. Photo etched panels are used for the
engine louvers and this proves to be a very clever idea. To mould these in
plastic using limited production techniques is fraught with danger.
As befits the 14A2, the side windows are no longer present. The
instructions tell you there should be one on the starboard side but this
appears to be a mistake. The reason being that the instruction sheet is a
modified version of the one used in the 14B2 kit.
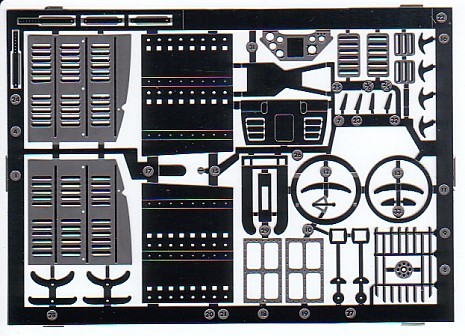
Interior
This comprises of a plastic framework to replicate the tubular structure
of the original. Resin is used for the seats and my examples were quite
good. P-e allows for the control columns, rudders, throttle and seat
belts. Some of these items are not suitable in this 2 dimensional format
and are best scratch built. A p-e instrument panel is supplied but the
dial faces to fit the holes will need to come from other sources. Sadly no
camera is provided and this also must be found elsewhere. Thus there is
plenty to be done in the cockpit for those that like to add extra detail.
Finals
The remaining resin pieces are used for the wheels and exhaust, with the
latter item needing putty to fill some air bubbles. A nice radiator is
provided and this is further enhanced with a photo-etched grill.
The undercarriage in the 14B2 kit was white metal but thankfully, this is
now done in plastic. It is still strong enough to support the weight of
the airplane and is easier to work with. Two photos of this machine reveal
that at one stage of its life at least, it didn’t have wheel covers
fitted. Thus the adventurous modeller could try fitting spoked wheels!
The white metal parts make up the propeller, Vickers and Lewis machine
guns.

The remaining p-e takes care of the control horns and scarf ring with the
rest being left over from the 14B2.
The decal sheet is superbly printed with excellent registration, good
colour and nice thin carrier film. It provides for a machine of the 96th
Aero Squadron, September 1918, one of its occupants being Capt. James
Summerset Jr.
As mentioned before, the instruction sheet has been modified from the 14B2
kit and as such, there is a little confusion for the uninitiated. Do not
install the 14B2 lower wing as shown in illustration G. The starboard
fuselage shows the window opening that is usually associated with the 14B2
and ignore the image of the same that has been used for the colour-painting
guide. Thankfully the rigging diagram has been altered to represent the
kitted version.
Hi-Tech has provided an excellent starting point to produce what should
be a stunning model. The very nature of the Breguet 14 means that it will
not be an easy kit to make, but patience will reward.
Recommended
Thanks to
Squadron.com for the review
sample.
Review and Images Copyright © 2003 by
Robert Baumgartner
Page Created 30 January, 2003
Last updated 15 August, 2003
Back to HyperScale Main Page
Back to Reviews Page
|
 Home | What's
New | Features
| Gallery |
Reviews | Reference
| Forum
| Search
Home | What's
New | Features
| Gallery |
Reviews | Reference
| Forum
| Search