|
Curtiss SO3C Seamew

Czech Model, 1/48 scale
S
u m m a r y
|
| Catalogue Number: |
CM4817 - Curtiss SO3C Seamew |
| Scale: |
1/48 |
| Contents and Media: |
28 parts in injected grey styrene;
13 parts in cream-coloured resin; 2 clear parts; markings for two aircraft. |
| Price: |
USD$44.96
from Squadron.com |
| Review Type: |
FirstLook |
| Advantages: |
Fascinating but until now neglected
subject; good quality plastic; good detail; recessed panel lines;
excellent decals; effective use of multi-media; resin parts packed in
separate zip-lock bag |
| Disadvantages: |
Some preparation required. |
| Recommendation: |
Highly Recommended to modellers who
have built some limited run kits |
Reviewed by
Rodger Kelly

Czech Model's
1/48 scale Curtiss SO3C Seamew is available online from Squadron.com
The Curtiss built SO3C Seamew was designed to be used as a ship-based,
catapult-launched floatplane. When assigned to battleships it was to be used
for gunfire observation and as a scout when assigned to cruisers.
The Seamew was meant to be a replacement for another Curtiss built machine,
the SOC "Seagull". To say the least, the aircraft never lived up to
expectations and was soon removed from front line service being found as
totally unsuited for the role for which it was designed.
There was a time that the only kit you would ever have seen of this aircraft
would have been a vacform one and it would have just been a couple of sheets
of white plastic with minimal panel detail, fuzzy vacform canopies, no
decals and absolutely no detail parts at all.
Thankfully, times have changed!
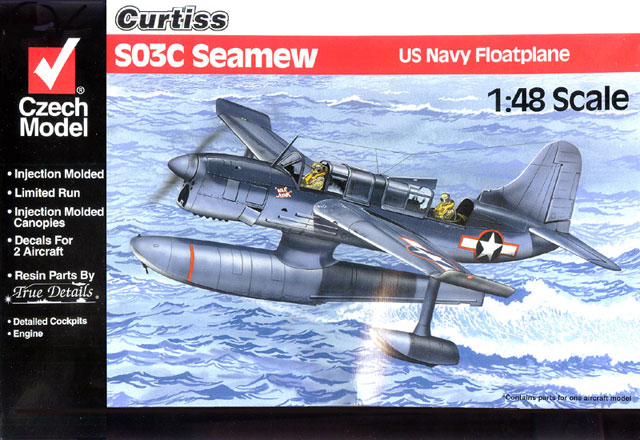
Czech Models 4817 is a limited run; mixed media 1/48 scale kit of the
Curtiss SO3C "Seamew", which ironically was itself a "limited run" aircraft.
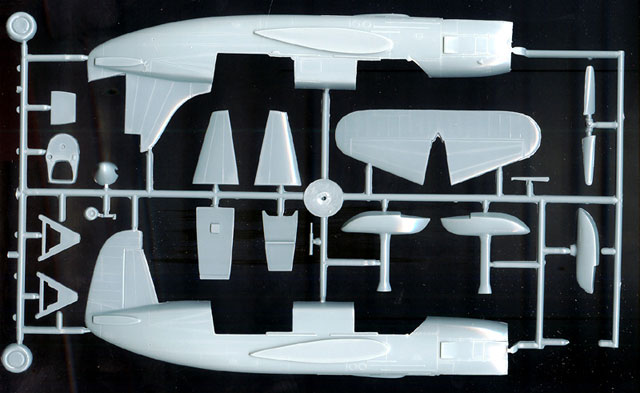
The kit comprises 28 injection moulded parts, injection moulded canopies,
and 13 resin detail parts. The airframe itself is made up of injection
moulded parts whilst the cockpit interior, engine front and exhausts are of
resin. The supplied parts enable you to build a floatplane version only; no
parts are provided to construct the land-based version of the machine that
was also produced.

Click the thumbnails below to view
larger images:
The injection moulded parts exhibit a combination of scribed panel
line/rivet and raised detail. The plastic is, in the main, shiny but has a
very, very fine grain to it that will benefit from a going over with fine
wet and dry sandpaper. Flash is present but minimal and easily cleaned up
but clean it up you must otherwise it just won't go together! Similarly,
there are ejection pins present but thankfully they are not in areas that
will be visible once the kit is assembled. Being a limited-run kit, there
are no pins, grooves, sleeves, tabs or cut-out aids to assembly with the
exception of raised ribs on the inside of the fuselage to positively butt
the resin interior parts to. The trailing edges of the wings, horizontal
stabilisers, wing float struts and propeller blades are very thin indeed for
a limited run kit and rival those of the Tamiya and Hasegawa. The wing is in
two parts per side and they are butt jointed to the fuselage. The fuselage
has a small 'plinth' moulded onto it to represent the wing roots. The
assembled wings are cemented to this and the dihedral is taken care of by
the wing root end of the wings being moulded with the correct built-in
dihedral. There is plenty of surface area to glue as the wing roots are
solid once the upper and lower surfaces of the wings are assembled. The
horizontal stabilisers are two-piece as well and slide over the rudder to
affix to the fuselage. There is one sink mark present in my sample and that
is on the inside of one of the beaching gear wheels, fortunately, this can
be easily rectified by the addition of a plastic card cap.
Unfortunately, the canopies are all moulded in the closed position but can
easily be separated to show off the resin detail cockpit interiors as the
moulded-on framing is quite distinct (which will also make the task of
masking a whole lot easier too). The clear parts are reasonably clear but
will benefit from a dunk in Future or its equivalent in your corner of the
world.
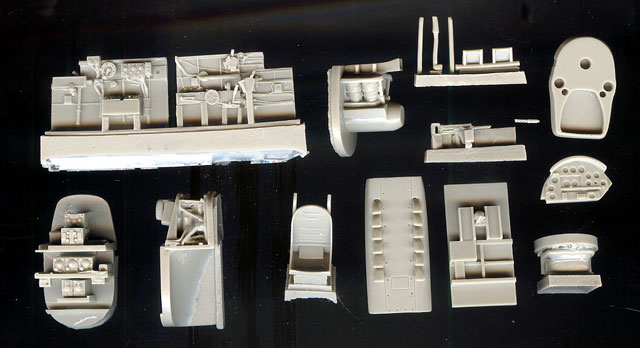
The resin parts are superb indeed. You get the left and right hand sides,
floor, rudder pedals, control column, rear bulkhead and instrument panel for
the front cockpit and front and rear bulkheads, floor, decking, seat/turret
ring and .50cal machine gun for the rear one. No sidewalls are provided for
the rear cockpit but some rib detail is moulded onto the insides of the
fuselage halves. As expected, the resin parts are excellent and the only
addition that you would need to make as far as I am concerned is a set of
seat belts. The cast plugs are minimal and a dry fit of the parts into the
fuselage halves reveals that you can leave most of on the parts (the
bulkheads at least) as they don’t interfere with the fit at all, granted,
you will need to give them some attention with a file and sandpaper but it
will be minimal.

Accuracy? Ah this is the part I hate most when reviewing kits! I have
compared the parts with pictures and drawings of the one-to-one-scale
version that I have found on the net whilst researching this review and have
to confess that just about all of them varied from one to the next! The
fuselage length and the wingspan measurements varied in my references, as
did the panel lines (those drawings that showed them at least! What I can
say though is that the kit looks true to photographs. A cop out? No, an
honest opinion as far as I am concerned.
The kit is packaged in one big cellophane-like plastic bag. The resin parts
are in their own smaller plastic bag and this is placed into the larger bag.
The bag is then heat crimped to separate the plastic parts from the clear
parts – simple yet effective. The final packaging is a flimsy 'envelope'
cardboard box (having stated that the box is flimsy though, I have to say
that it serviced the trip from one side of this 'wide brown land' to the
other without major damage).
Markings
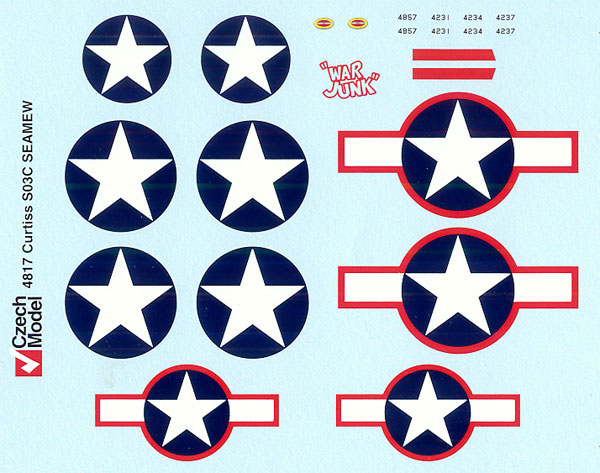
Decals are provided for two machines:
-
Bureau number 4857 assigned
to the light cruiser USS Denver in 1943. This option is in the early war
scheme of blue grey upper surfaces over light grey undersides with white
star on blue circle background national insignia.
-
“War Junk”. Aboard the light
cruiser USS Biloxi in 1944. The correct Bureau number is not known, it
was either 4231, 4234 or 4237 and a decal for each is provided. This
option is in the mid to late war tri colour scheme of sea blue upper
surfaces, intermediate blue sides of the fuselage/vertical stabiliser
and white undersides. It wears red outlined national insignias and the
(appropriate!) name “War Junk".

Click the thumbnails below to view
larger images:
The decals look to have been produced by Techmod. They are thin, in perfect
register and have minimal carrier film. I have used Techmod decals before
and they are every bit as good as Superscale ones, you do however need to
use plenty of water to float them into place as they are very thin and
easily torn.
The instruction sheet is A-3 in size and carries a potted history of the
machine and a parts map on the front page, two pages of exploded-view
drawings assembly guide in black and white with English language assembly
and painting notes and colour notes and decal placement/painting
illustrations on the back page. The illustrations on this page also appear
on the back of the box, this time though in full colour.
To be truthful, I was expecting this kit to be a whole lot less that what it
actually is. I would not recommend it for the beginner by any means but I
can recommend it to those who enjoy a bit of filing, puttying and
sanding. It is indeed an excellent kit by limited-run standards.
Czech Models have come a long, long way in a few short years and this new
kit from them is evidence of that journey. I would say that quite a few of
them will actually be finished and placed on display rather than being
started with enthusiasm and left half finished and hidden at the back of the
cupboard or hurled against brick number 47 on the wall of the modelling room
through frustration with fit problems!
Recommended.
Thanks to Squadron
for the review sample.
Review Text and Images Copyright © 2005 by Rodger Kelly
Page Created 16 December, 2005
Last updated 16 December, 2005
Back to HyperScale Main Page
Back to Reviews Page
|
Home | What's
New | Features
| Gallery |
Reviews | Reference
| Forum
| Search