|
Focke-Wulf Fw 190D-9
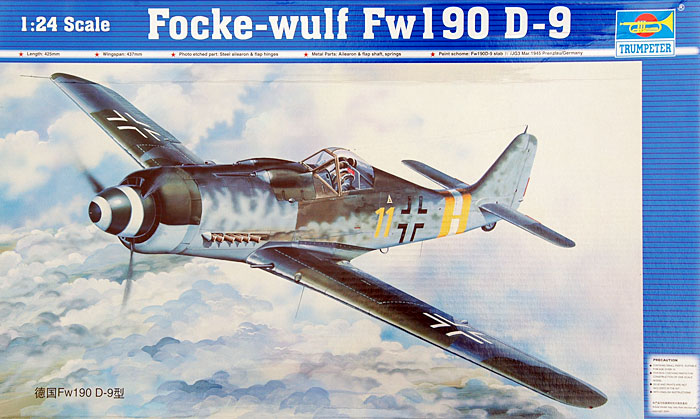
Trumpeter, 1/24 scale
S u
m m a r y
|
| Catalogue Number: |
02411 |
| Scale: |
1/24 |
| Contents and Media: |
Five sprues in light grey injection molded plastic;
One sprue in black; One sprue in clear injection moulded plastic; metal
shafts for ailerons and flaps; photo-etched parts for control surface hinges;
2 x springs; markings for two aircraft |
| Price: |
USD$99.96
from Squadron.com |
| Review Type: |
QuickLook |
| Advantages: |
Accurate outline compared to
respected drawings; constant and crisply engraved panel lines; restrained
flush rivet detail; good quality mouldings; workable control surfaces; nicely detailed engine; very
thin, clear and accurate transparent parts; includes optional style gun
cowls plus drop tank and MW tank. |
| Disadvantages: |
Several whacky detail issues (eg
tiny DF loop, fictional detail on inside of gear doors, curved engine
cowling hinge line, featureless tail wheel); no easy way to display
engine and MW tank. |
| Recommendation: |
Recommended. |
Reviewed by John Hassall
with additional material by Brett Green

Trumpeter's
1/24 scale Focke-Wulf Fw 190D-9 may be ordered online from Squadron.com
On a visit to my local hobby shop after work for some retail
therapy I was presented with a large blue box and the words “This is the
last one of half a dozen and we saved it just for you” .
The box was the new 1/24 Trumpeter Focke-Wulf Fw190D-9 so,
with those opening words, what else could I do other than to hand over my
weary plastic (marginally less painful than cash) and figure out how to get
the thing home on the bike in the rain.. Strapped to the pillion seat and
wrapped in plastic bags, Dora and I rode home.
As a recovering AMS sufferer I am not one to run the
micrometer over things. However I am a great fan of the Dora and since
coincidentally I have a Hasegawa 1/32 example at the painting stage I have
all my references scattered over all the flat surfaces of my “shed”. This
essay, then, is a Mk 1 eyeball assessment of the kit in the box.
Packaging
The kit comes in Trumpeter's now standard industrial grade
cardboard box with a decent bit of art on the lid depicting Yellow 11 of II/JG
2. If the parts fit as well as the lid does to the box minimal filler will
be required!
Inside the sprues are individually bagged and fit closely in
the box. There is a card insert at one end holding the etched sheet and
hardware for the control surfaces that seem to feature in all Trump’s kits
(Has anyone actually ever used this feature yet?)
Click the thumbnails below to
view larger images:
Take care with the etched fret as the film insert for the
instrument panel is tucked away on the backing!
Under the card filler is the bagged clear sprue with both
canopy types and assorted stuff such as the instrument panel upper section
and a dodgy looking Revi gunsight.
Oddly though there are no wingtip lights, these being
represented by blobs on the wing halves.
The canopies are very nicely moulded, very clear and thin in
section with “frosted” areas to define the frames.
Instructions & Decals
Instructions are in an 8 page booklet in 29 steps with very
well drawn, clear diagrams. Paint chart only has Gunze reference with little
or no RLM or any other matches.
As usual the assembly sequence will not suit everyone and I
suspect there will be some frustration when it comes to the undercarriage.
The camouflage and markings are on a separate colour printed
A3 sheet. There is no reference given for either scheme.
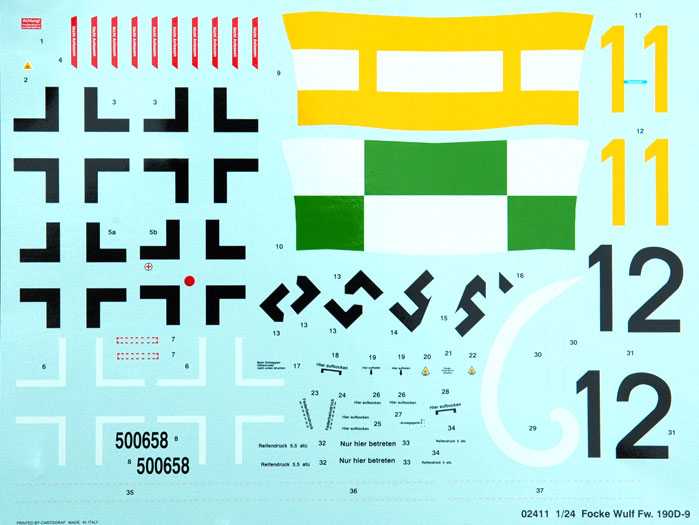
The options are Yellow 11 of II/JG 2 and Black 12
Werknummer.500658 with a green white checked RV band, presumably from one of
the converted KG units. I’ve not seen this one before so if anyone can shed
some light, I would be grateful (the green/white chequered RV band on
this aircraft is new to me too - ed).
Decals are by Cartograf and look quite good with adequate
stencils, white spinner spiral and the colourful RV bands included. No doubt
those good chaps at the decal companies are busy enlarging their 1/32
artwork as I write.
Fuselage Sprue
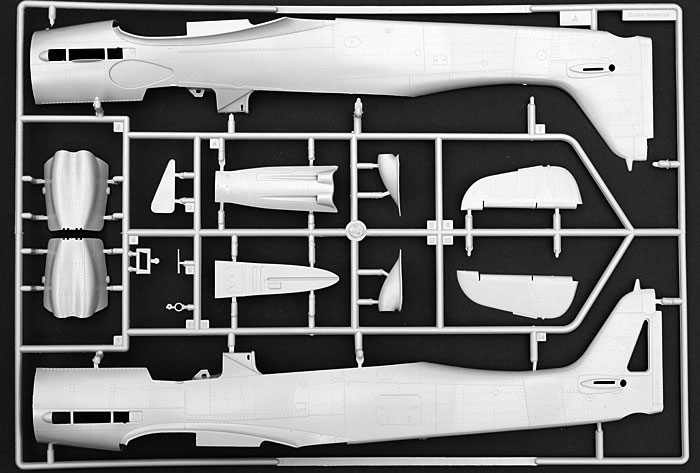
The fuselage halves are impressively large with nice neat
panel lines and rivet “engraving”. Noticeable is the separate triangular
inspection panel in the fin. Even more noticeable is the lack of any
internal detail either there or on the cockpit sidewalls.
Then there’s the engine area. A whole sprue of parts is in
the box for a very detailed engine but there are no arrangements for
displaying the thing once installed!
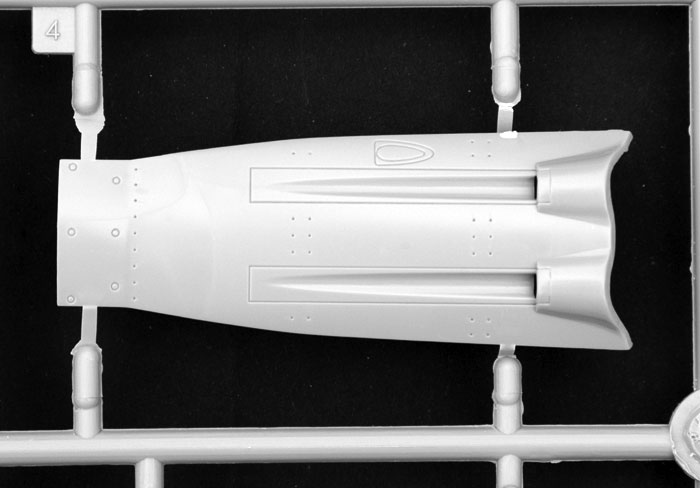
The forward upper panel with gun troughs looks a little
suspect in plan view but I’ll leave judgement for others.
Both types of gun cowl are included though both appear to
suffer from the “Sabrina” (or for younger readers, Pamela Anderson ) effect
a la the Hasegawa 1/32 example. However they do have some dubious structural
detail on the inner surface.
Cockpit and Nose
The cockpit tub is cleanly moulded but detail seems a little
shallow for this scale. The rear deck is neat but a bit simplified.
The seat is adequate and has a rather featureless cushion as
a separate part. No harness is supplied.
The control stick is a rather poor, fat effort and I’m not
sure whether it can be salvaged. Instrument panel as stated above is an odd
mix of moulded detail with a film backing and separate clear front for the
upper panel. Plenty of scope for more detail here.
The front of the annular radiator is just about okay but is
a bit soft in definition. It does however include the rear face and body
which is a nice touch.
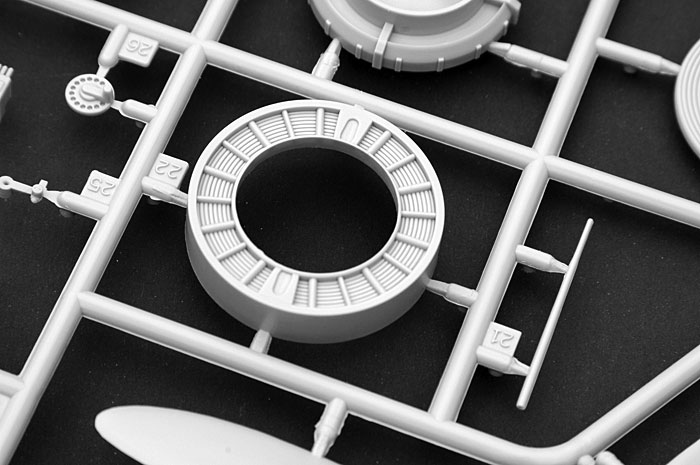
Cowl flaps come as optional open or closed. The open option
is incorrect in that it has ALL the flaps open. The flap in front of the
intake should remain closed. The open option also demonstrates the slightly
gap-toothed appearance of other large-scale Trumpeter cowl flaps.
The airscrew is a one piece moulding and looks good in shape
(this from a bloke who hasn’t yet got his head round the Bf 109 F thru early
G series shapes yet). The spinner looks suitably bulbous. A couple of
reasonable cowl MG’s round out the nose area and at least this time one can
“lift the lid” with the separate top cowl parts.
Engine
This is a busy sprue of parts to make a very nice engine. It
would be a model in its own right on a stand - and that would be the only
way it will ever be seen again without extensive surgery to the fuselage!
Exhausts are in two parts each and are hollow but have
exaggerated flanges on the end.
The wing ammo boxes have the straps moulded on them
Wings
Again the wings are impressively large. The lower wing is
one piece but there are no spars or other supports. Ailerons and flaps are
separate with some neat interior detail.
The wing leading edges have an annoying “squared off “
appearance. There’s enough plastic there to resculpt but that will mean
restoration of detail.
The A series legacy exhaust channel between the wheels is
depicted in a rather shallow nondescript fashion. I think I’ll probably just
fill and sand. Spent ammunition casing ports are shown as shallow indents.
There are some rather basic wing root cannon included but no
bay detail or separate access hatches. Panel lines and rivets are nicely
done though at a quick check against the Hasegawa kit all may not be present
or correct.
The undercarriage bay insert has been fixed by deletion of
the centre area, though it is shown on the parts layout in the cartoons.
Incidentally my instructions set has quite a few corrections applied via
stuck on amendments.
Undercarriage and Wheels
The round end of the undercarriage bay has walls moulded,
which shouldn’t be there. All things considered maybe there’s an A series
190 in the pipeline somewhere down the track. (Or did they use the old
Airfix kit as a reference? There is a faint resemblance here and there).
The gear legs are moulded separately in black and are
designed to be sprung. The upper ends are moulded per the prototype instead
of the more usual peg and socket found on most kits. The main issue is that
because the legs have the “bend” at the top means they have to be glued in
place when the wing is assembled. I can see that in my usual ham fisted
fashion I’m going to be repairing the undercarriage a few times during
assembly! I’ll be interested to see others solutions to this one.
There are two biro springs included in the metal parts bag
which one apparently insert into the leg, followed by the lower oleo section
and axle. I’m not sure how it all holds together but it looks like one of
those insert, twist and click to lock exercises. Should be fun!
There are no brake lines on the gear legs. Scissor links are bulky and in 2
parts. Also, the gear doors have excellent detail on the outside, but
completely fictional raised structural features on the inside.
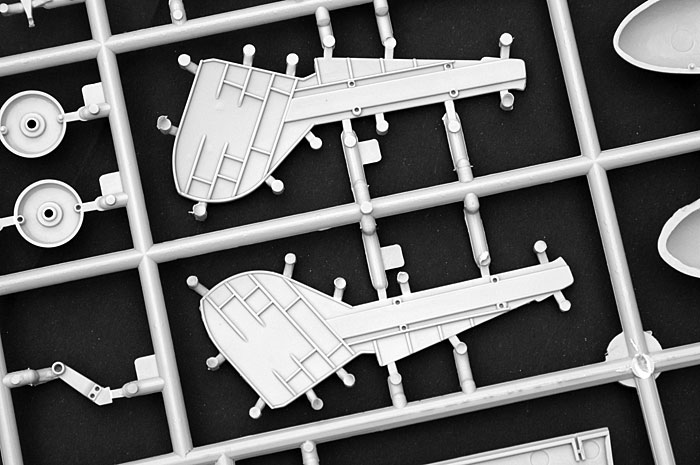
Tyres are supplied in injection plastic as two halves each
with the late tread pattern and separate hubs.
The tailwheel has NO hub detail at all, resembling a small
donut. Also, the fuselage area around the tail wheel opening is not flared.
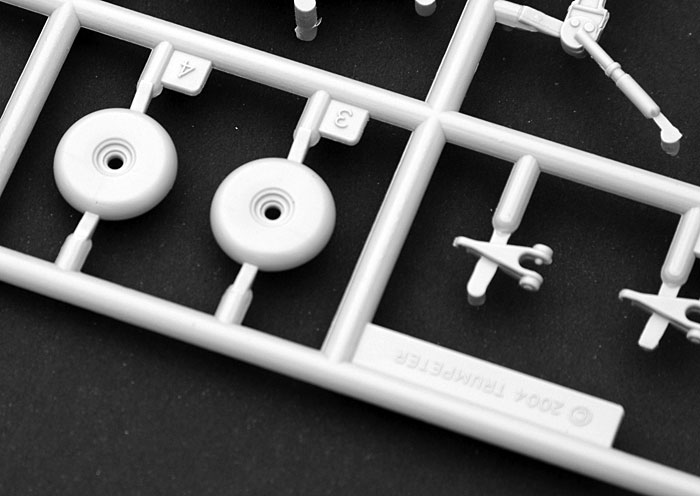
The tail leg is okay but is quite simplified.
Miscellaneous
Replace the pilots footstep - it is too fat and clunky.
While there are no sink marks to be seen on any of the parts I did notice a
very slight flaw in the fin on one fuselage half. Also, the DF loop is tiny.
It will be fairly easy to make your own replacement.
Fabric effect on the rudder and other control surfaces is
restrained.
Various parts on all the sprues have some minor flash.
On another sprue there are parts for the large MW (Methanol
Water) tank situated behind the cockpit. Once again, though there is no
other interior detail and no separate access panels.
Outline Accuracy
by Brett Green
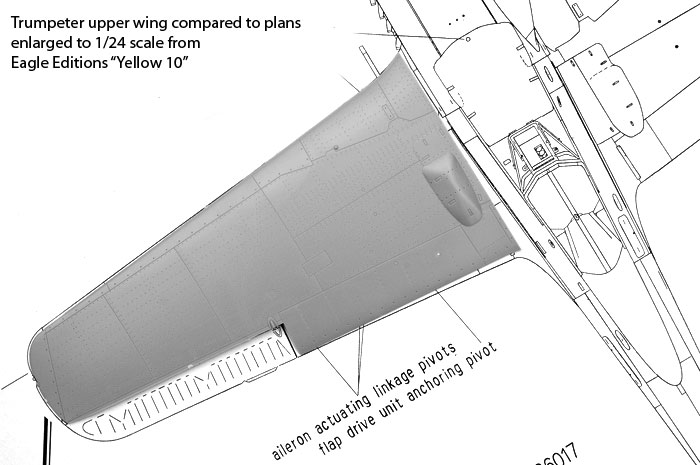
I compared the fuselage of Trumpeter's 1/24 scale
Focke-Wulf Fw 190D-9 with plans in Jerry Crandall's book, "Yellow 10",
published by Eagle Editions. The plans were scaled up from 1/48 to 1/24.
Although the drawings depict a Fw 190D-13, the basic fuselage, wing and
tailplane forms are the same. The differences lie in cowl shapes,
powerplants and armament.
Fuselage and tailplane dimensions matched very closely. .
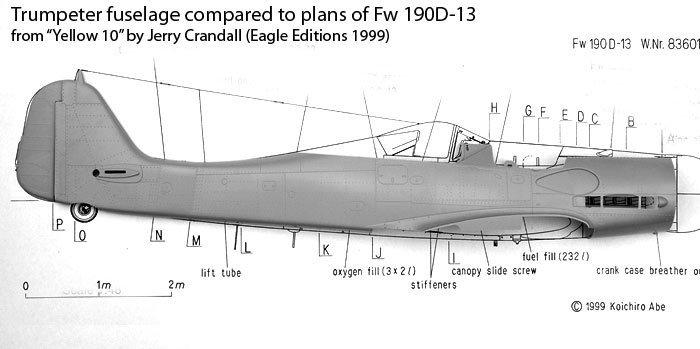
The kit fuselage was very slightly shallower than the drawings
in the mid fuselage area - less than two millimetres at the point of
greatest discrepancy.
The wings also compare very closely to plans.
More obvious is the hinge line of the upper forward cowl.
Being a hinge, this line should be perfectly straight, but it actually is
curved. Fortunately, it should be a relatively simple matter to glue the top
cowl in place, fill the existing hinge line, sand flat, then rescribe a new
straight line.
Overall though, the outline of Trumpeter's Dora compares
closely to these respected drawings. In the box, the model certainly passes
the outline accuracy test.
by John Hassall
While it may seem that I am mercilessly bagging this kit I
actually quite like it. Overall it is a nicely presented kit of my favourite
aircraft, and the thought of a BIG Dora for my collection is a delight..
There are some disappointing aspects to the package but at
least there is now a 190D-9 out there. However, I am mystified by
Trumpeter's half-cocked approach in supplying all the extras only for much
of it to be hidden once built. Are they planning to do a Profi style version
perhaps? Or maybe a see through version?
I'll bet that the aftermarket will have a field day with this one. The scope
for a full on detail build is immense.
In summary, Trumpeter's 1/24 scale Fw 190D-9 lacks the
authority and definition of the current Japanese kits with which it will be
compared, but it is accurate in outline, will look impressive when completed
(even without modification), and has great potential for additional
detailing.
I look forward to seeing what Messrs. Wauchop, Green,
Robertson, Werner and all the other Experten will make of this kit.
If you like Luftwaffe, Dora’s or big models then this is for
you.
Recommended.
Kits purchased with the reviewers' funds
Text Copyright © 2004 by
John Hassall and
Brett Green
Images Copyright © 2004 by
Brett Green
Page Created 08 November, 2004
Last updated
08 November, 2004
Back to
HyperScale Main Page
Back to
Reviews Page
|
Home | What's
New | Features
| Gallery |
Reviews | Reference
| Forum
| Search