|
Nakajima Ki-115
Tsurugi
(Sword or Sabre)
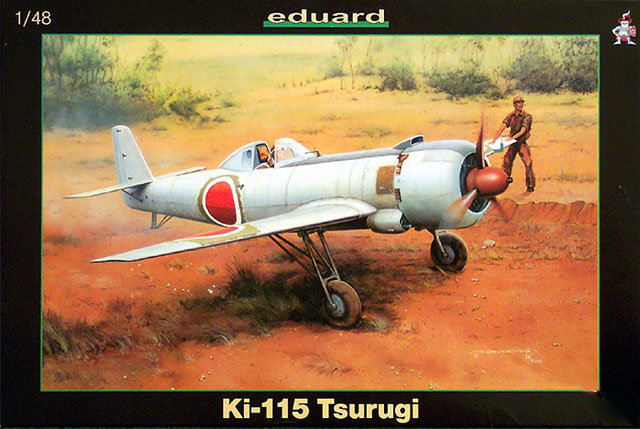
Eduard
S
u m m a r y
|
| Catalogue Number: |
Kit #8087 - Nakajima Ki-115 Tsurugi
(Sword or Sabre) |
| Scale: |
1/48 |
| Contents and Media: |
80 pieces in gray styrene; 2 in
clear; 4 photo-etched parts; vinyl masks; markings for 4 aircraft |
| Price: |
USD$29.47
from Squadron.com |
| Review Type: |
FirstLook |
| Advantages: |
High quality mouldings; excellent
surface features including subtle recessed rivets; high level of detail;
thoughtful inclusion of small photo-etch fret and vinyl masks; good decals
and instructions; sturdy packaging. |
| Disadvantages: |
Solid fuel rockets not included. |
| Recommendation: |
Highly Recommended. |
Reviewed by Matt Swan

Eduard's 1/48
scale Ki-115 is available online from Squadron.com
In January 1945, the
Japanese Army ordered the Nakajima firm to develop a special attack aircraft
armed with a single bomb. A maximum speed of 515 kph (320 mph) was also
required but most important, the aircraft had to be simple to build.
Flight-testing of the Ki-115 'Tsurugi' (loosely translated as Sword or Sabre)
began less than three months after the initial proposal in March 1945. In
purpose, this plane was the equivalent of Navy's Ohka for the Army, designed
exclusively for Taiatari ‘special attack’ (suicide) missions. An offensive
load of one 250, 500, or 800 Kilogram bomb was carried in a recess under the
forward fuselage. Designed by Nakajima engineer Aori Kunihiro, the major
impetus in building this aircraft was the perceived lack of available obsolete
aircraft to use in kamikaze attacks should the Allies invade the home islands.
As completely expendable
weapon in character, a very simple structural design was pursued with the
outward appearance being quite linear, with a fuselage of thin steel, light
alloy wings, and wooden tail it could be mass produced in Japan's aviation
cottage industry in provincial towns and cities. The aircraft was designed to
be able to accept a number of different power plants. The initial production
aircraft (Ki-115a) were powered by 1,150 hp Nakajima Ha-35 radial engines. It
is not known if any other engine was ever actually fitted to the aircraft.
Steel tubes were used for the main landing gear but each strut was bolted
directly to the wing and incorporated simple shock absorbers. The gear was
designed to drop after takeoff. Nakajima also added auxiliary flaps to the
inboard wing trailing edges and installed fittings beneath each wing for two
solid-fuel rockets to boost speed during the final plunge. With these changes,
speed jumped to a maximum of 550 kph (343 mph) and range was 1,200 km (720
miles).
The Tsurugi had very poor
handling, stability, and take-off and landing performance and could not be
flown by anyone other than experienced pilots. The testing department
concluded that it was a virtually useless design. Nakajima had already been
given the order to urgently mass-produce it and 104 aircraft were ultimately
produced. In the end, none of the 104 Ki-115a aircraft produced entered
operational service. The war was over and eager volunteers never got to make
their final flight. A naval variant and several improved versions did not
progress from the drawing board. Little is known of the Tsurugi test program
or planned deployment of these aircraft because Nakajima destroyed most
records before the Allied forces arrived. The only surviving copy of this
unique aircraft was absorbed into the aircraft collection at the Garber
Facility of the National Air and Space Museum in 1949.
From the moment you touch
the box this kit exudes a feeling of quality.
The Parts
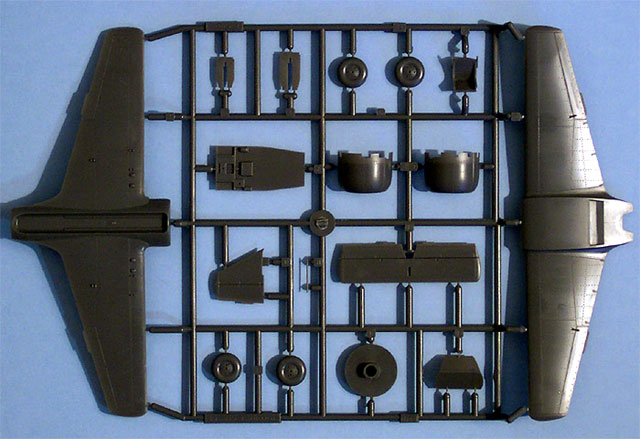
Overall the kit includes
80 pieces in gray plastic, 2 in clear and 4 PE parts giving the modeler 86
pieces to work with.
Click the
thumbnails below to view larger images:
The box is made from a
heavy duty cardboard with very nice graphics on the cover. On the first glance
inside we have another cardboard insert onto which are stapled several small
plastic, resealable bags.
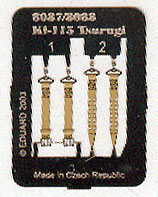 Inside these bags we have a small fret of colored
photo etched seatbelts, a complete set of masks for the canopy and for some of
the paint pattern and a small sprue of clear parts (2) for the canopy. Lifting
this insert out brings us to the real meat and potatoes of the kit. Next we
have two large, resealable bags containing three sprues of parts done in
medium gray polystyrene plastic. Inside these bags we have a small fret of colored
photo etched seatbelts, a complete set of masks for the canopy and for some of
the paint pattern and a small sprue of clear parts (2) for the canopy. Lifting
this insert out brings us to the real meat and potatoes of the kit. Next we
have two large, resealable bags containing three sprues of parts done in
medium gray polystyrene plastic.
All of the parts display
very finely engraved panel lines and rivets. I could find no sink marks
anywhere on the kit but did find a few ejector pin markings. Most of these
were on interior areas of the fuselage and do not look to present any problem
to construction. The kit does have locator pins but they are very fine and
delicate in construction. There are some slight mold lines on the landing gear
struts and other smaller pieces but a quick touch of a sanding stick should
make short work of them. The sprue gates are all fairly small and most are
placed in areas that will not present problems cleaning up other than one
located on top of the nose of the fuselage, right across some raised detail.
It takes a little care and skill to clean that gate off and retain the kit
detail.
As you can see in the
comparison photo below this is a small aircraft with a slightly shorter
wingspan than a Bf 109.
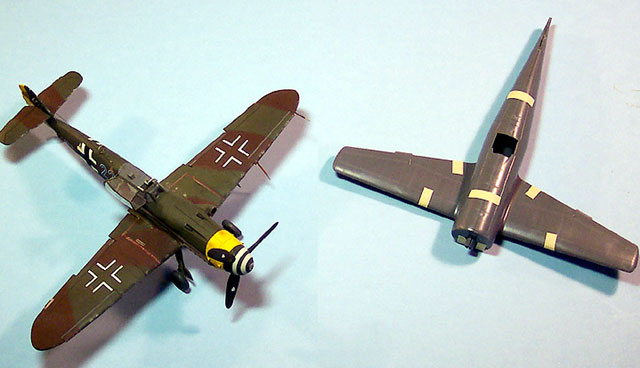
I test fitted the major
components of the kit and was quite pleased with the results. The fuselage
pieces lined up well and the wing pieces fit together like a charm. The
cockpit is very well detailed and the engine is also exceptionally well done.
Eduard has reproduced the attachment points under the wing for the two
solid-fuel rockets but failed to include those items as part of the kit. From
the looks of preliminary fitting there will be little call for fillers when
constructing this kit. You get a choice of arming it with a 500 Kg or an 800
Kg bomb.
Decals and Instructions
The instruction booklet
for this kit is a very nicely done eight page affair in full color. It is
apparent that a lot of thought was put into producing this booklet.
The
instructions do not include any historical information on the aircraft at all
but does include a nice color reference chart. It cross references colors for
Gunze Aqueous and Mr. Color as well as Tamiya, Humbrol, Revell and Testor. We
are provided with a complete parts diagram as well.
The next six pages cover 9
exploded view construction steps with color call-outs, detail close-up inserts
and light blue highlights to areas that need special attention.
The last page
covers the use of the painting masks. In addition to this there are three full color pages of instructions for decal placement and exterior painting.
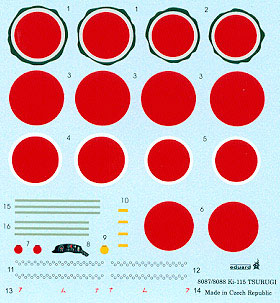 The decals provided with
the kit allow you to model three different aircraft. The decals provided with
the kit allow you to model three different aircraft.
The decals exhibit the
same level of quality seen though-out the rest of the kit. Color density looks
good and print registry is right on the money.
In addition to the standard national
markings we also get a set that include the olive drab undercoat that
apparently was visible on one aircraft. There are a few service stencils
included and an optional decal for the dashboard.
There’s even a nice little
selection of decals intended for the bomb load.
My previous experience with Eduard decals has shown that they respond nicely to setting solutions and I
have no reason to believe that these would behave any differently.
Eduard has produced a
very nice kit of an unusual aircraft.
The level of detail is
very nice, the decals are great and the instructions are top-level work. They
did not stop there but continued with a superb job of packaging ensuring that
the parts were not likely to take damage in shipping and would survive well in
a modelers large stash.
Although this aircraft
never saw service (thankfully) it is an important piece for a World War Two
collection representing the extremes that some regimes would go to when
situations seem beyond hope.
Kudos to Eduard for a job
well done.
Highly Recommended.
Text and Images Copyright © 2004 by
Matt Swan
Page Created 10 February, 2004
Last updated 10 February, 2004
Back to HyperScale Main Page
Back to Reviews Page
|
Home | What's
New | Features
| Gallery |
Reviews | Reference
| Forum
| Search