There was a time when America was obsessed with the "Space
Race".
Visions of traveling into space permeated our culture, from
movies and books to fashion and interior design. For the first time, spaceship
kits were being released based on actual spacecraft, not just something that
appeared in a comic book or a Saturday morning matinee. The early astronauts
were instantly propelled to overnight fame, receiving the same kind of publicity
and exposure that is today reserved for only the trendiest of Hollywood types.
Slowly, over the next 15 years, the public became used to hearing about the
latest accomplishment in space.
As goals were achieved, it somehow became common. And then it
slowly faded from the front pages of newspapers and only started to appear in
the pages of specialty magazines.
For us model builders, the "Real Space" kits of the 60's gave
way to the STAR WARS kits of the 70's (not that that was necessarily a bad
thing). Occasionally, someone would re-issue an old kit and it would be fun to
pick up a quick weekend build, reliving fond memories of our youth. But this new
release goes beyond reliving old memories.
This is what it must have been like for a kid to get the latest
kit back then.
You won't be able to miss Atomic City Model Engineering's 1/12
scale Mercury Capsule kit when you walk by it on the shelf of your local hobby
store.
Likely, it will be the box that is dwarfing all the others on
the shelf (especially if it is in the "space" section). You may not recognize
the name Atomic City Model Engineering (distributed by MRC), but those of us
that are familiar with Scott Alexander's work in Hollywood, with resin kits and
studio scale replicas, know that he is fanatical when it comes to detail and
equally obsessed with engineering. In short, unfamiliarity with this brand name
is nothing to fear.
A quick look inside the box proves that.
Everything about this kit leads you to believe it is a new release from one of
the major manufacturers. Except of course, most of the major manufacturers would
not think to release an all new, large scale styrene kit of a spacecraft that
was designed over 40 years ago. (Sorry, I'm done venting now.)
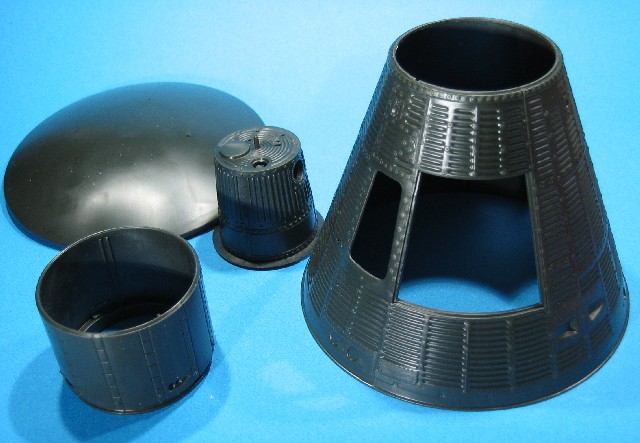
The (huge) box reveals 5 sprues of plastic parts (1 in clear, 1 in red, 1 in
black, and 2 in off white), a vinyl sprue for the astronaut figure and his
accessories, a set of photoetched parts for the retropack straps, a piece of
clear sheet, a metal pin, and two large sheets of decals. The major components
of the capsule are large single pieces, already detached from their sprues and
separately bagged. All of the parts are quite large as can be expected with a
1/12th scale kit of anything.

Click the thumbnails below to view larger images:
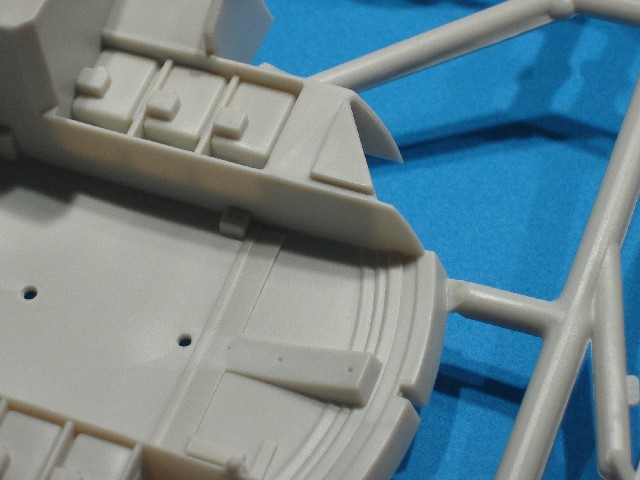
A minor note here is that while the parts are large, so are the
sprue attachment points. You'll need a good sharp knife to cut off the parts.
(Luckily the smaller parts have smaller sprue attachment points, so the risk of
breaking a delicate part is reduced.)

Upon first glance, it appears that the straps that hold the
retrorocket packs in place are photoetched metal. Closer inspection reveals that
they are stamped out of some sort of steel and are actually made up of two parts
welded (or glued) together. They feature some nice detail and they have a nice
finish to them - no painting necessary. You will still have to bend them, but
the shape doesn't appear too difficult. A nice little multi-media touch. The
instructions are professionally laid out - clear and easy to follow. There are
some additional photos and text to get around a couple of tricky areas which
will help the less experienced modellers who are tempted by this large kit.
Decal placement is also clear, courtesy of a large, stretched out view of the
capsule that also covers the different variations between missions. The decals
themselves are clear, sharp, and thin - especially useful on the corrugated
surface of the capsule. I would stock up on Micro-Sol in advance. Markings are
included for all of the Mercury missions as well as stenciling and individual
gauges on the instrument panel.
Assembly is straightforward and broken down into sub-assemblies. The escape
tower can be completed and attached once the capsule is finished (or left
removable). Likewise, the interior can be assembled, detailed, and dropped into
place once done. The main hatch can be left off so you can see the interior
(boy, was it cramped in there). The capsule exterior is broken down into a few
major pieces and several smaller detail parts. The only tricky part will be the
widow area. The capsule featured a clear fairing over the window, and that is
represented in the kit by a piece of clear PVC sheet that will have to be cut
into shape with the provided template. Once that is done, it needs to be trapped
in place between the capsule exterior and the window frame. This provides a nice
clean fairing, but parts must be prepainted and the assembly order followed or
you will have to mask the clear fairing later. Luckily, due to the modular
nature of the kit none of this should be a problem. (Basically, you have to
follow the instructions.) Also included in the instructions are some
scratchbuilding tips if you want to model the Alan Shepard sub-orbital capsule.
That one capsule had a different main hatch and window arrangement than the
others. Some cutting of the kit is required and the instructions warn you that
this modification it isn't for inexperienced modellers.
The detail on the exterior of the capsule is fantastic. All of the shingles and
the various fasteners are crisply represented, as are a myriad of other little
details. The retropack features fine raised details and all of the various
panels are there, along with many little hoses, nozzles, and connectors. The
detail of the interior is a little basic, though the dash panel has finely
molded gauges and individual switches to glue on. The scientific packages
carried on the Mercury missions are there, though the fine detail such as
switches and wiring is missing. The main dash panel has molded detail on the
back of the panel, though. This will help those of us that can't leave well
enough alone to wire up the capsule. Due to certain necessities, the pilot
figure had to be molded out of a soft vinyl. Though not the first choice of
materials for many of us, overall I think the figure is acceptable. It will be
interesting to see how one will get the shiny aluminum finish of the early
spacesuits to stick on the vinyl material.

Click the thumbnails below to view larger images:
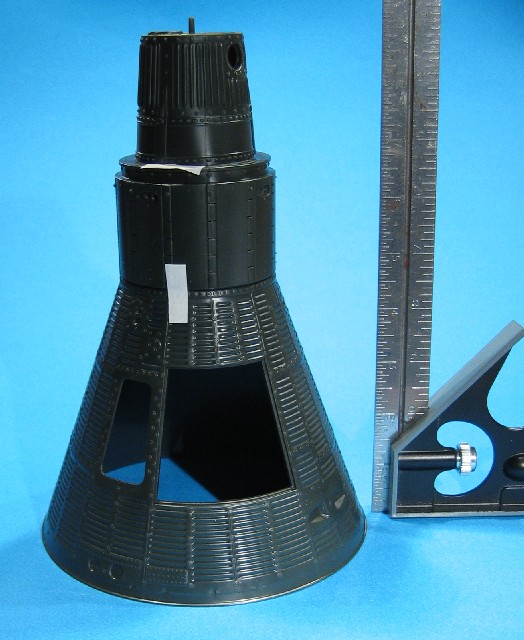
I was able to get a quick dry-fit taped together for some
photographs in fairly short order. The final product is going to be
impressive. With the escape tower attached, the overall length will be over
24". The capsule itself is 11" long and over 6" in diameter (at the heat
shield). The combination of size, detail, and options make this kit worthy
of a nice display case. The super detailers are going to have a field day
wiring up the cockpit and depicting the various missions, as well as the
weathered appearance of a post splash-down capsule. Due to the size of the
parts and the layout, I think anyone with a little modeling experience will
be able to create a real showpiece.
Highly Recommended.
Text and Images Copyright © 2005 by
Gene Kozicki
Page Created 13 January, 2005
Last updated 13 January, 2005
Back to HyperScale Main Page
Home | What's
New | Features
| Gallery |
Reviews | Reference
| Forum
| Search