|
Gloster Meteor FR.9
Classic Airframes
S u m m a r y
|
| Catalogue
Number: |
457 |
| Scale: |
1/48 |
| Contents and Media: |
71 parts in grey styrene; 16
parts in
clear styrene; 13 parts in dark grey-coloured resin. Decal sheet
with three marking options. 7 pages of instructions and letter-sized
colour marking guide. |
| Price: |
USD$49.97 online from Squadron.com |
| Review Type: |
FirstLook |
| Advantages: |
Meteor PR.9 variant not
previously available in this scale; PR nose supplied as clear parts
(simple to mask camera windows); beautiful surface detail; accurate
outline; thoughtful engineering; high quality resin parts; good
quality decals with colourful marking options; useful options -
large and small intakes, belly tank, drop tanks. |
| Disadvantages: |
No gunsight; some chunky sprue
attachment points; some fiddling required at nose wheel bay /
cockpit assembly |
| Recommendation: |
Highly Recommended for
experienced modellers. |
Reviewed by Brett Green

Classic
Airframes' 1/48 scale Meteor FR.9 is available online from Squadron
Classic Airframes continues its noble quest to cover the
range of Gloster Meteor variants. In addition to the F.8 (in three
different boxes and two different versions), F.4 and T.7, Classic
Airframes now introduces their Meteor FR.9
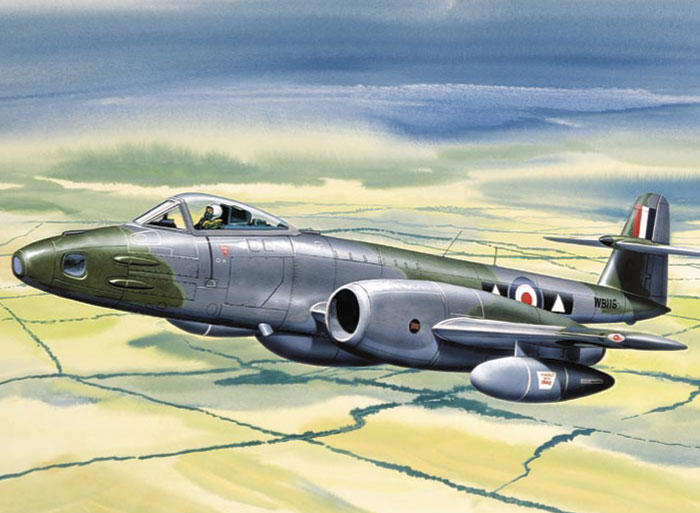
The Meteor FR.9 was essentially an F.8 fighter fitted with
a new nose, nine inches longer, to also accommodate cameras. This variant
first flew in 1950. It operated in Europe, the Middle East, Cyprus and
Aden. The FR.9 also saw service with Israel, Ecuador and Syria. The FR.9
nose was fitted to at least one Meteor T.7 in Australia too (a rather
interesting conversion prospect!)
Reflecting the heritage of the real aircraft, Classic
Airframes Meteor PR.9 kit is based on the earlier F.8 release. In fact,
the box contains the entire "Early Version" Meteor F.8 kit with a new
sprue of clear parts for the nose plus a "Late Version" canopy in a
separate bag. Appropriate markings for this version are also included.
The model
comprises 71 parts in pale grey injection moulded styrene, 16 parts in
clear injection moulded plastic, and 13 resin parts.
The PR nose is presented in clear plastic. This is a
terrific idea, as the modeller can simply mask off the camera windows
prior to painting. The lens for the nose camera is a separate part,
avoiding the messy prospect of a join line down the middle of this round
window. Although the clear plastic is distortion free, a quick dip in
Future floor finish lifts the parts to a stunning lustre.

The nose section on the main fuselage halves must be cut
off, but the required cut is along an existing panel line. This simplifies
the task considerably. Please note that cameras are not supplied, but some
basic shapes could easily be added to the interior of the nose before the
fuselage is sealed.
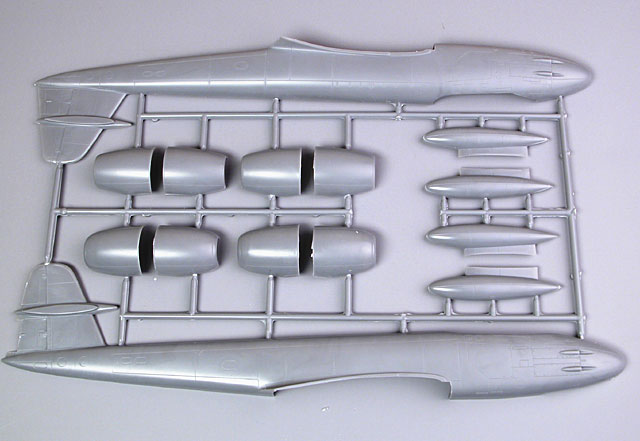
In common with the earlier releases, the quality of the
grey plastic parts is excellent. The surface
texture is satin, and panel lines are finely engraved. The dive brakes on
the upper and lower surfaces of the wings are represented by engraved
panel lines. Most of the ejection pin marks are hidden on the inside
surface of parts except for one big raised pin inside each main wheel
well. The only other minor problem was some disappearing rivet detail on
the inside of one gear door - hardly a tragedy.
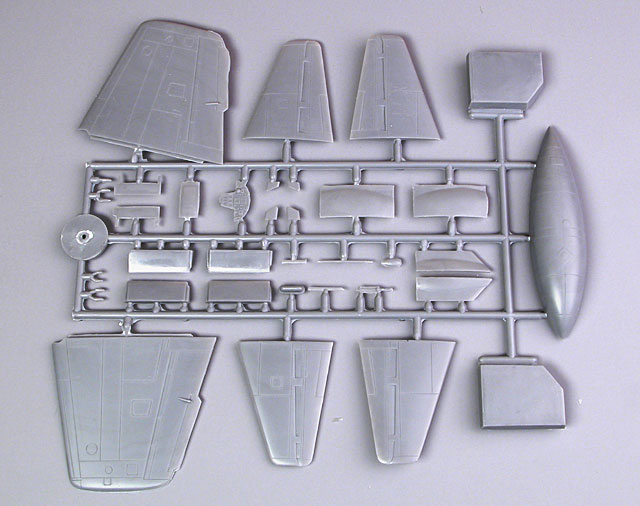
Trailing edges of most flying surfaces are nice and thin,
but the inside surfaces of the rudder halves would benefit from some
sanding. The trailing edge of the wing centre section (inboard of each
nacelle) also seems a trifle thick but a few minutes with a sanding stick
will remedy this area too.
Engineering is thoughtful. The lower centre section of the
wing is moulded as a single part, onto which the inside upper wing parts
(incorporating the nacelles) are joined. The outer wing panels are secured
via a recessed reinforcement strip - much better than the butt-join we
might have otherwise expected.
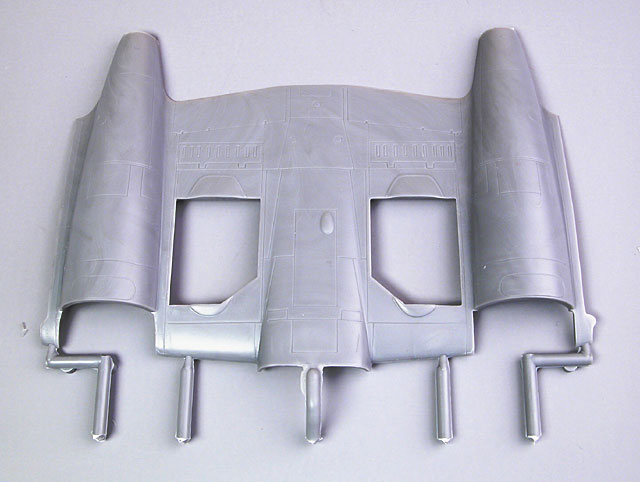
We do get a butt join for the horizontal tailplanes
though, so some reinforcement with wire or fine brass rod would be a good
measure to prevent later damage.
There are no locating pins, so extra time should be
allocated for test-fitting and aligning parts. Also, sprue attachment
points are a little thick and located in some prominent areas, so take
care when removing and cleaning up parts.
Classic Airframes has supplied
both the smaller, early intake and the larger, later intake in this version of the kit.
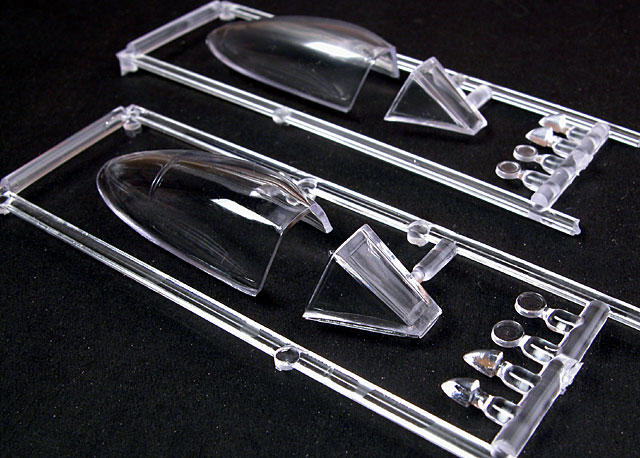
The nose, canopy, navigation lights and landing lights are
all supplied in clear injection-moulded plastic.
As mentioned earlier, my sample of the PR.9 kit includes
both early version canopy with the rear metal cover, and the all-clear
canopy. Only the "late" version is required for this variant..
The parts are very thin and free of distortion. They also
respond exceptionally well to Future. I dipped some of the parts and the
sparkling results speak for themselves - no prizes for guessing which set
of parts was treated!.
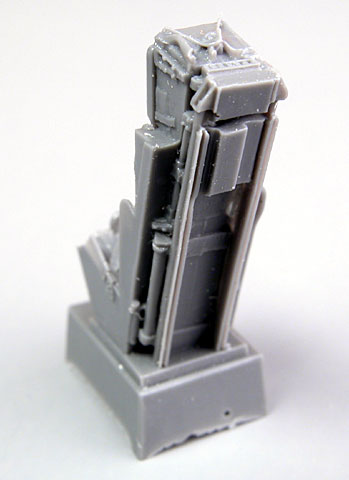
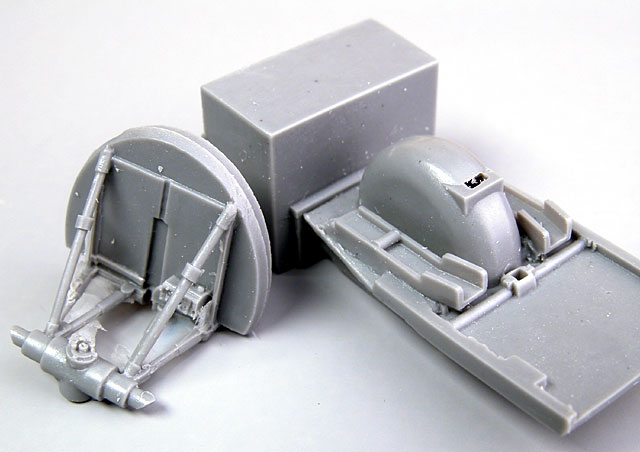
Resin parts are delicately detailed and as nice as we have
come to expect from Classic Airframes in recent years. The complex mount
for the nose wheel is pre-fabricated, saving the modeller some potentially
delicate assembly. Both this part and the combined cockpit floor/nose
wheel well and nicely rendered. I particularly like the Martin Baker Mk.2
seat. Careful painting of the cushions and harnesses will offer the chance
to add some colour to the otherwise all-black cockpit.
Click the thumbnails below
to view larger images:
Instructions are logically laid out in six pages over 14
steps. Brief notes supplement the exploded view diagrams.
Decals are provided for three aircraft. These are two RAF aircraft finished in Dark Green and Dark Sea
Grey (one over Aluminium and the other with PRU Blue lower surfaces); and
one Israeli Meteor in High Speed Silver (ie, not natural metal, but
silver paint).
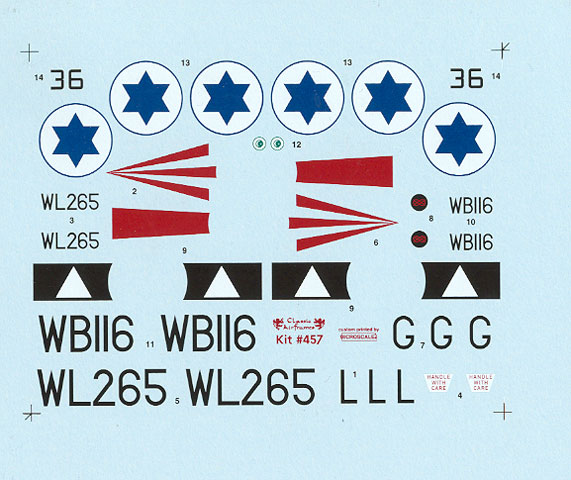
Options include the distinctive belly tank and
wing-mounted drop tanks.
In common with earlier releases, the PR.9 kit does not supply a gunsight.
You will
need to scratchbuild one from scrap plastic or buy a resin
after-market item. Also, the style of wheels seems to be more appropriate
for the early Meteors. Even so, the main wheels are barely visible under
the nacelles. For those of you who want an entirely accurate Meatbox,
though, accurate replacements are now available from Loon Models (along
with replacement wheel wells, rockets and other Meteor goodies)
It is nice to see the FR.9 join Classic Airframes' growing family of
Meteors.
As I have mentioned in earlier reviews of Classic Airframes kits, the lack of locating pins will call for extra care and dry-fitting; and
a little more cleanup than average will be required; but I do not see
anything too alarming in construction.
Reports from modellers who have built the earlier Classic Airframes Meteor
releases have reported that there are some challenges presented
(especially aligning the intakes and in the location of the cockpit and
the nose wheel bulkhead), but that the model is eminently buildable. The
completed CA Meteors in HyperScale's Gallery and Features sections stand
as testament to the attractive results that are possible.
The Meteor FR.9 boxing seems to be the best value and most flexible of
all the Meteors released to date. It includes all the parts required to
build not only the stated FR.9, but alternatively an early F.8 or a late
F.8. It will be worth keeping this in mind as the Meteor F.8 kits get
harder to find in the coming months (they are already out of stock on the
Classic Airframes site, although happily still widely available through
retailers).
Classic Airframes' 1/48 scale Meteor PR.9 will need more preparation
and attention during assembly, but a great result should be possible for
anyone wanting to take on a project a little more challenging than a
standard Tamiya or Hasegawa kit.
Now, roll on to those great looking Meteor Night Fighters!
Highly Recommended to experienced modellers.
Thanks to
Classic Airframes for the review sample.
Review and Images Copyright © 2004 by
Brett Green
Page Created 29 March, 2004
Last updated 30 March, 2004
Back to HyperScale Main Page
|
 Home | What's
New | Features
| Gallery |
Reviews | Reference
| Forum
| Search
Home | What's
New | Features
| Gallery |
Reviews | Reference
| Forum
| Search