|
Eurocopter EC145 Rega

Revell, 1/32 scale
|
Summary |
|
Catalogue Number: |
Revell
04492 - EC145 Rega |
|
Scale: |
1/32 |
|
Contents and Media: |
White,
grey and clear styrene |
|
Price: |
CDN $29.99 from
northstarhobbies.com |
|
Review
Type: |
First Look |
|
Advantages: |
Crisply
moulded parts; Clear transparencies; Excellent decals; Fine detail |
|
Disadvantages: |
Interior details not representative of a REGA aircraft |
|
Recommendation: |
Highly
Recommended |
Reviewed by
Dave Irons

Revell's 1/32 scale
EC-135 Air Zermatt is available online from Squadron
The box is standard Revell Germay fare with opening flaps on either
end, a very nice bit of box art depicting a photo of the actual
helicopter on the front, some fragmented colour photos of the real
helicopter and a brief history on the side panels, and photos of some
other Revell products on the bottom.
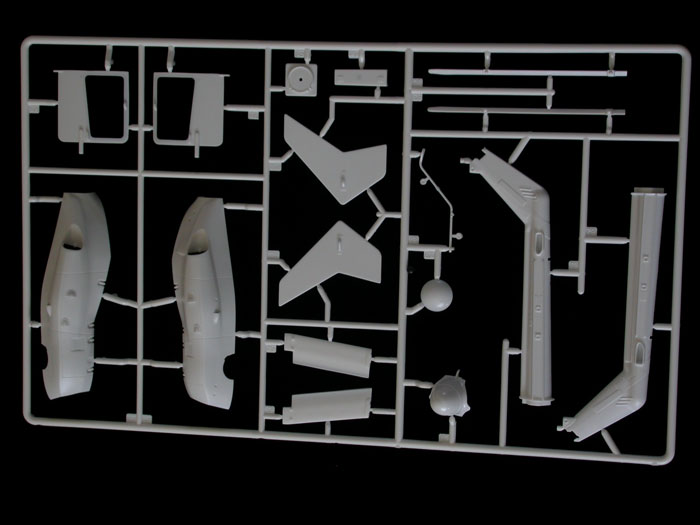
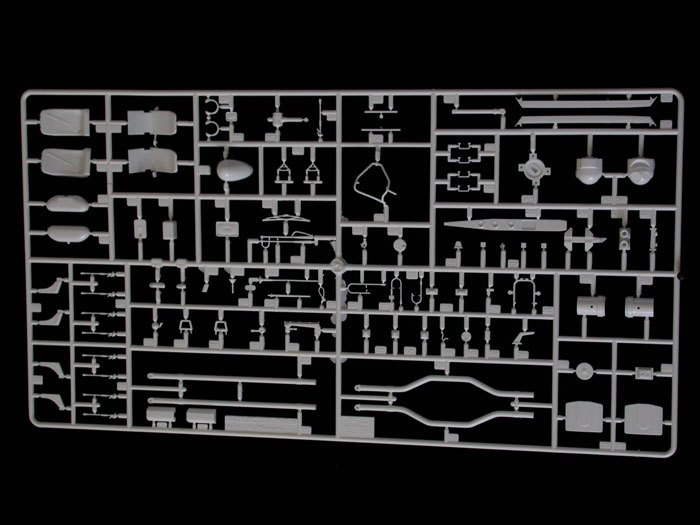
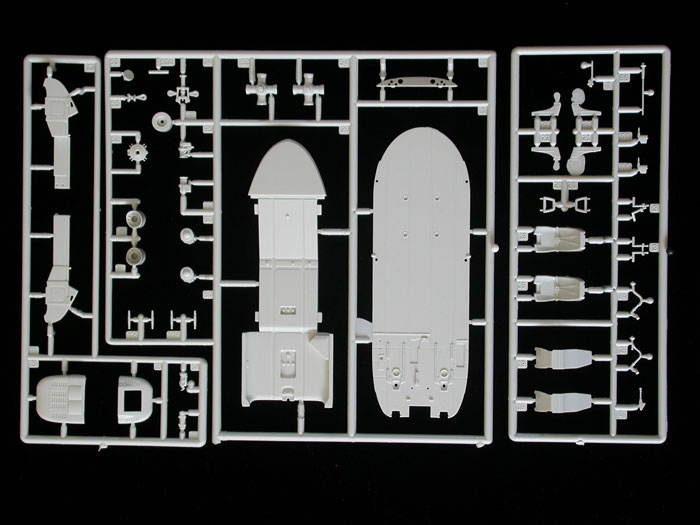
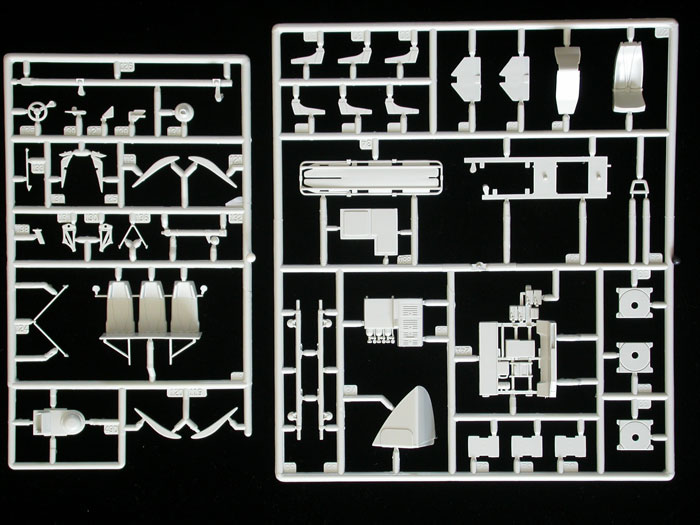
The part trees are bagged in groups with everything then stuffed in one
large bag. Three trees are moulded in white, six in light gray and two
in clear. That’s eleven trees of parts! Granted, three are fairly small,
but the parts count is still impressive at 291. Now, the kit contains
quite a few parts marked ‘not for use’, mostly due to one tree clearly
marked “EC-135 POLICE” that you need for a few parts (even more than you
think if you do a true REGA Machine).
There is minimal flash and it looks like most if not all ejector pin
marks will be hidden once the kit is complete. There are a few sinkmarks
that will require attention around the rotor mast on the upper engine
shroud, and at the root of each rotor blade. On one of my two kit’s they
are more pronounced than on the other so you may get lucky! The ones on
the blades will require some patience in cleaning up do to the adjacent
raised detail.

Click the thumbnails below
to view larger images:
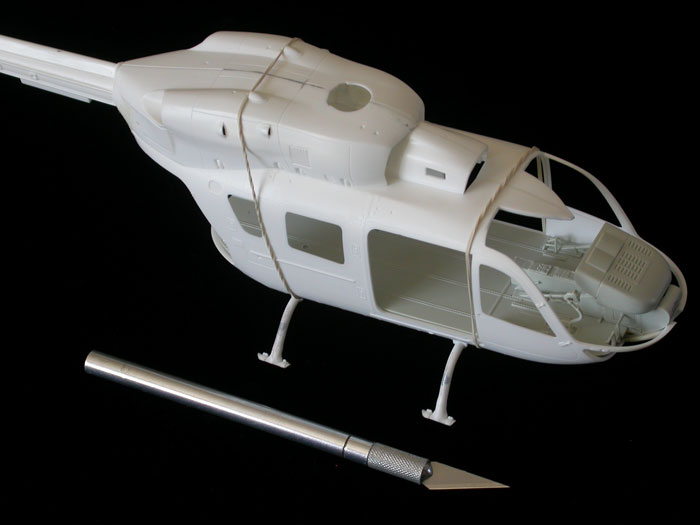
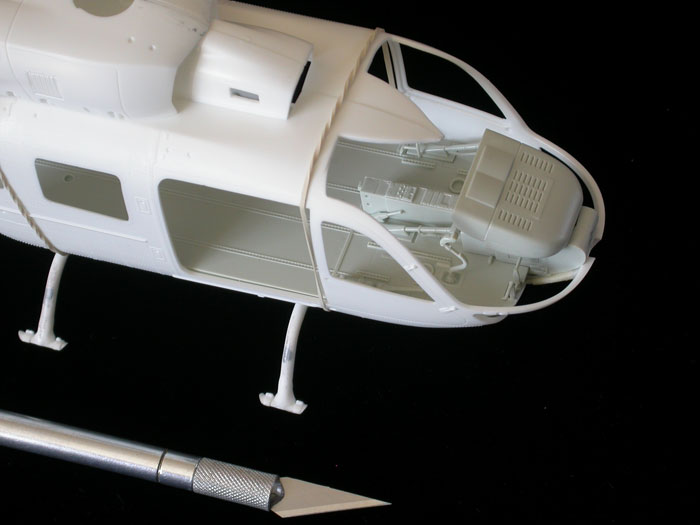
The cabin windows on the EC-145 are bulged outward and Revell have
captured this feature. Due to this however, there is some distortion in
the kits clear parts. This is not a big deal as all the parts are
crystal clear and when I viewed the decal sheet through all the windows
as a test, they looked crisp and legible. The huge windscreen is
virtually distortion free and will show off the cockpit area
wonderfully. Since both sliding cabin and rear clamshell doors can be
posed open, any distortion in the cabin windows shouldn’t be an issue in
viewing the interior.
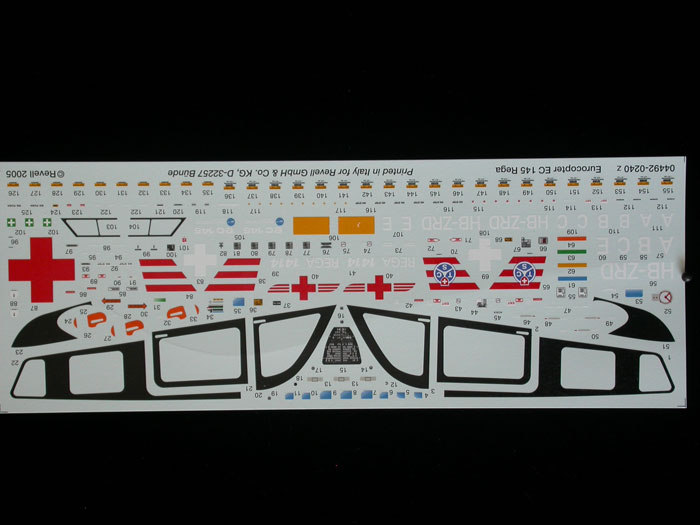
The decal sheet is printed in Italy, looks to be nice and thin, and both
my examples are in perfect register. Although not as large as some other
Revell Germany sheets, it is comprehensive and covers all five of REGA’s
machines. As usual, all small stenciling is provided, even for the
interior and the colour coding stripes for the rotor blades. Revell has
even gone to the trouble of providing individual serial numbers for ALL
the rotor blades. That’s four blades times five helicopters! They are
barely legible, but are called out for in the instructions. Good news
is, if you screw one up and have to use a spare, well, who is really
going to know! My only complaints with the sheet are the hokey blue
decals provided to represent the screens on the MFD’s in the cockpit.
Some gloss black paint would be a lot more convincing for a shut down
MFD! The other error is that on the ‘EC-145’ logo’s (decal 105), the
actual ‘EC-145’ portion of the decal should be in aluminum, not white as
portrayed on the sheet. Well, that’s at least according to my reference
photos.
Not having used any of the decals yet I can’t comment on how well
they work on the model, but if my experience with other Revell sheets is
any indication, they should not pose any difficulties.
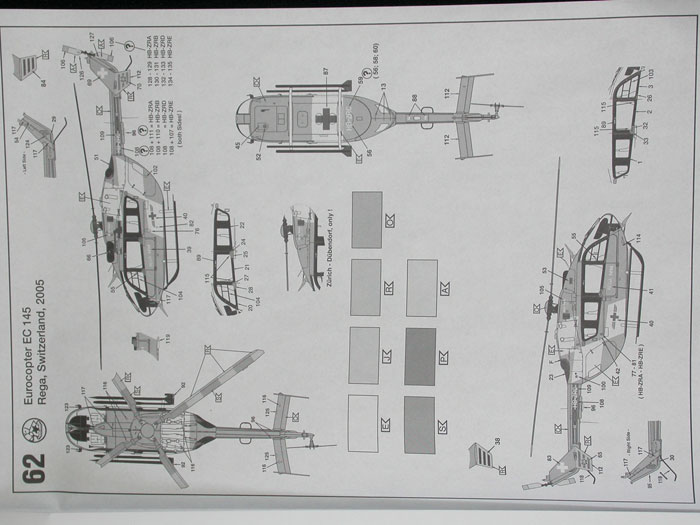
The instructions are straightforward, nicely illustrated, follow a
logical evolution, have a brief history of the EC-145 and REGA, a parts
map, and a small paint and decal map.
I think the paint and decal map could have been spread over two pages
and made a bit larger, especially for those of us a little past our
prime in the eyesight department!
However, there are a few errors and some confusing drawings in the
instructions with regards to the REGA specific machines. This is due to
the fact that Revell seems to be using various steps in the instructions
for several kits, so some of the drawings have equipment shown that you
don’t have in this kit!
Okay, now you know what you get, it’s time for the bad news. There are
some errors in the kit with regards to an actual REGA machine. This is
due in part to what looks like Revell’s intention to get a few variants
out of this kit.
The basic interior is correct, but the layout of the various bits of
medical / rescue equipment is not representative of a REGA machine. You
can use the stretcher and mount, the seats, and the bin on the rear
door, but for the cabinets, the support structure for the various
medical things that go ‘beep’ and the ‘beeping things’ themselves, you
are going to have to scratchbuild if you want it to be dead accurate.
It’s not as daunting as you would think and armed with some good
reference photos, quite do-able. If you are comfortable using the
interior bits supplied in the kit, then you can go on with the few
corrections I will be listing in a follow up build article and have a
very nice model just the same. I will also list the major interior
corrections for those who want to go the extra mile.
I do have a photo of HB-ZRA just after delivery with the base
interior with no cabinets, etc. installed, so technically, you could
stick in all the seats and leave it at that and have an accurate model.
Now onto a nice little bonus in the kit! Many of the photos of REGA
EC-145’s show a rear view mirror array mounted on the nose just under
the main windows on the right side. No mention of this is made in the
instructions, but, on the tree intended for the EC-135 POLICE
helicopter, all the parts are provided for the mirror assembly. Whether
it fits properly on this particular nose is another thing, but I’m sure
with a bit of fiddling around it can be accomplished more easily than
scratchbuilding the whole thing. Check references or snag a scan of the
Revell 1:32nd EC-135 kit’s instructions to figure out how it all goes
together.
The mirror parts are 233, 236, 237, 239, and 240.
Now for a few little disappointments with the kit.
I had hoped that all of the doors would be provided separately, but the
two swing out cockpit doors are moulded into the fuselage sides. A bit
of careful surgery is going to be required to open these up. There is a
small inspection window on the right front of the engine ‘pod’ just
forward of the intake. Revell forgot about it and have given you one of
those cheesy blue decals to replicate the glass (decal # 53). Also, in
this scale, I would have liked it if the anti-collision lights on the
vertical tails had been provided as clear parts but they are moulded
with the tail pieces. There are a couple of clear teardrop lights on the
clear sprue that I assume are for the EC-135 kit, and could be used with
some careful sanding off of the large attachment point.
There is a little problem with the two front seats as well. The
seatbelts are moulded with the seats and become nearly invisible at the
top, especially the right shoulder harness. Both belts should go through
openings in the front of the seat to retractors inside the assembly.
That detail is soft and nearly invisible.
The only other negative for me anyway is the way in which Revell
chose to mold the forward clear parts. I would have preferred it if they
had chosen to mould the entire nose section in clear with frosted areas
to show the framework that gets painted. This way, they could have
eliminated the problem of having a glue joint along the very large edges
of the actual window area. It would also have given them the chance to
have the forward doors separate and positional. Compounding the problem
is a triangular portion of the upper fuselage that extends forward of
the main roof and I can see this being a problem when it comes to proper
fitment of the clear windscreen. If Revell had moulded this section as
part of the windscreen, it would have provided a good solid painted over
joint. Trumpeter has seen the light and moulded the entire nose section
on their new 1:35th CH-47 in this way and I think Revell dropped the
ball on this one. If they decided on the approach they have taken to
ensure a clear canopy, then okay, but I think it’s going to be a
delicate area of the kit to get right.
Now, here are some things you should be aware of if you are going to
even begin to build an accurate replica of a REGA specific machine:
In step 25, the instructions specify part 49B when in fact, you should
use part 49C, with the vent in it.
In step 41, parts 81, the snow plates are not always fitted and can
be left off at your discretion.
Do not use part 80 on the left side! This style step is used only on
the right side, which is part 83. On the left side, use a modified part
126, even if not using the searchlight. Now, the mounting post for the
searchlight has to be cut down flush with the top of the step like part
210, but you can’t use part 210 because it’s meant for an EC-135 and has
different mounts. I’m not sure how well engineered the light mount is,
so I would wait till step 55 to see if it needs to be cut down if you
are mounting the light. Take a look at reference photos and you will see
what I mean. (also of note here while talking about the skids, the
handles on the sides of the skids are also sometimes removed, so if you
break one of these little handles off, just sand the area smooth and
drill a couple of mounting holes!)
Step 48. Okay, they have me here! I have yet to see a photo of the
loudspeakers depicted by parts 221 and 222 installed. Go directly to
step 49!
Step 51. Don’t pay any attention to the step style depicted in the
illustration, and only use the skid extension, parts 119 and 120 on the
left side if the light is not mounted. Always use it on the right skid.
Step 58. If you want to display the winch swung out ready for
operation, be aware that the winch housing itself is bolted rigidly to
the arm and will rotate 90* to be perpendicular to the fuselage when
it’s swung out. It doesn’t remain parallel to the fuselage as it is when
stowed. Also, the flotation ring on part 134 should be painted in the
same colour as the surrounds on the door handles (decal #25 for
instance).
While talking about the winch, you should be aware that on many
EC-145’s, the winch can be mounted on either side of the airframe.
Revell has moulded the mounting points and electrical sockets on both
fuselage sides of the kit. However, REGA only has this on the left side,
so you will have to carefully sand off the detail representing this on
the right side, being careful to damage as little of the adjacent rivet
detail as possible.
All in all though, this is a very nice, finely detailed model, but the
high parts count, small detail parts and a large windscreen that I’m
sure will cause some stress make it a subject suited to more experienced
modelers.
Since I have now already begun construction, a detailed build article on
how to do an accurate REGA machine will follow.
Click the thumbnails below
to view larger images:
Highly recommended for all fans of Medivac Helicopters.
Review and Images Copyright © 2006 by Dave Irons
Page Created 31 July, 2006
Last updated 30 July, 2006
Back to HyperScale Main Page
Back to Reviews Page
|
 Home | What's
New | Features
| Gallery |
Reviews | Reference
| Forum
| Search
Home | What's
New | Features
| Gallery |
Reviews | Reference
| Forum
| Search