|
1/48 scale Ryan NYP
Spirit of St.
Louis
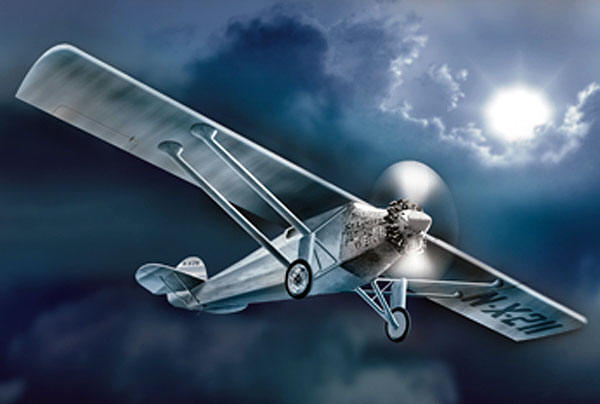
Revell-Monogram
S
u m m a r y
|
| Catalogue Number: |
Revell-Monogram Kit No. 85-5244
Spirit of St Louis |
| Scale: |
1/48 |
| Contents and Media: |
More than 50 parts in silver and clear;
instructions; decals |
| Price: |
MSRP
USD$12.75 |
| Review Type: |
FirstLook and Test Fit |
| Advantages: |
Good moulding; great attention to detail; separate
cockpit door to display interior detail; good fit (according to
test-fitting); clear instructions; decals supplied for damascene effect
on engine cowling; thin, distortion free clear parts (bagged
separately); two accurately clad figures supplied; |
| Disadvantages: |
Only one Lindy head provided for the two bodies;
problematic join line on lower trailing edge of wings |
| Recommendation: |
Recommended for beginner modellers
and up |
Reviewed by
Brett Green

Revell-Monogram's 1/48 scale "Spirit of St Louis" is available online from Squadron
One of the most famous and influential aircraft of all time, few
modellers have not heard of the Spirit of St. Louis, and most have
probably made at least one. Surprisingly, there have been only three
injection-molded kits of this airplane over the last 50 years,
Lindberg’s, Hawk’s and now Revell’s. Lindberg’s was acceptable for a
1/48 scale kit at the time (1955) and is still generally available from
Glencoe (with ScaleMaster decals that are greatly superior to the
originals) and Hawk’s (now Testor’s) was in 1/72nd scale, so Revell’s is
a most welcome newcomer.
The IPMS site at
http://www.ipmsusa.org/EventsGallery/05-07-15_Nat_Con/Manufacturers-new-releases/RevellMonogram.htm
has pictures of the kit parts as provided in the box. Molded in silver
and clear plastic China, the more than 50 parts are clean, accurate and
well-engineered and well-molded. Clear parts are commendably clear, and
bagged separately.
Decals are well-done but highly glossy waterslide transfers which
will require some flattening once applied.
Two pilot figures are provided, one seated and one standing, and the
resemblance to Charles Lindbergh is apparent, even in this small scale.
Even the style of the flight suit is correct. Sadly, there is only one
head provided for the two bodies, but if you have a spare head in the
parts box, the unused figure may fine an alternate role.
There was no flash on any of the parts.
Construction - A First Fit
The instructions (two sheets, eight pages, nine steps) are very good
with clearly drawn assembly diagrams. All parts are numbered and paint
call-outs are clearly marked. I test fitted a number of the parts and
subassemblies to see what was what when I began construction of the kit;
the fit was good.
The cockpit is the center of this kit. It’s extremely well detailed,
including the wicker seat, stick and rudder pedals, throttle, map case
(in which the cockpit windows were stoted when they were not in place;
that’s a hint in case you want to leave them off the kit) and even the
compass mounted directly above the seat. You know, the compass that
required the famous mirror stuck to the instrument with chewing gum.
Even the Lunkheimer fuel manifold is present below the instrument panel,
and the panel attaches to a representation of the fuel tank just in
front of the cockpit. A representation of the pilot’s periscope is on
the left side of the panel. It’s this sort of detail that makes the kit
more than normally educational, and a great subject for younger modelers
as well as more experienced ones. Fortunately, the cockpit door may be
left open (or off) to view all this detail.
Control surfaces are highly detailed, with separate hinges simulated,
but molded in place. The wings are molded in top and bottom halves, with
a very thin trailing edge attained at the cost of a joint about 3/16
inch from the edge. This join line will be difficult to fill and sand
without removing the subtle surface detail. Paint may help.
Marking Options
Exterior painting presents few problems if you like silver. In fact,
you will need two main shades, one for the cloth covering that makes up
most of the airplane, and one for the aluminum panels and the steel
propeller and exhaust stubs. If you use a gloss silver overall, apply
the decals, then apply a flattening agent for the wings and fuselage,
the outcome should be satisfactory. The Wright J-5C engine was new, and
should be semi-gloss black. Flat dark gray for the tires, and you’ve
basically completed the exterior.
The interior was largely the inside of the aluminum-doped fabric
covering. The cockpit floor was initially unpainted plywood, and the
seat was wicker withy an inflated rubber cushion. This cushion was lost
at Le Bourget, and was replaced with a black leather cushion which is
still present in the airplane in the Smithsonian.
The decals provides markings and details for the airplane as prepared
for departure from Mitchell Field, New York and as on arrival at Le
Bourget, Paris. Lindberg’s fuel econometer, used on the transcontinental
flights but not on the transatlantic flight, is missing, is it should
be. There is an option to add the flags and markings accumulated on
overseas visits made after the transatlantic flight.
The decals also provide for the engine-turned (damascene) effect on
the aluminum engine cowling and panels. Those familiar with the old
Lindberg (Glencoe) kit may recall the difficulty of duplicating this
effect in the mold.
Decals are a compromise, but keeps the suggest price of the kit
$12.75.
I am impressed with the quality of this release from Revell-Monogram,
and I look forward to completing the model as soon as I can clear the
space. I would recommend this kit for both beginners (say, 10 years old
or so) and experienced builders, and it would make an excellent diorama
subject of the kind so loved for end-of-the-school-year history
projects. Overall, everything is provided to build an accurate, highly
detailed replica out of the box.
Excellent value for money.
Review and Images Copyright © 2006 by
D.C. Shoemaker
Page Created 18 January, 2006
Last updated 18 January, 2006
Back to HyperScale Main Page
Back to Reviews Page
|
 Home | What's
New | Features
| Gallery |
Reviews | Reference
| Forum
| Search
Home | What's
New | Features
| Gallery |
Reviews | Reference
| Forum
| Search