|
Mitsubishi
A5M4-K "Claude"
Classic
Airframes
S u m m a r y
|
| Catalogue
Number: |
438
|
| Scale: |
1/48
|
| Contents
and Media: |
27 low-pressure injection plastic, 37 resin
and 4 clear vacform. See text for details
|
| Price: |
Approx. US$29.95
|
| Review Type: |
FirstLook
|
| Advantages: |
Interesting subject;
nice surface detail; good quality resin parts; straightforward assembly; spare vacform parts provided; clear instructions
|
| Disadvantages: |
Instrument panel detail a little
understated; some modelling skills required!
|
| Recommendation: |
Recommended for experienced modellers
who enjoy building IJN aircraft
|
Reviewed by Brett Green
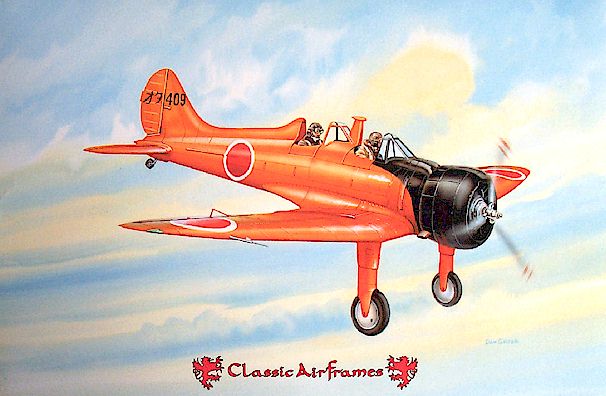
The Mitsubishi A5M4-K was the trainer development of the first monoplane
fighter to enter service with the Japanese Navy. The western code name for this
aircraft was "Claude" (although it was sometimes referred to as
"Sandy").
By the time of the attack on Pearl Harbour, the single-seater A5M4 Claude
fighter was in front-line service only with Vice-Admiral Kondo's Southern Force
on the light fleet carrier Ryujo. The type was withdrawn shortly after Claudes
from the Ryujo were used to attack a US seaplane tender on 8 December, 1941.
However, the A5M4-K two-seater proved a robust and reliable aircraft that
continued in the training role for several years. Some sources claim that
Claudes of training units were even used in suicide attacks during 1945!
Classic Airframes has once again come to the rescue of modellers in search of
significant aircraft types that are unlikely to be released by a major
manufacturer.
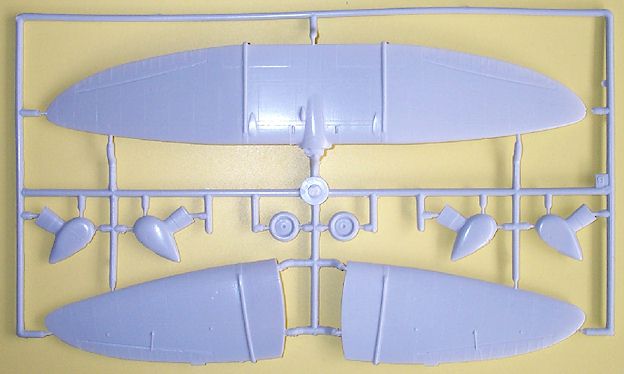
The Claude trainer comprises only 27 plastic parts on two sprues, plus 37
pale yellow resin parts and two sets of two vacformed windscreens.
Instructions are supplied on a single folded sheet in six steps with exploded
view diagrams and helpful written construction tips.
 A
full-colour painting guide is also included with schemes for an all-orange
machine of an unnamed training unit, and a green and orange aircraft of
Kasumiguara Kokutai, Omura. It is interesting to note that panel lines on the
colour, but I suspect that the panel lines on the kit are in fact correct.
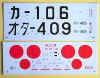
Decals are supplied on two small separate sheets (click the thumbnail to the
left to view the decal image full-size). Mine are in perfect register. A
full-colour painting guide is also included with schemes for an all-orange
machine of an unnamed training unit, and a green and orange aircraft of
Kasumiguara Kokutai, Omura. It is interesting to note that panel lines on the
colour, but I suspect that the panel lines on the kit are in fact correct.
Decals are supplied on two small separate sheets (click the thumbnail to the
left to view the decal image full-size). Mine are in perfect register.
The plastic parts will be familiar to anyone who has built a Classic
Airframes kit. The styrene is a shiny light grey and slightly soft, but surface
detail is admirably crisp. Panel lines are engraved and I like the fabric
texture of the control surfaces.
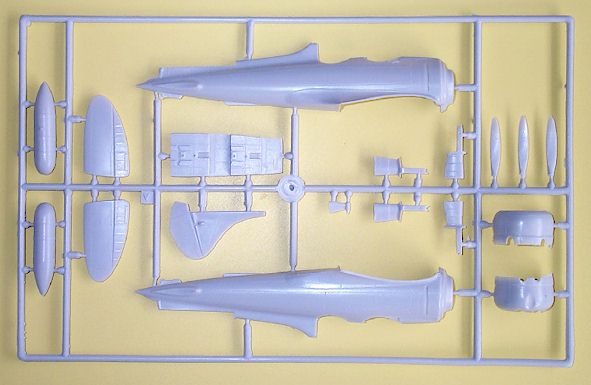
There is a little flash present on parts but nothing that five minutes with
the back of a hobby knife won't fix. Large ejector pins on the inner surfaces of
parts will be equally simple to remove. Before assembly, major parts may benefit
from a quick sanding with 1000 grit paper and a polish.
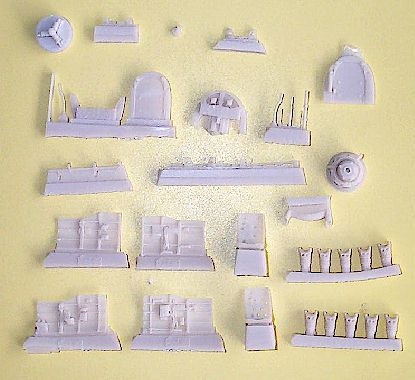 The
resin parts are also a familiar style. They bear the logo of CMK. These
parts are very detailed and thin where it counts. For example, the cockpit
sidewalls are translucent. Cylinder head, crankcase and perforated seat
detail are particularly noteworthy for their detail and delicacy.
Instrument details were a little too subdued for my liking, but they will
probably look better under a coat of paint. The
resin parts are also a familiar style. They bear the logo of CMK. These
parts are very detailed and thin where it counts. For example, the cockpit
sidewalls are translucent. Cylinder head, crankcase and perforated seat
detail are particularly noteworthy for their detail and delicacy.
Instrument details were a little too subdued for my liking, but they will
probably look better under a coat of paint.
Classic Airframes clearly intend to produce different versions of the
A5M. The parts as supplied include shell ejector chutes, machine gun
breeches and tailhook fairings that do not apply to this trainer version.
The instructions are quite clear about dealing with these features.
Options in the kit comprise the choice of wheel spats or bare wheels
and a drop tank. The modeller is also left too choose whether to leave the
moulded-on aileron actuators in place or to replace them with resin parts.
The fin and horizontal tail surfaces are supplied as one part each.
This means that they are quite thin and have acceptably sharp trailing
surfaces straight from the box. The wings look good in this respect too,
but I will probably swipe the inside surfaces a few times with a sanding
stick to ensure a razor-sharp trailing edge. |
Cowl flaps are moulded shut as part of the engine cowl halves.
Classic Airframes' Claude looks like a fairly quick build for a moderately
experienced modeller. You'll only use 23 plastic parts, and the resin parts
primarily contribute to the cockpit and engine. In examining the parts breakdown
of this kit, I would make the following recommendations when approaching
construction:
-
As with all limited-run kits, prepare and dry
fit all the plastic parts first.
-
Dry-fit all the plastic parts again! · Read
the instructions carefully
-
Check the fit of the assembled resin cockpit
tub in between the fuselage halves and be prepared to remove material from
the inside of the plastic fuselage parts. There won't be any spare material
to remove from the outside of the resin tub! A motor-tool will be helpful
for this task, but rolled sandpaper will do the job too.
-
Complete the engine assembly and dry-fit
carefully between the cowl halves. This area may require removal of material
to fit properly. If you have to trim material from the top of the cylinder
heads it should not be visible past the close-cowled cover.
-
I assume there was a collector ring on the
inside rim of the front cowl opening. You might use a skinny sausage of
Milliput (or similar) to represent this feature.
-
Carefully drill holes in the propeller hub to
ease location of the prop blades.
-
To strengthen the model and aid correct
placement, it will be helpful to drill locating holes for the tail surfaces
and undercarriage.
-
Don't forget to add the fuselage airflow fence
from scrap styrene and the step from wire.
Classic Airframes' A5M4-K Claude is another interesting subject. The parts
supplied will render an accurate and detailed model.
Anyone with some experience of building limited run, multi-media kits should
achieve a very nice result straight from the box.
Thanks to Jules Bringuier of Classic Airframes for
the review sample. Classic Airframes kits are available in Australia via JB
Wholesalers and worldwide through hobby retailers.
Review and Images Copyright © 2000 by Brett
Green
Page Created 21 March, 2000
Last updated 09 November, 2003
Back to HyperScale
Main Page
Back to Reviews
Page
|  Home | What's
New | Features
| Gallery |
Reviews | Reference
| Forum
| Search
Home | What's
New | Features
| Gallery |
Reviews | Reference
| Forum
| Search