|
Hawk
III

MPM
S
u m m a r y
|
| Catalogue
Number: |
No.72137 "Upgraded
Kit" |
| Scale: |
1/72 |
| Contents and Media: |
2 sprues in "limited
run" injected plastic, 8 resin parts, 1 sheet of decals, 1
vacform canopy, 1 photoetched sheet with instrument film. |
| Price: |
USD$13.96 from Squadron Mail
Order |
| Review Type: |
FirstLook |
| Advantages: |
Nicely cast resin parts that
replace some older injected kit parts; finely engraved wing and
fuselage detail. |
| Disadvantages: |
Some small areas of flash
and no locating pins on parts. Rigging required. |
| Recommendation: |
Recommended to more
experienced modellers due to the complex assembly requirements
and the multi-media nature of the kit. |
Reviewed
by Dale Smith

MPM's
1/72 scale Hawk III kit is available online from Squadron.com
The Hawk III was one of a long line of aircraft
developed by the Curtiss Aircraft Company for requirements of both the
USAAC (United States Army Air Corps) and the US Navy.
The subject of this review , the Hawk III, was an export version of
the US Navys Curtiss BF2C-1 (F11C-3), that mainly differed from the
naval version by its wooden wing structure. US Naval aircraft differed
in that they had metal wings, but that design had serious vibration
problems and eventually all of that mark of aircraft were withdrawn from
service after only a few months service.
The Hawk III was powered by a Wright SR-1820F-53 Cyclone engine
developing 785 hp for take-off and 745hp at 9,600 ft.(2,925 m). Armament
consisted of two synchronised 0.3-in. (7.62 mm) machine guns firing
through the propeller arc.
Export success with this aircraft amounted to 1 single example to
Turkey in April 1935, 24 aircraft to Thailand in August 1935, 10
aircraft to Argentina in May 1936 and the largest order, 102 aircraft to
China starting in March 1936. 90 of these airframes were assembled at
the Central Aircraft Manufacturing Company (CAMCO) in Hangchow, China.
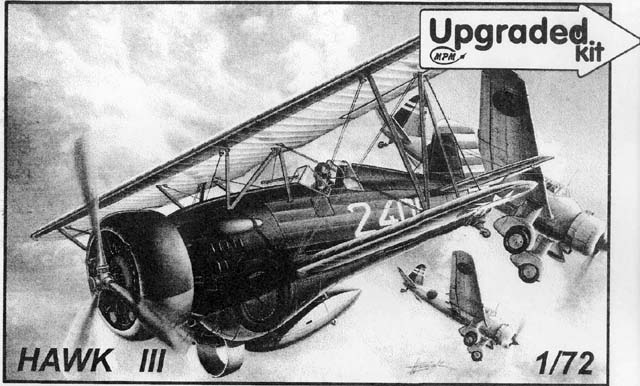
MPM's 1/72 scale Hawk III is marked as an "Upgraded
Kit". This means that a number of the original injected parts are
replaced by resin items.
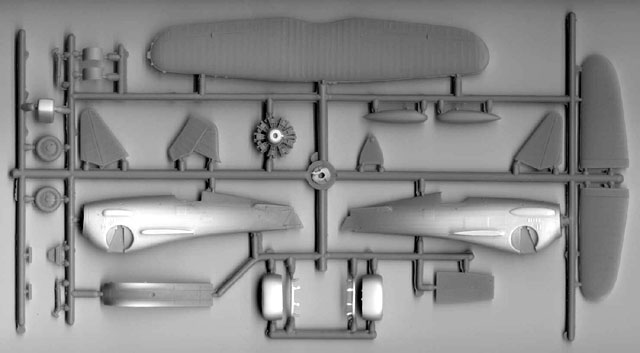
2 sprues of 'limited run' injection molded plastic are
supplied. All of the injected parts are nicely molded, with a small amount
of flash evident on some parts. No locating pins are provided on any of
the parts, so alignment of the parts before application of the glue is a
must. The molding gates are quite large, so careful removal from the
sprues will be the order of the day.

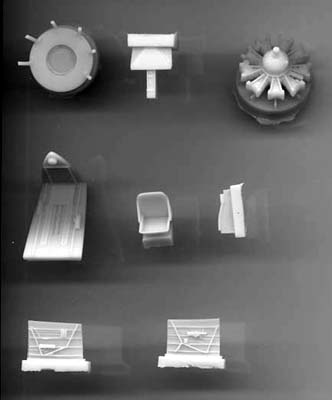
 Resin
parts include a new cockpit floor and rear bulkhead, cockpit sidewalls,
control column, engine, engine exhaust ring, instrument panel and pilots
seat. All of the resin parts are nicely molded with no air bubbles or
molding deformities present. A separate instruction sheet insert is
provided to cover the resin parts and their placement. The resin parts are
very fine and careful cutting and sanding from the molding is
required. Resin
parts include a new cockpit floor and rear bulkhead, cockpit sidewalls,
control column, engine, engine exhaust ring, instrument panel and pilots
seat. All of the resin parts are nicely molded with no air bubbles or
molding deformities present. A separate instruction sheet insert is
provided to cover the resin parts and their placement. The resin parts are
very fine and careful cutting and sanding from the molding is
required.
Photo-etched parts are supplied that cover the rudder
pedals, seat belts, instrument panel and some miscellaneous parts on the
instrument panel. A small film is also provided for the instrument
dials.
A small single vacform is provided that covers the 2 small
(and I mean tiny) windscreen and rear canopy glazing. Careful with
the Exacto knife when removing them.
One decal sheet is provided with markings for 3 aircraft.
Two are Chinese Air Force examples of the aircraft flown by H.T.Walker
(USA) from the Hangkow base in 1937 in a Forest Green (upper) and Light
Grey (lower)scheme. The final marking choice is an aircraft of the Royal
Thai Air Force in late 1940 in a Brown, Green (uppers) and Light Blue
(lower surfaces). The decals are supplied by Propagteam and are nicely
printed, in register, and appear to have good colour density.
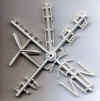
 On
the subject of rigging, the instructions provide a drawing that show
placement of the rigging wires that need to be supplied by the
modeller. On
the subject of rigging, the instructions provide a drawing that show
placement of the rigging wires that need to be supplied by the
modeller.
Take note that the rigging wires between the fuselage and
the centre of the wing and near the cockpit are single wires and the other
wires that run outward from the fuselage and upper wing to the outer
struts are dual wires. Two rigging wires are also required to be placed
from the horizontal tailplanes to the vertical tailplane. A check of
references and a cutaway drawing will help in this area.
The MPM Hawk III should build up with a little care and
patience, into a nice replica. The resin parts add a little more finesse
to the originally issued model but perhaps rigging the model should be
left to the more adventurous amongst us!
Recommended.
Many thanks to 'Squadron
Mail Order' for supplying the review kit.
Review Copyright © 2001 by Dale
Smith
Page Created 18 June, 2001
Last updated 09 November, 2003
Back to HyperScale
Main Page
Back to Reviews
Page
|
Home | What's
New | Features
| Gallery |
Reviews | Reference
| Forum
| Search