|
Curtiss H-16

Roden 1/72
S
u m m a r y
|
| Catalogue Number: |
Curtiss H-16 Kit No.049 |
| Scale: |
1/72 |
| Contents and Media: |
232 parts in injection moulded
plastic; markings for four aircraft |
| Price: |
USD$24.97 from Squadron.com
|
| Review Type: |
FirstLook |
| Advantages: |
Superbly moulded parts, fully
detailed engines, amazing trailing edges. |
| Disadvantages: |
Unclear rigging diagram. |
| Recommendation: |
Highly Recommended |
Reviewed by Robert Baumgartner

Roden's 1/72
scale Curtiss H-16 is available online from Squadron.com
After the release of the Felixstowe F2A, the next
logical step for Roden would be to do the license built US version.
Essentially this was the same aircraft with Liberty V12 engines being
used in place of the Rolls Royce Eagle power plants.
These items are contained on two “Z” sprues, and are miniature kits in
themselves.
The Liberty will be in full view as it sits exposed
between the wings so it is important that they look “busy”. There is no
problem here as each engine and radiator assembly amounts to nearly 40
parts! The detail is very crisp with little or no flash on any of the
pieces.
The rest of the 232 plastic parts are contained on sprues already seen
in the previous F.2A (early) release. None of these have suffered with
age and were free of any blemishes or surface imperfections.
There are a total of 10 sprues in the usual soft grey plastic. A new
clear one is added to provide for the angular windscreen seen on this
variant.

Click
the thumbnails below to view larger images:
The well-printed decal sheet provides for 4
options, each with enough colour differences to please all tastes.
In the cockpit there are the usual items such as seats, control columns
(with steering wheels), floor, rudder pedals and a representation of the
internal structure, which is found inside the fuselage halves.
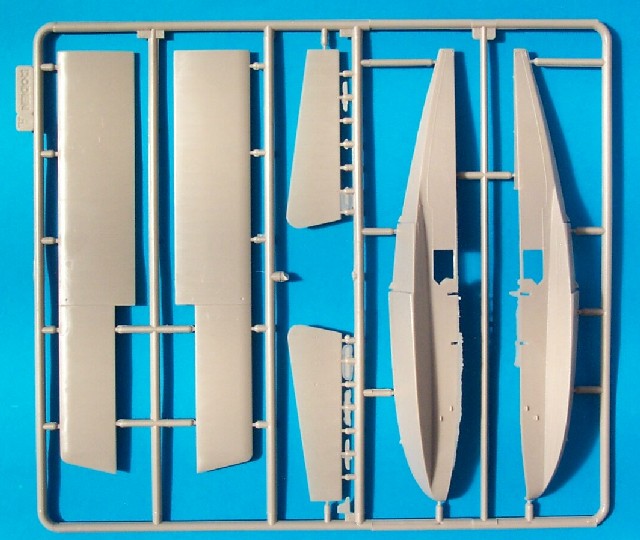
The wings on this kit are outstanding. They exhibit some of the sharpest
trailing edges you will find in plastic and have excellent subtle
surface detail. The rib positions are represented quite delicately and
thankfully there is no “fabric” detail, which would not be correct for a
model such as this.
Don’t be put off by the three-piece upper wing. Previous experience has
found that this can be butt joined without the need for pinning. Liquid
glue was applied to the parts and after pushing them together the melted
plastic was allowed to ooze from the joins. This was sanded smooth when
dry and the panel line reinstated with a scribing tool.
The ailerons come as separate parts as do the elevators and rudder. Some
of these items have overly pronounced rigging location points that will
need to be filled for a more realistic effect. Again, the trailing edges
were found to be superb.
The instruction sheet calls for the wing cellule to be completed before
sliding it into slots located in the assembled fuselage. While this may
be convenient, it does result in a tough sanding and painting job when
the rear top deck goes on. It’s a nice try by Roden but the more
conventional approach works just as well. This involves attaching only
the lower wing in the grooves and then adding the rear top deck. The
cleaning up of the join is then much easier, as is the painting of the
fuselage.
There is plenty of armament provided, this being in the form of some
beautifully detailed Lewis guns. Eight are supplied along with twelve
magazines.
Bombs are not forgotten and here we have two that can be hung under the
wings
Another difference from the F.2A that needs to be catered for is the
propeller. Sprue Z contains this two bladed part as well as the balanced
rudder.
To aid in the displaying of the finished model, Roden supply a 17 part
beaching trolley.
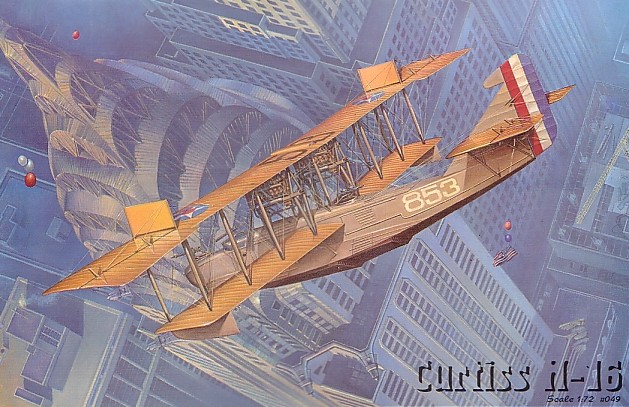
The instruction sheet is quite comprehensive and shows the construction
sequence clearly enough. Where there may be a problem is in the rigging
diagram. For an aircraft as complicated as this, reference to the box
art is also essential (as the instructions mention). Many areas are
still hidden so an oblique diagram of some of the wire runs wouldn’t go
amiss.
The decal sheet is a vast improvement over other offerings from this
manufacturer. My example showed all items to be in perfect register.

The carrier film was very thin and of the preferred
gloss type. A “spare” decal was removed and tested on a freshly painted
surface. There was no cracking or silvering detected so I will use these
with confidence.
Markings options provided on the sheet are:
a) Curtiss H16, A-1032 Lough Foyle, 1918
Basically this is an all over gray scheme and
will appeal to those that want a hassle free finish.
b) Curtiss H16, A-845, US Navy
This US Navy scheme will probably prove to be
the most popular. The chrome yellow wings and tailplane/elevators
will provide a spectacular contrast to the gray body.
c) Curtiss H16, Killingholme, 1918
For something a little different, the colour
scheme here is a brown body with dark green upper wing surfaces over
linen under surfaces.
d) Curtiss H16, Felixstowe, 1918
This aircraft provides a more testing paint
job. The fuselage is finished in a light buff over brown with the
addition of a green fin. The upper surfaces of the wing are also
painted in this later colour leaving the undersurfaces in linen.
As with other kits in this family, the Curtiss H-16
is an impressive model.
The sheer size and detail of what is presented in
the package will allow the builder to complete a stunning project
straight out of the box.
Highly Recommended.
Thanks to
Squadron.com for the review
sample.
Review and Images Copyright © 2005 by
Robert Baumgartner
Page Created 02 February, 2005
Last updated 02 February, 2005
Back to HyperScale Main Page
Back to Reviews Page
|
Home | What's
New | Features
| Gallery |
Reviews | Reference
| Forum
| Search