|
Beechcraft B200
King Air
RVHP Models,
1/72 scale
S
u m m a r y
|
| Catalogue Number: |
RVHP Models 72168 - Beechcraft B200
King Air |
| Scale: |
1/72 |
| Contents and Media: |
60 parts in cream-coloured resin; 16
clear resin parts; 2
clear vacform parts; 3 white metal parts; markings for one aircraft |
| Price: |
USD$50.00 plus postage online from DMC Models' website
and specialist retailers worldwide |
| Review Type: |
FirstLook |
| Advantages: |
Well cast and detailed; no casting blocks
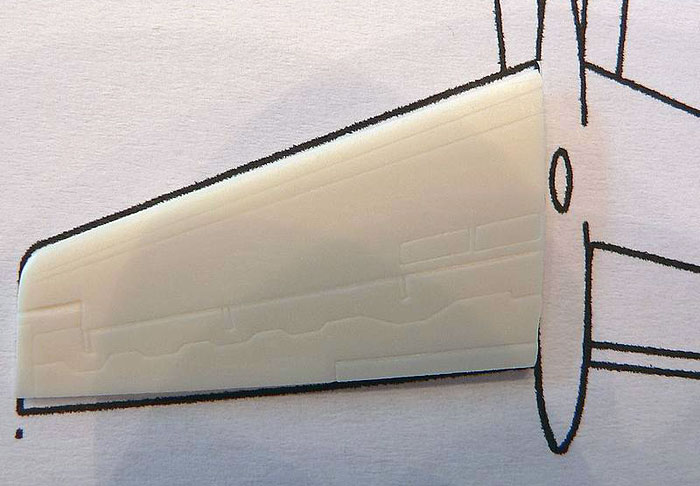
on major components; excellent surface detail including delicate panel
lines, vents and raised areas as appropriate; good decals. |
| Disadvantages: |
Some flash to clean up; minor
details missing or need changing; very basic
instructions |
| Recommendation: |
Highly Recommended |
Reviewed by Thomas Pedersen

HyperScale is proudly supported by Squadron.com
I was very happy when I first heard of this kit. A couple of years ago I
bought the Rare Plane vacuform kit, but never started building it. I
wanted it to be perfect and there is simply too much work in that kit
for me before it will be that.
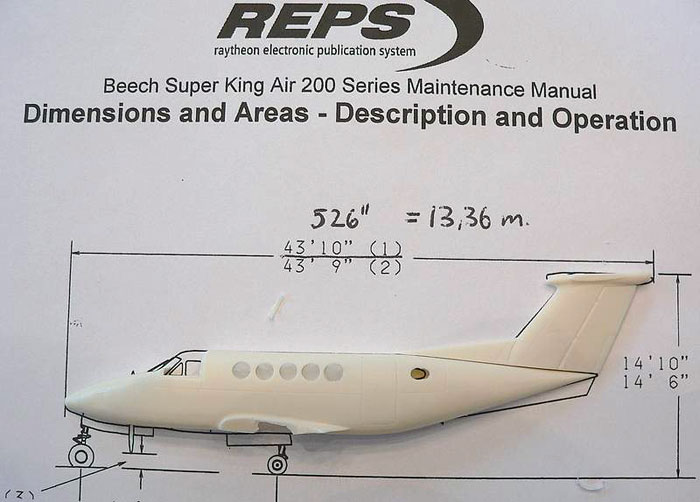
I am a licensed aircraft mechanic and have been working primary on King
Airs and Beech 1900´s the last 9 years. The drawings I have used for the
comparison are from the Aircraft Maintenance Manual scaled up to 1/72
scale on my computer.
This kit comes in several versions, some not released yet, I chose the
Swedish Air Force kit (no.72168) mainly because I want to convert it
into a Beech 200HDC (sometimes called the Beech 1300, a B200 with a
factory installed cargo pod underneath) and for that I would need 4
bladed propellers.
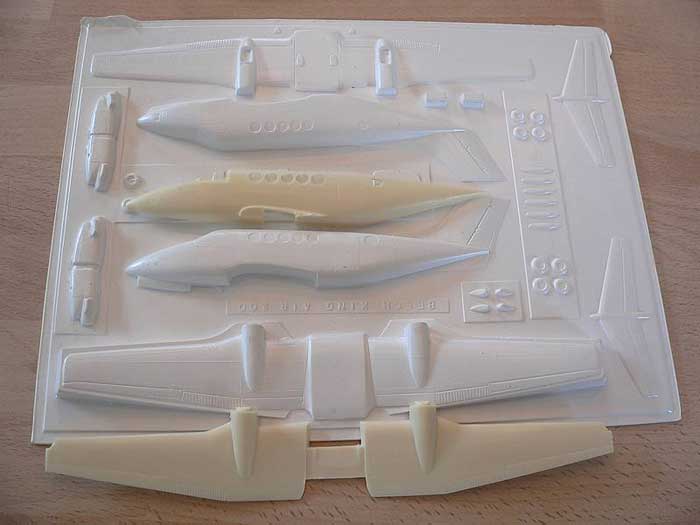
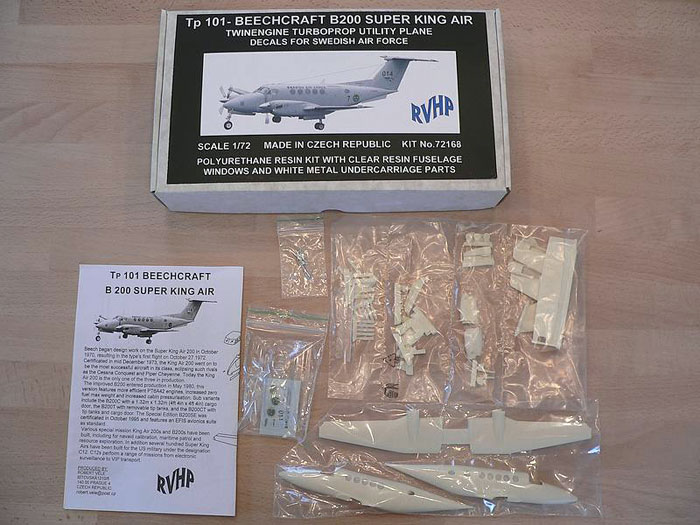
The kit contains 60 resin parts, 3 white metal parts (landing gears), 16
clear resin parts (cabin windows), 2 vacuformed windshields (one to mess
up) and 2 small sheets with decals.
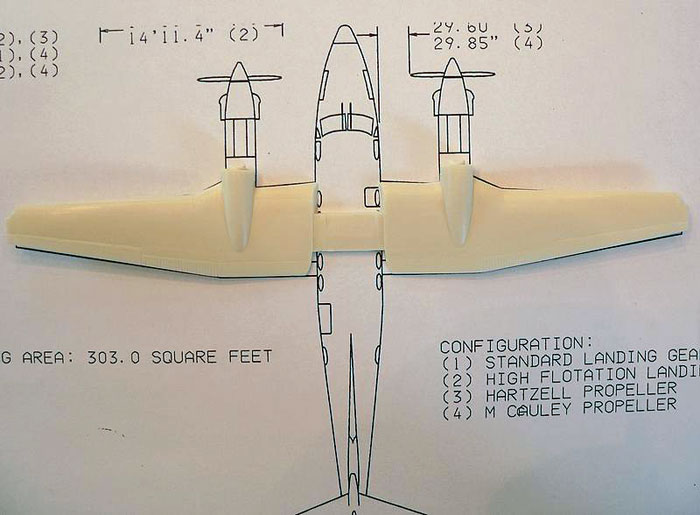
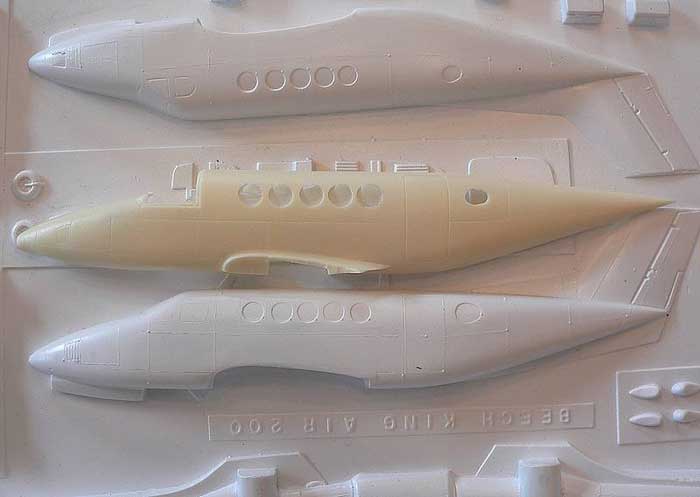
There are a little flash on the fuselage parts, but it
will be easily removed with a sharp knife. Dry fitting the wing to the
fuselage without proper cleaning up showed a very good fit.
Click the thumbnails below
to view larger images:
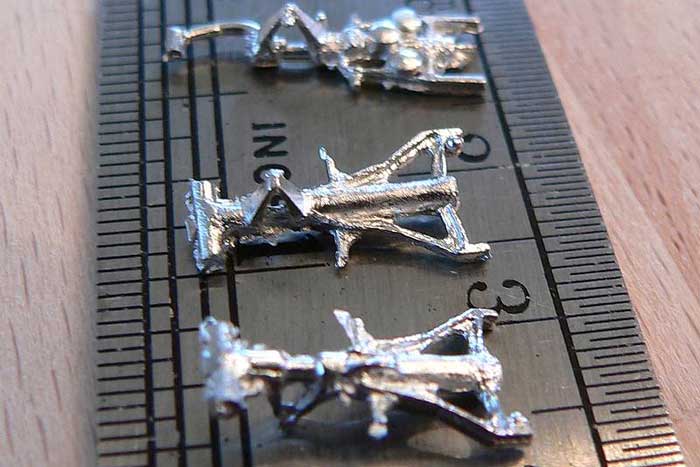
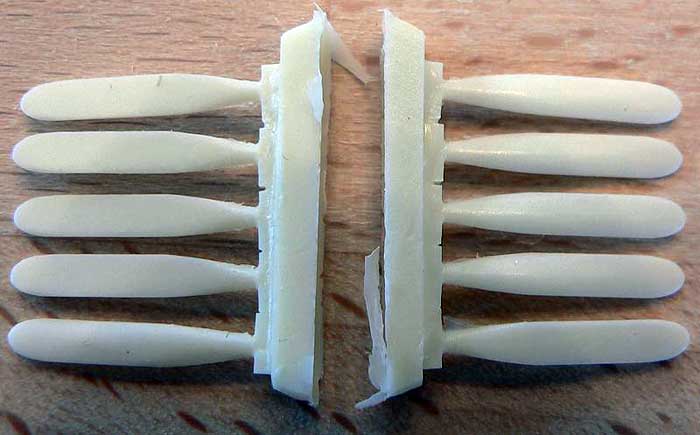
Several parts like antennas and geardoors are cast
paper-thin and so are the Raisbeck (real life aftermarket stuff!!!) dual
aft body strakes.
There are 2 spare propeller blades. There are no interior in the cabin
apart from the floor, the aft pressure bulkhead and the partition to the
cockpit. The cockpit has a couple of nice seats, rudder pedals molded to
the floor, instrument panel, pedestal with some details and two
beautifully little control columns.
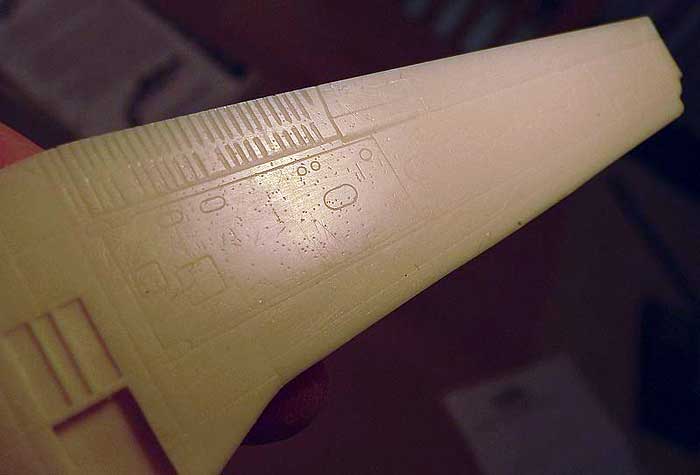
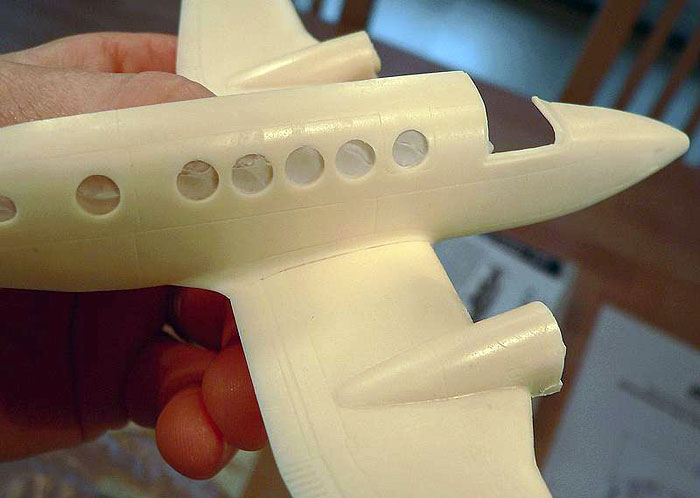
Moving to the one-piece wing I found several very small holes in the
surface of the wing. They are not bigger than a layer of primer with
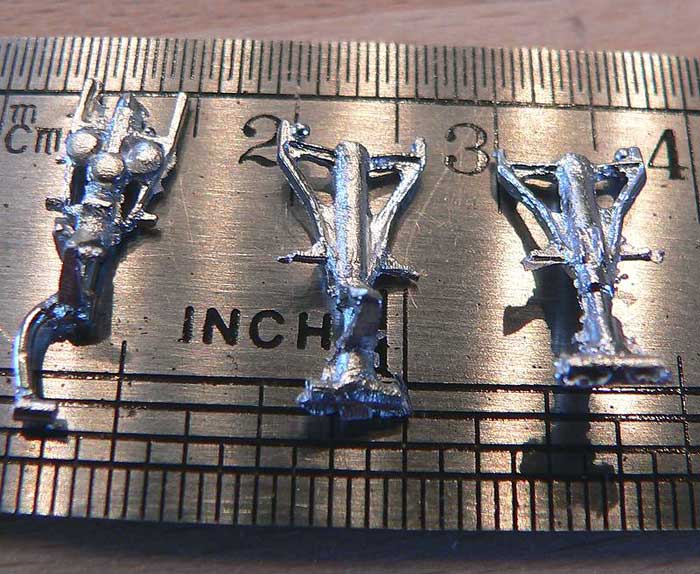
fill them, I think. The landing gears are cast in white metal are are
very nice and are the standard type. The drag braces are cast in resin.
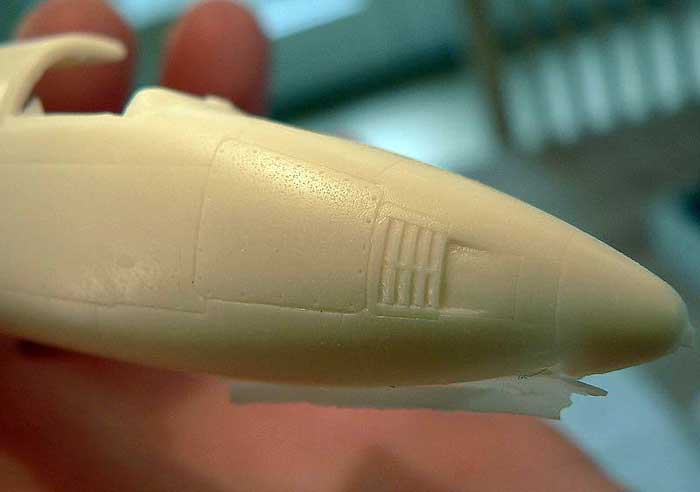
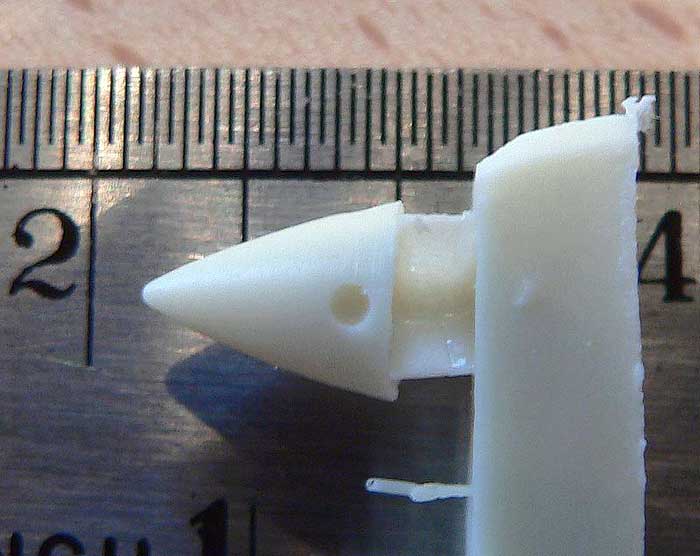
The wheels has molded on Cleveland disk brakes. The forward part of the
nacelle is molded separately, and catches the lines nicely, on the
picture it looks oversize (camera angle) but follow the lines of the
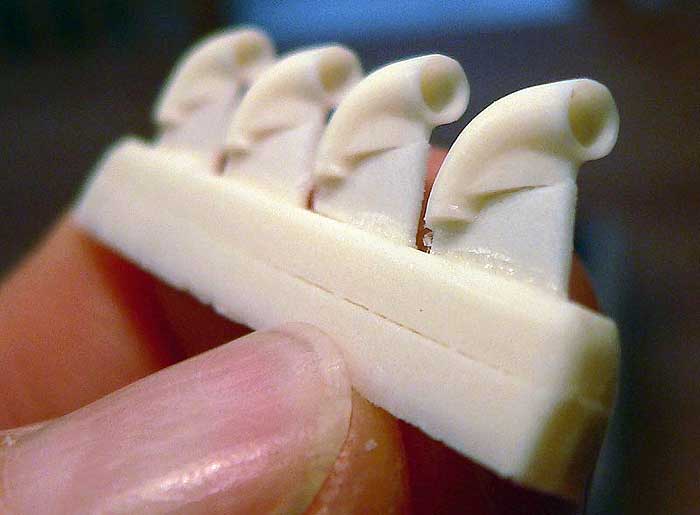
drawing in real life. The exhaust stacks are of the early type and they
are hollowed out with a nice thin wall left. The propellers and spinners
are also from Raisbeck´s. The spinners look just a little bit too pointy
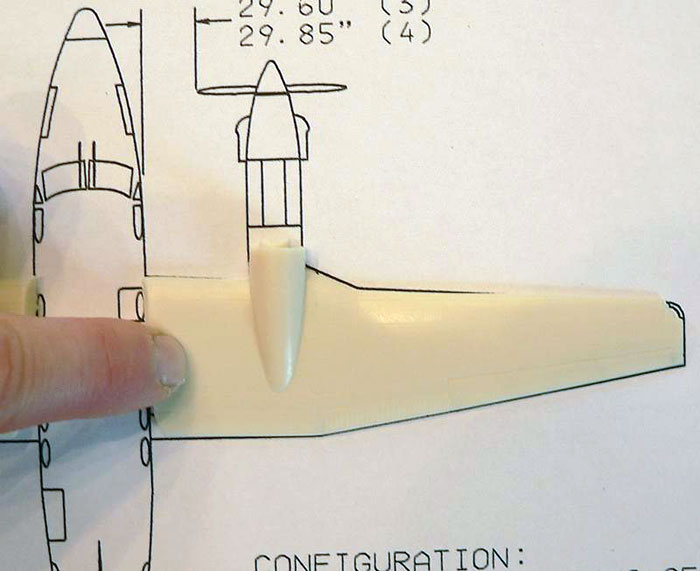
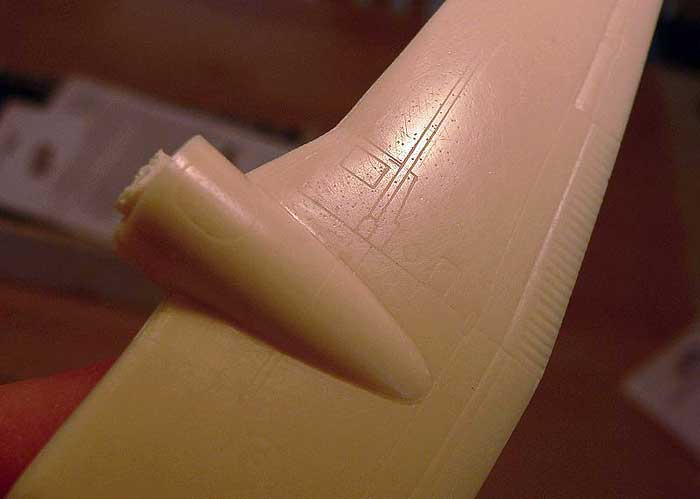
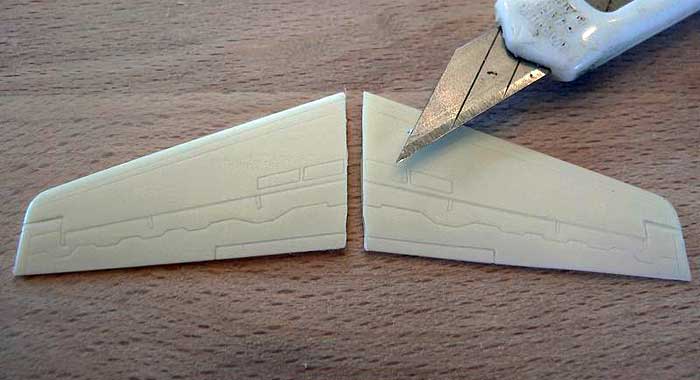
but I am not sure, will have to check up on that. The Horizontal
stabilizers are just a little out of line with the drawings another
small thing is the location of two of the inspection panels (where the
knife points on one of the pics) on the left stab they should be on the
top and on the right they should be on the bottom, a little filler on
the top of the right and bottom of the left will correct this easily.
Something a little harder to correct and what I thing is THAT little
thing that makes this kit not perfect is the angle of the top of the
vertical stab, some cutting and filling will be required to correct
this.
There are also a few things missing detail wise: The wing fuel filler
ports are missing in the wing tips and so is the battery access panel on
the right center wing. Small things that are easy to do yourself and
would enhance the finish of the model as they are pronounced on the full
size.
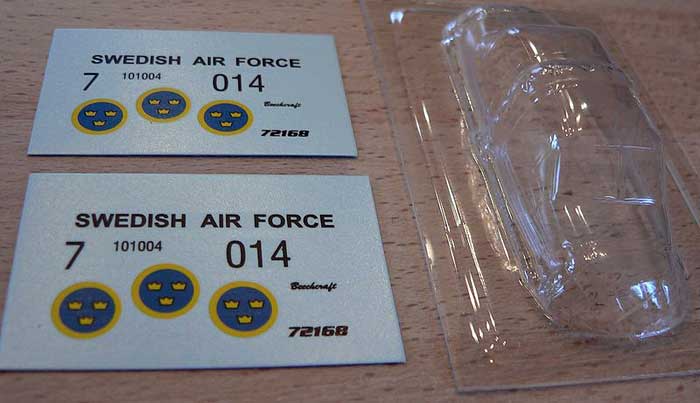
The decals are few, Beechcraft logo and Swedish Air Force numbers and
roundels, with perfect register of the roundels.
Details, details...
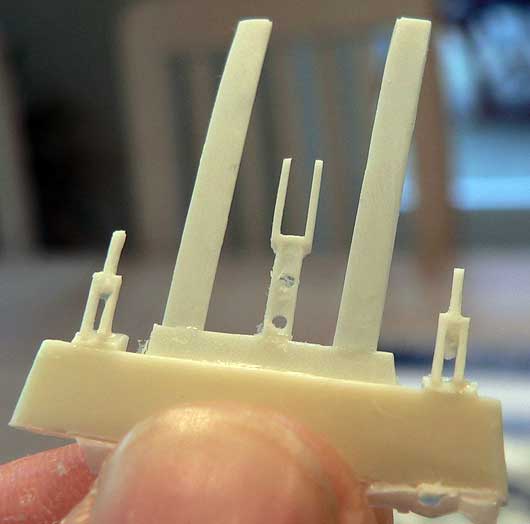
Two other small details that are correct on several King
Airs but not the Swedish one at the time (2004) are the nose landing
gear fork which is round in the kit but square on the real one and the
exhaust stacks which is of the old type. The first versions of the nose
landing gear fork was made of tubular steel but this was prone to
cracking ( has to be inspected every 100Hrs), this was later replaced
with a square one (no cracks found so far). The fork it self is easily
replaced with the newer type but it is not a requirement to replace it
as long as it is inspected and no cracks are found. But the pics of
Swedish Air Force Tp 101 "014" serial BB-932 I found on Airliners.net
shows a square fork.
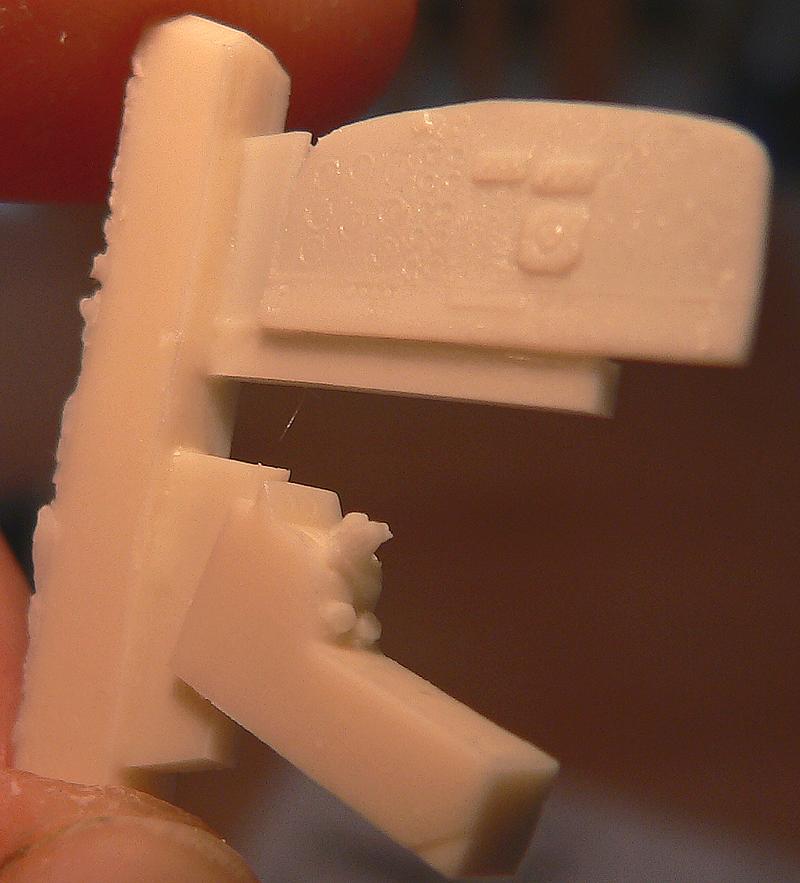
The exhaust stacks supplied in the kit are of the early type which were
also prone to crack. At every fase inspection we would remove them and
weld the cracks. As far as I can tell from the pics on Airliners.net
"014" was equipped with a new and improved version, much more
streamlined.
I had hoped for an injection molded kit from a Japanese
kit manufactor but I guess if I have to wait for that I will be dead and
gone before it will even be announced. This is a very nice kit of a
lovely aircraft, with fine recessed panellines and good details inside
(the cockpit) and out. It looks like there will be no more fitting
problems than most injecton molded kit. If you want a King Air in your
collection then do not skip this kit just because it is a resin kit most
people will be able to assemble this kit as long they are not completely
beginners in this hobby. All in all this kit looks like it was made with
great enthusiasm from RVHP and I am looking forward to se what other
versions they may offer.
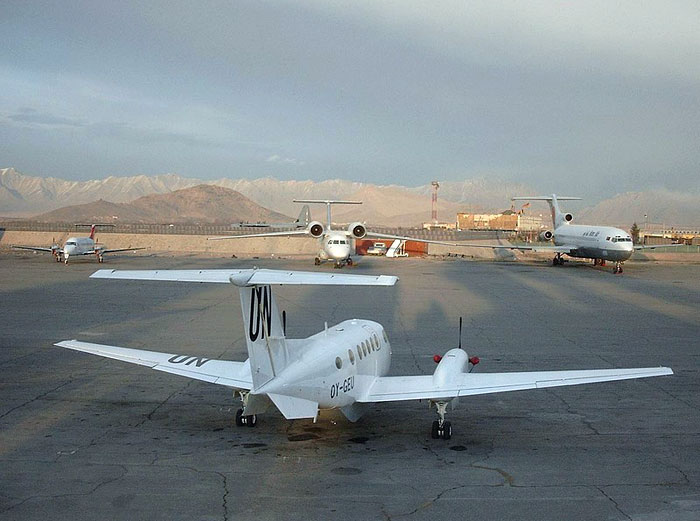
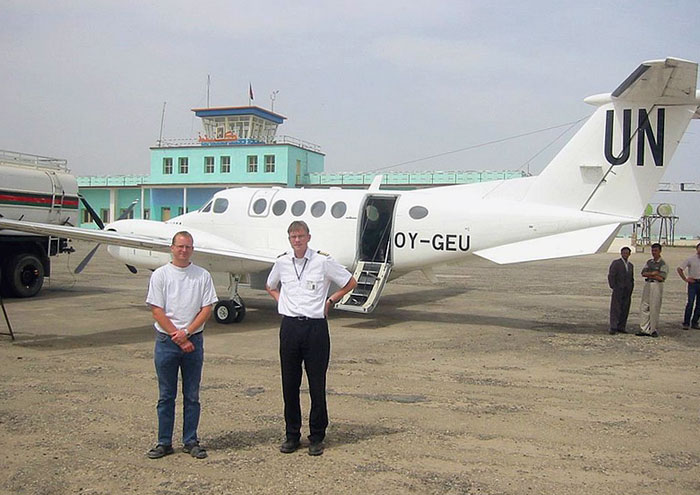
I have attached some pics of that B200HDC (high density configuration)
that I want to build, OY-GEU. The first pic (above) is taken by me in
Kabul and the second was taken in Kunduz, Afghanistan (below) - that's
me to the left. Both were taken in 2004.
Highly Recommended.
Sample kit purchased by reviewer
Review Text Copyright © 2006 by Thomas Pedersen
Page Created 06 December, 2006
Last updated 21 February, 2007
Back to HyperScale Main Page
Back to Reviews Page
|
 Home | What's
New | Features
| Gallery |
Reviews | Reference
| Forum
| Search
Home | What's
New | Features
| Gallery |
Reviews | Reference
| Forum
| Search