|
SB2U-3
Vindicator
VMSB-241, Battle of Midway
Accurate
Miniatures, 1/48
S u m m a r y
|
|
Catalogue Number: |
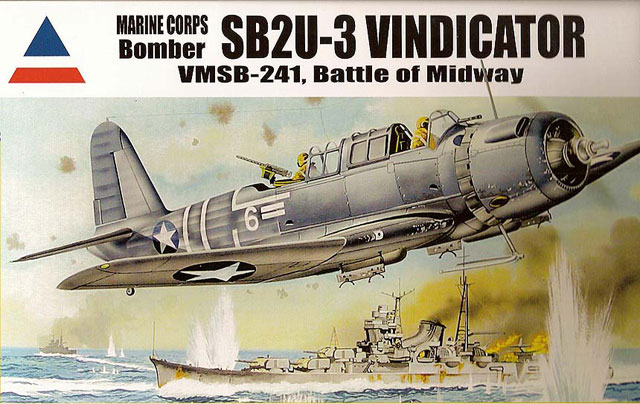
480202 - SB2U-3 VINDICATOR Marine Corps
Bomber. VMSB-241, Battle of Midway |
|
Scale: |
1/48 |
|
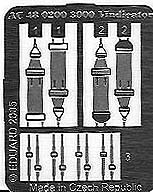
Contents and Media: |
111 parts in grey styrene, 11 parts in clear
injection molded plastic, etched metal seat
belts. Instructions and decal sheet for one
complete aircraft with numerals to make one
of 11 different aircraft. |
|
Price: |
USD$27.43 on line from Squadron.com |
|
Review Type: |
FirstLook - In Box |
|
Advantages: |
Finally the Vindicator is out. Masks for the
clear parts |
|
Disadvantages: |
Overdone fabric ribbing of the wings and
control surfaces; noticeable vertical sink
marks on rear fuselage; canopy molding |
|
Recommendation: |
Highly
Recommended |
Reviewed by
Steven "Modeldad" Eisenman

Accurate Miniatures' 1/48 scale SB2U-3 Vindicator
is available
online from Squadron
The day I received this kit, there
was an article in the news about advances in
reproductive science; a woman gave birth to a baby that
was “conceived” 13 years ago. It may not have been 13
years ago that a high quality, injection molded kit of
the Vindicator was conceived, but given the trials and
tribulations of Accurate Miniatures since
that conception, very few modelers thought the kit would
finally be released.
Well, it is here and one and all can be rightly proud of
this kit. The level of detail is excellent. If you
enjoyed the SBD series, then you will not be
disappointed with the Vindicator. In fact, it appears
that the cockpit interior is represented in finer detail
than was the case with the Dauntless.
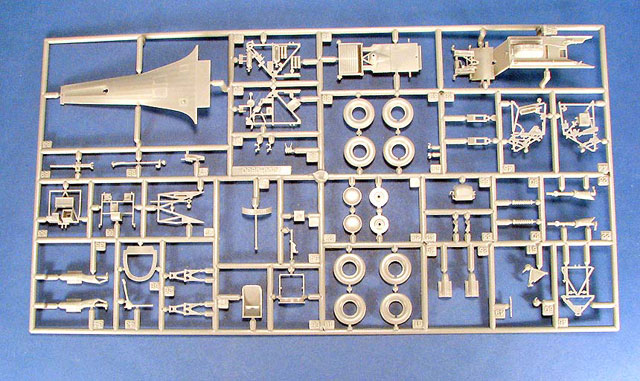
The kit is well molded and there are virtually no
visible mold ejector marks. Those that are inside the
fuselage would be hidden under the sidewall detail, or
easily cleaned up with a few swipes of sand paper.

Click the thumbnails below
to view larger images:
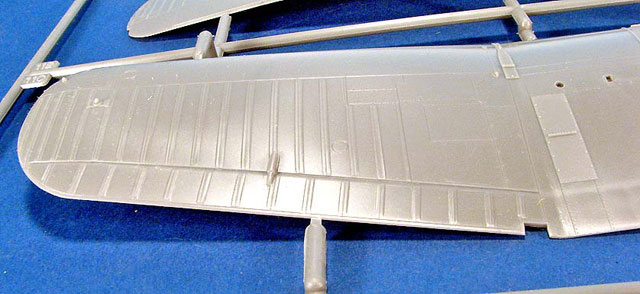
The surface detail is made up of finely engraved
panel lines and virtually microscopic, and appropriate,
rivets and panel fasteners. The fabric on the fuselage
is beautifully represented. My sample, however, had two
vertical sink marks on the left fuselage half and one on
the right causing a noticeable crease in the fabric.
These sink marks run the full height of the fuselage.
They appear to be related to the molding of the rear
bulkhead alignment rib, to which part 68 attaches, and a
smaller rib further forward.
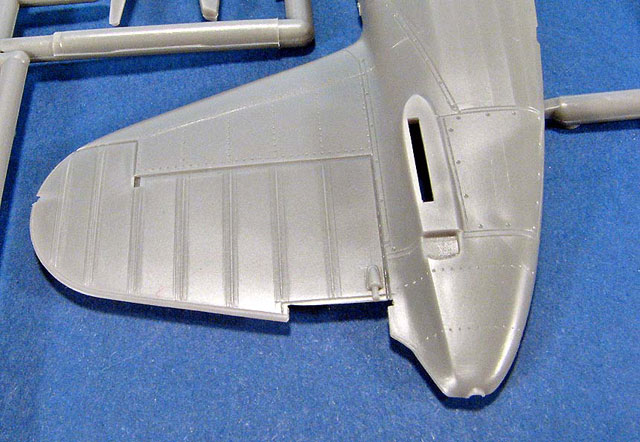
I am also not sure about the representation of the
fabric on the main wings and control surfaces. To my
eye, they look a bit overdone; somewhat like wood
furring strips applied over tarpaper. According to the
instructions, Accurate Miniatures was provided access to
the sole surviving SB2U at Pensacola, Florida, so the
representation may be correct. My observations are based
on pictures alone. But given how fine is all the other
detail, the ribbing just looks a bit much to me.
It has been brought to my attention that there may be an
issue with the wing machine guns. The -3 was intended to
carry four .50 cal machine guns in the wings, outside of
the propeller arch. But in practice, they usually
carried only one. It appears that the unused gun ports
were blanked-off. The kit does have the four opening for
the guns in the upper wing halves, but you will need to
make and insert the gun barrels, or blank-off the
openings.
Now for the issue with the kit, in the –1 / 2
Vindicator, the single wing gun was in the starboard
(right) wing. When the -3 carried only one gun, it also
was in the starboard wing. The wing in the -3 kit has
the ejection port on the underside of the port (left)
wing only. If the same wing underside is used for the –1
/ 2 Vindicator, it appears to be incorrect. The kit has
it molded on the wrong under-wing.
Furthermore, if, in fact, the -3 was to carry four guns,
would there not have been under-wing provisions for four
ejection slot panels? There would be one under each wing
inside the wing fold, and one under each wing outside
the wing fold. The kit does not have that represented.
Finally, it also appears that the ejection port is
molded too close to the wheel well and intrudes upon the
opening. It should be further out by approximately 1/l6
inch.
I also have questions regarding the canopy. All the
pictures I have seen of the -3 (and apparently the -1/2
also) show that the canopy immediately behind the
pilot's position was sheet metal for the length of
approximately three canopy frames. The kit does not have
this represented. Instead, the entire canopy is
"framed". Even if painted to represent the sheet metal,
the frame lines would still be quite distinct under the
paint. Although the paining guide shows that part of the
canopy is to be painted, it should be specifically
pointed out.
The kit does provide for a few options, one of which
appears to be “a secret”. There is one 1000 pound bomb
and two 100 pound bombs. The bombs have nicely molded
fins and finely molded arming propellers. Be careful
handing the bombs, as the propeller is delicate. There
is an option to place practice bomb dispensers under the
wings in place of the 100 pound bombs. There is also a
centerline tank that can be used instead of the 1000
pound bomb.
You have the option of using weighted or un-weighted
tires. Additionally, there are open and closed cowl
flaps and open and closed canopies. With regard to the
canopy, AM has saved many a modeler a good deal of time
consuming masking of that grand greenhouse by including
a set of masks. I noticed that two of the masks should
be reversed, as they are incorrect on the sheet. The
first two sets of masks immediately behind the
windshield masks should be reversed in position. The
larger of the two should be applied at the forward most
position.
The one “secret option” appears to be the wing fold.
There are two parts in the kit numbered 6 and 7. They
are clearly the bulkheads to create a folded wing. The
bulkheads are molded as a single piece with the
appropriate wing-fold angle. The instructions are silent
on these parts. One could be venturesome and cut the
wings and the spar to have a folded wing bird. Fold
lines appear to be clearly engraved at the inboard end
of the control surfaces. I wish the wing fold could have
been scribed on the inner surface with appropriate
instructions.
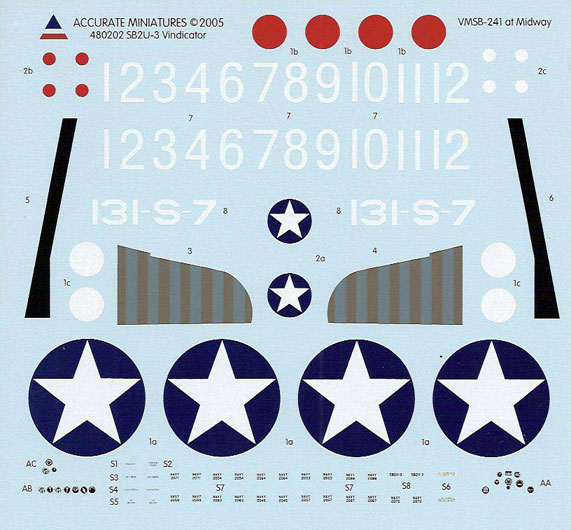
Marking
The marking provided are for the Vindicators of Marine
unit VMSB-241 at Midway on June 5, 1942, all in
Blue-Gray over Light Gray. There is a complete set of
national markings and stencils for one aircraft. But,
there are individual aircraft numbers to represent any
one of 11 different aircraft. You will, however, either
have to paint the white fuselage medical tape bands or
use white decal strips, as none are provided on the
decal sheet. The decals are cleanly printed, but the
printer is not indicated, bearing only the AM logo and
name.
Click the thumbnails below
to view larger images:
In looking at the decals there is one point not made
clear in the marking instructions. The instructions
explain that just prior to the Battle of Midway the red
and white rudder stripes and the red centers to the
national markings were painted over. The kit provides
decals, 3 and 4, for the rudder that represent the
rudder stripes over painted with a Blue-Gray paint. One
may choose to use these, or apply red and white rudder
decals from another source and over paint with a
Blue-Gray.
The problem with the instructions is with respect to the
national markings. The instructions indicate that the
national roundels, decals 1a and 2a, are to have white
dots, decals 1c and 2c, applied at the center. But, the
instructions show a lightened, but identifiable, red
center. Most likely the proper decal placement order
would be to apply decals 1a and 2 a, then apply the red
centers, 1b and 2b, then finally apply the white
centers, 1c and 2c. The effect then would be to have the
red appear to have been over painted with white.
Unless my sample did not come with another piece of
paper, or I unwittingly misplaced it, there is no
explanation for the marking on the sheet for “131-S-7”.
From what I see in the box, all the
effort to bring the Vindicator to modelers was certainly
worth it. It truly is a welcome addition to the models
of early WW-2 U.S. aircraft. Even though I have raised
some issues, which should be considered, I recommend
this kit.
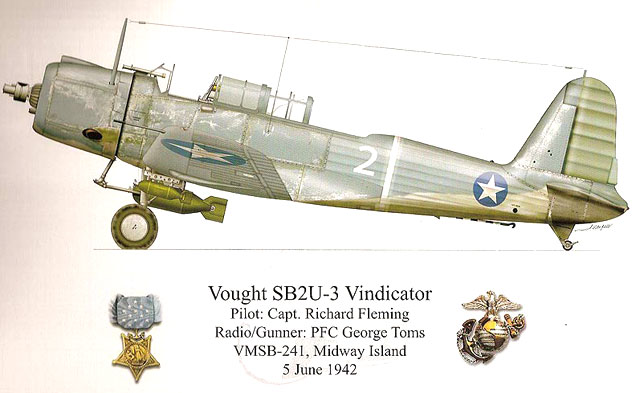
I would also like to point out that the AM packaging
tradition continues on. The kit is packed in a large box
with the larger sprues separated from the delicate clear
parts, decals and instructions by means of a cardboard
separator. In this instance, the cardboard separator is
a “work of art” and can be framed and put on the wall of
one’s workroom. The separator pictures the Vindicator of
pilot Capt. Richard Fleming and radio/gunner PFC George
Toms.
Recommended.
Thanks to Joe Myers at Accurate Miniatures for the
review sample.
Accurate Miniature kits are available worldwide through
hobby retailers and at
Squadron.com
Review and Images Copyright © 2005 by
Steven
Eisenman
Page Created 14 July, 2005
Last updated
16 July, 2005
Back to
HyperScale Main Page
Back to
Reviews Page |
 Home | What's
New | Features
| Gallery |
Reviews | Reference
| Forum
| Search
Home | What's
New | Features
| Gallery |
Reviews | Reference
| Forum
| Search