|
Saunders
Roe P177R
Freightdog Models,
1/72 Scale
S u m m a r y
|
|
Catalogue Number: |
Freightdog Models
Saunders Roe P177R |
|
Scale: |
1/72 |
| Contents and
Media: |
25
parts in cream coloured resin; two clear vacform parts;
speculative markings for six aircraft. |
| Price: |
GBP£33.00 available online from
Freightdog Models website |
| Review Type: |
FirstLook |
| Advantages: |
Interesting subject;
excellent casting; almost flawless fit; good level of
detail; high quality "what-if" decals |
| Disadvantages: |
A few air bubbles here
are there. |
|
Recommendation: |
Highly Recommended |
Reviewed by Brett Green

HyperScale is proudly sponsored by
Squadron.com
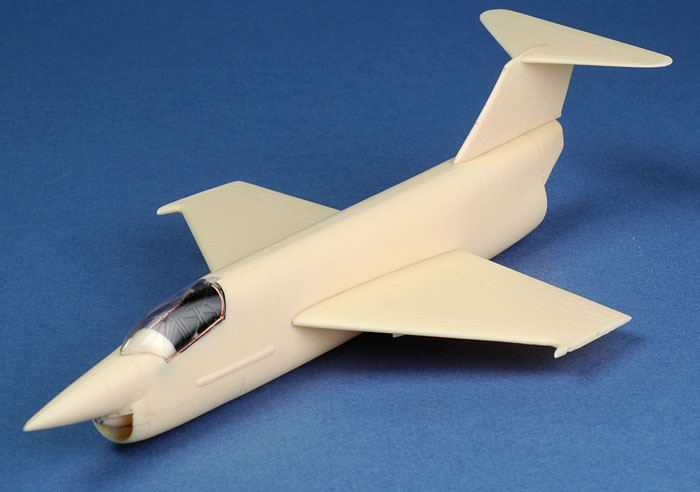
Freightdog Models released their 1/72 scale Saunders Roe P177R mixed-power
fighter project aircraft at IPMS ScaleModelworld last weekend.
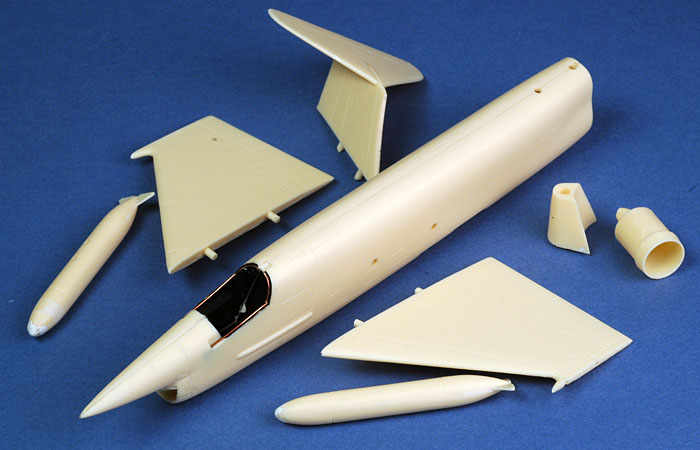
The model comprises 25 beautifully cast yellow resin parts, plus a vacform
canopy (and a spare). The high level of casting is not surprising as the
parts have been produced by Anigrand Craftworks in Hong Kong. There were a
few air bubbles that need to be filled on my sample, but this was a fast and
easy task.
Click the thumbnails below to view larger
images:
Rockets and drop tanks are supplied, as is a nice ejection seat. The seat
is the full extent of cockpit detail.
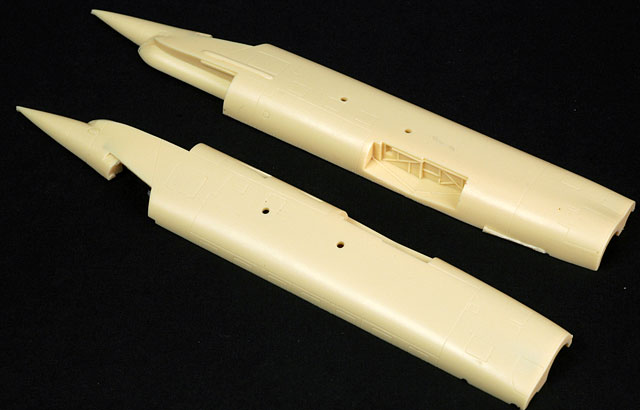
Wheel well detail is cast in place on the fuselage halves.
Very little cleanup of the resin parts is required before construction
begins.
The kit is cleverly engineered to help ensure secure fit of major parts.
The fuselage has locating holes for the wings and the fin, and the
horizontal tailplanes slot into the top of the fin for a secure bond.
Markings for six speculative aircraft are supplied, but with the real
aircraft never having been completed you can please yourself about the
finish of your model. These attractive markings will provide ample
inspiration, however. The decals are printed by Fantasy Printshop, and are
thin and in perfect regsiter.
Construction Underway...
When I received my early production sample some months ago, I did not
really intend to build the model immediately. I was just going to test fit
the parts.
As it turned out, preparing the parts was so easy that I thought I might
glue a few components together. The fit was so good that I just kept going!
I only have a few comments and suggestions about
construction:
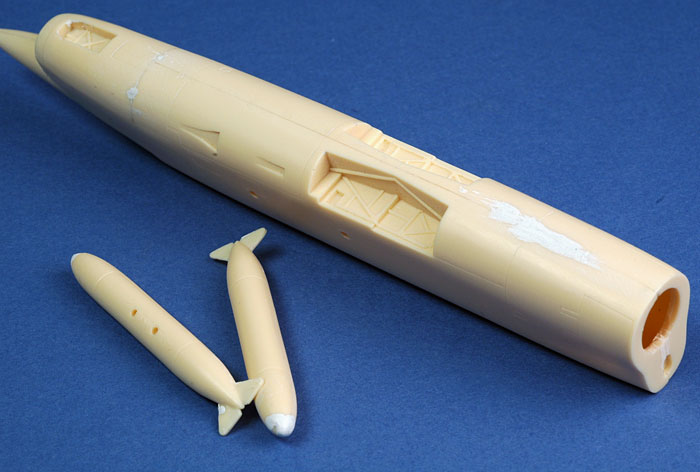
Do take a few minutes to check
for pin holes and air bubbles. On my sample, there were a few on the
fuselage and wings, and more noticeably on the drop tanks. These were filled
with Milliput and sanded smooth when set.
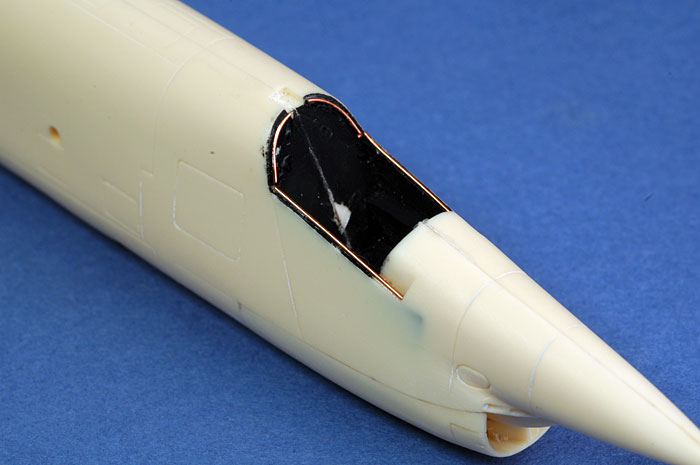
The vacform canopy is very thin.
If you are securing it in the closed position, I recommend gluing a fine
bead of copper wire (or plastic sprue, or fuse wire, or any similar
material) to act as a positive lip to glue to the inside edges of the canopy
part.
If you are building the aircraft
with the wheels down, remember that the intake lip would have been extended.
My early sample did not come with instructions so I did not discover this
detail until it was too late!
I have not yet added nose
weight. I have not glued the jet nozzle in place, so I can add small lead
pellets iside the fuselage if required.
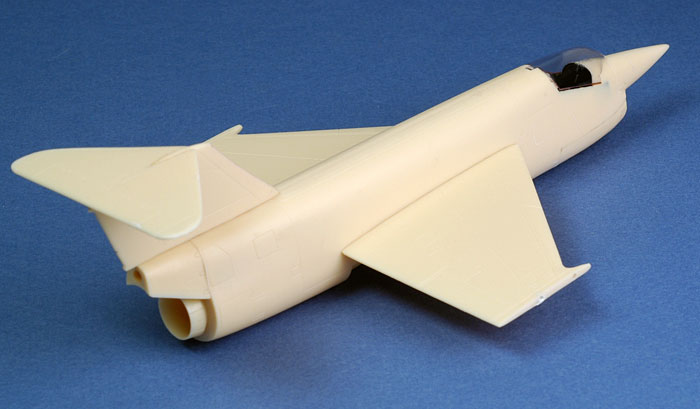
Otherwise, construction has been very straightforward.
Fit is almost flawless. No filler has been applied to joins
in these photos. However, I did manage to slightly misalign the join on the
bottom of the rear fuselage. This step was filled with Milliput and sanded
flat when set.
I look forward to completing and painting the model now that
I have received the decal sheet. A full Feature Article will be posted to
HyperScale when I have finished.
Text and Images Copyright © 2006 by Brett Green
Page Created 24 November, 2006
Last updated 21 February, 2007
Back to HyperScale Main Page
|
Home | What's
New | Features
| Gallery |
Reviews | Reference
| Forum
| Search