|
F4U-1 "Birdcage" Corsair
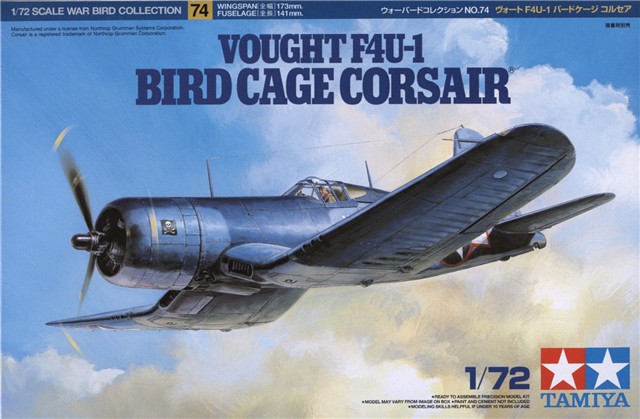
Tamiya,
1/72 scale
S u m m a r y
|
| Item No. |
Tamiya kit number 60774 |
| Contents and Media: |
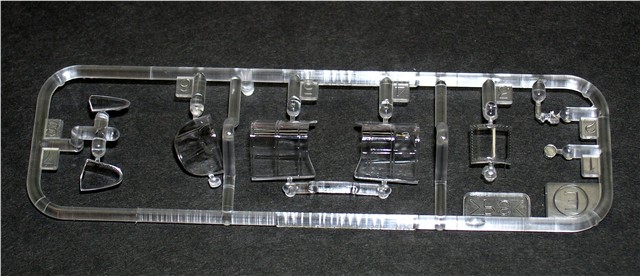
Three grey plastic sprues, one clear
plastic sprue, one decal sheet, one bag of poly caps and an instruction
booklet. |
| Scale |
1/48 |
| Price: |
1500 Japanese Yen |
| Review Type: |
FirstLook |
| Advantages: |
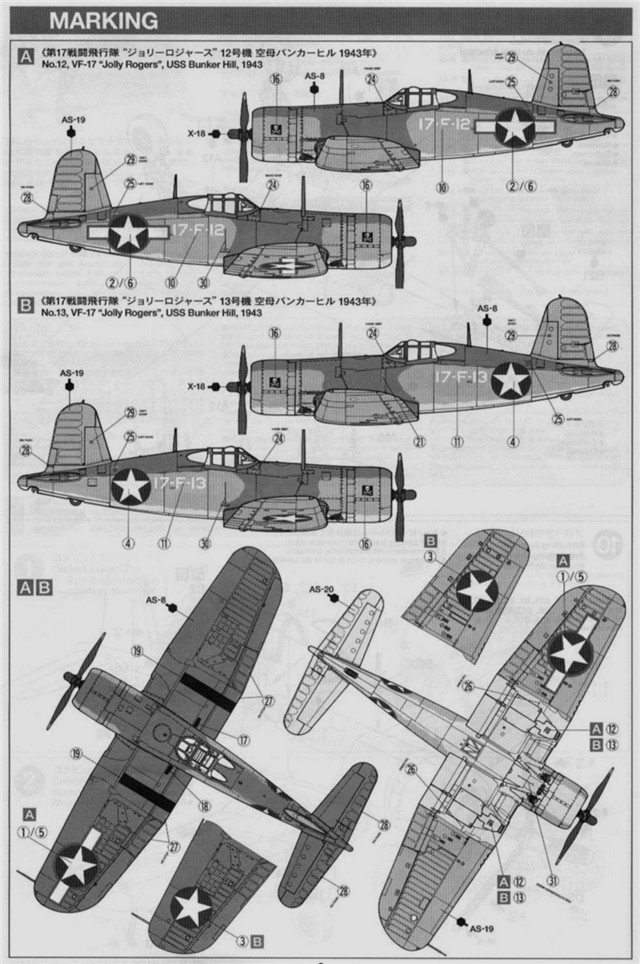
Makes use of the superb 1/72 Tamiya
F4U-1D as the base kit. Decals for four different aircraft featuring
three in the so-called tri-color scheme and one (Walsh’s “13”) in Blue
Gray over Light Gray. A well detailed, quick and easy kit that makes a
great out-of-the-box model or a very good start for a super detailing
project. If not building the kit strictly out-of-the-box, some added
detail and corrections will improve the finished model. |
| Disadvantages: |
Some may consider cost as the
principal disadvantage. In the USA, the MSRP is around $23.00 USD. Parts
for the day fighter only. |
| Recommendation: |
Highly Recommended |
Reviewed
by Don Fenton

Tamiya's 1/72 scale F4U-1 Birdcage Corsair will be available online from Squadron.com
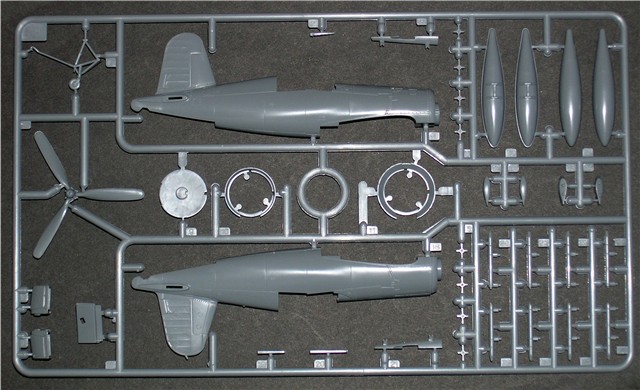
At last we have the Tamiya 1/72 F4U-1 Birdcage Corsair. The F4U-1 kit
includes sprues “A” and “B” from the superb 1/72 Tamiya F4U-1D kit.
Click the thumbnails below
to view larger images:
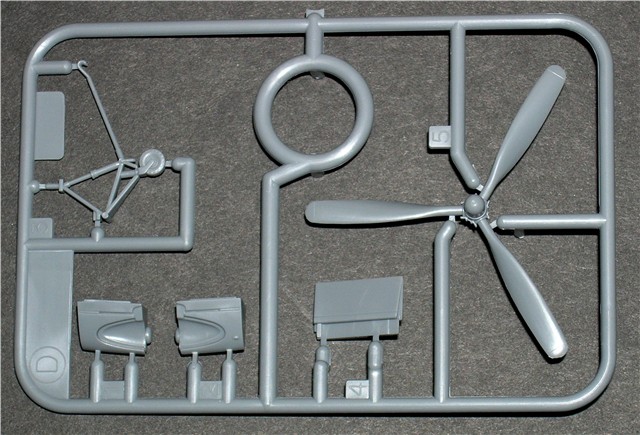
A separate sprue “D” has the narrow chord propeller, halves for the
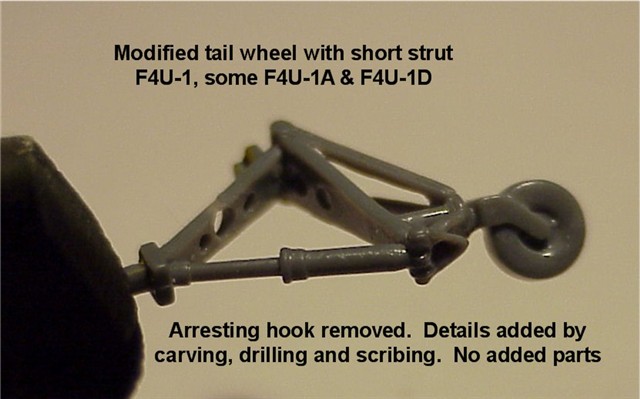
turtleback with fuselage window installation, short strut tail wheel
assembly and the right inner wing flap without the rectangular step in
it.
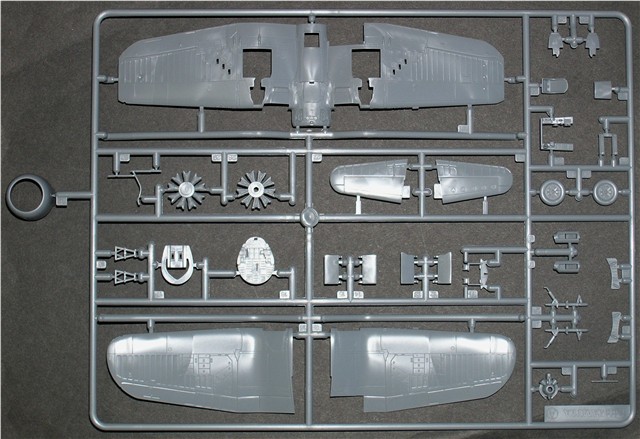
Sprue “E” has the clear parts, including the side windows, correct
windscreen, two styles of canopies, wing light lens, lower fuselage
window and a representation of the early gunsight with integral
reflector.
Scribed lines and raised detail, when appropriate, and a parts layout
reminiscent of the 1/48 Tamiya kit of the F4U-1 are the highlights of
the kit. The fit of the parts is very good. Dry fitting of the parts
indicates that little filler will be required. The kit provides parts
for the dayfighter only. This leaves open the future release of the
F4U-2 night fighter.
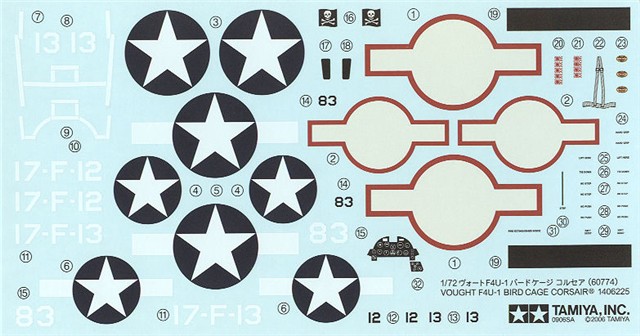
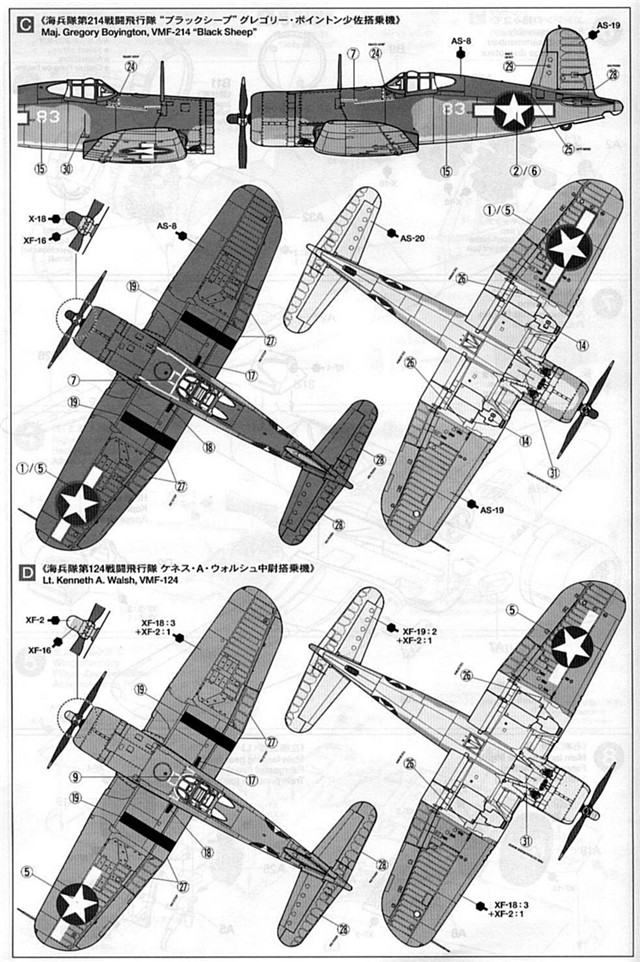
The decal sheet provides options for four different aircraft with
national insignia for three. These are 17-F-12 and 17-F-13 both of
VF-17, VMF-213 white “83” Major Gregory Boyington, and white “13” from
VMF-124, one of Lt. Kenneth Walsh’s Corsairs.
Click the thumbnails below
to view larger images:
General Comments:
-
Saw off the clear parts from the
sprues. Sand off the resulting stubs. The canopies are attached at
the bottom edges. Snipping these parts off is probably not a wise
move.
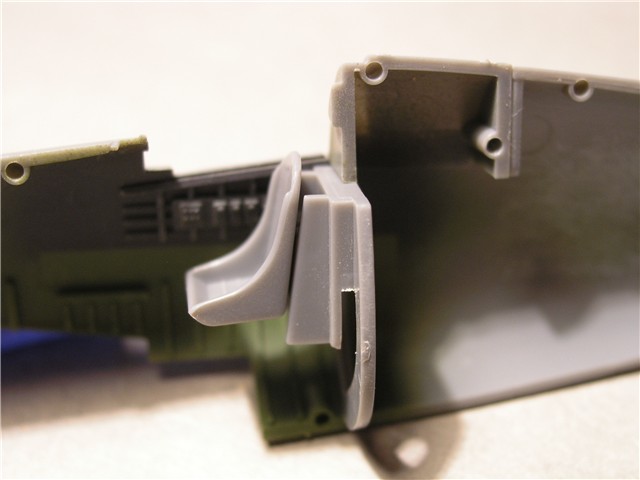
-
Be very careful when removing the
tail wheel assembly, rudder pedals and control stick from their
sprues. These parts are easily broken.
-
The kit has included in it many
features of the F4U-1, F4U-1A and F4U-1D.
<<Insert image left wing bottom>>
<<Insert image right wing top>>
<<Insert image wing center section>>
<<Insert image wing vent>>
Follow the kit instructions, noting which features to remove or use.
- The kit does not include fuselage centerline tanks, bomb rack or
ordnance. The F4U-1 birdcage was not configured for the carriage of
centerline fuel tank or ordnance. Field modifications may have
allowed use of a centerline bomb rack.
Here are some observations of the kit:
Engine cowl flaps:
- The kit provides the engine cowl flaps opened and closed – Parts
B10 and B11. The early production F4U-1 had all around cowl flaps.
The two aircraft, 17-F-12 and 17-F-13, had these all around cowl
flaps. Check images of the aircraft that you are making to get the
correct configuration. You can easily make the all around cowl flaps
from the parts in the kit.
Insert image cowl flaps>>
If installing the all around cowl flaps, fill in the notch in the top of
the fuselage and shape to match the existing rounded contour.
The top three cowl flaps were modified to minimize oil spatter and
accumulation on the windscreen. This was accomplished in three stages.
In the first change, the top three cowl flaps were merely battened down.
The second change replaced the top three cowl flaps with a 0.064 gauge
pan. The third was a production change. The method of actuation was
changed and a “dead cowl flap” replaced the three top cowl flaps. The
kit represents the third change.
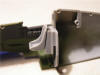
Cockpit:
In 1/72 scale, the kit parts are a very good representation of the
F4U-1 cockpit. For those that like to detail and modify kit cockpits,
many items can be added such as a new instrument panel to represent that
installed in the F4U-1 birdcage, seat belts, a tubular mounting frame
for the seat, battery, signal pistol installation, Engine Control Unit,
map case, bullet resistant glass on the cowl deck, changes and additions
to left and right consoles and sub-panels, addition of flap control,
additional tubing and wiring are items to be considered.
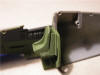
The kit instruction sheet correctly shows no switch boxes mounted on the
cowl deck above the instrument panel. In the F4U-1 birdcage, the
switches for gun control and the gunsight rheostat were installed on the
left hand sub-panel below the flap control.
A simple improvement is to modify the seat mounting without making a
tubular mounting frame. The seat installed onto bulkhead part A17 places
the seat too far forward in the cockpit. This is the result of the
design of part A17 and the right and left panels, part A22. On part A17,
remove the seat mounting plate (represents the armor plate behind the
seat) by slipping a saw blade in the gap between the armor plate and the
bulkhead.

Sand the front face of the bulkhead and the rear of the armor plate
smooth. The armor was 3/8” thick steel plate. That’s 0.005” thick in
1/72 scale. Reduce the thickness of the armor plate, if you like.
Click the thumbnails below
to view larger images:
|
|
|
|
Before Adjustment
|
|
|
|
After Adjustment
|
|
|
Glue the plate and seat mounting brackets to the bulkhead. The angle
of the seat can then be adjusted. The sides and back of the seat can
also be sanded a bit thinner. Remove the connecting bar on part A22 to
separate the left and right hand panels. The modification of the seat
mounting will not allow this connecting bar to slide between the seat
and the bulkhead. Glue the left and right hand panels directly to the
instrument panel on the cockpit front assembly part A16. A few minutes
of work will make an improvement in the cockpit.
Not all birdcage Corsairs had the head rest installed. Remove the head
rest from the kit turtleback. This eases the task of making a nice,
seamless bulkhead above the seat.
The kit instruction sheet provides a mix of two parts Flat Yellow XF-3
and one part Flat Green XF-5 as the cockpit paint finish. The E&M for
the F4U-1 states Lacquer - Dull Dark Green USN Spec. AN-TT-L-51 for use
on the cockpit interior. William Reece in his well known monograph “USN
& USMC Aircraft Interiors of WWII” dated 20 April, 2004 states:
“F4U-1 Birdcage Corsair. Cockpit: Well this is tricky. The
best evidence is black. Photos of F4U-1s taken at the time show the
cockpits as being a very dark color. The F4U-1 E & M manual calls
for Dull Dark Green. Photos and some wrecks show flat black. A photo
of 'Pappy" Boyington in Bruce Gamble's book, The Black Sheep, shows
him sitting in a Birdcage with a black armor plate and upper seat.
This a/c also has no headrest. All other areas of the F4U-1 Birdcage
Corsair would normally be 'Salmon'. Salmon is a pale pinkish/brown
primer made by mixing Indian Red pigment with Zinc Chromate Yellow.
The closest Munsell match is 2.5 YR 6/8 or between FS 32276 and FS
32356. This color was applied to the whole F4U before the final
camouflage finish. The landing gear bays were this color. The
insides of the main gear doors were Light Gray. Sometimes this was
only over spray over the Salmon. Note: there were canvas covers on
the inner and outer wheel bays that were either Olive Drab or Light
Gray. The closest paint that I have found to the Salmon samples in
my possession is PollyScale Railroad, Southern Pacific Daylight
Orange. The E & M manual calls for the wheel bays, engine cowling
and accessory cowlings to be painted in Non-Specular Light Gray to
match the underside of the aircraft. Recovered wrecks show these
areas to be Salmon however. Color photos of early Corsairs show the
cowling interior to be Non-Specular Light Gray.”
Take your pick for the cockpit and wheel well finishes.
Wings:
The images above show the many features of the kit wings. More
details can be added to the wheel wells as you see fit. The kit is nice
as is. A couple of simple additions that can be made with decal strips
are the wedge plates installed on the rear wall of the wheel wells and
the canvas cover on the inner wall of each wheel well. The wedge plates
were sometimes dark colored, perhaps black. The canvas cover was olive
drab or dark gray. Page 19 in the Detail & Scale “F4U Corsair”, Vol. 56
has a nice image of the wedge plate and canvas cover as installed in an
F4U-4. The birdcage Corsair was similar.
The kit instruction sheet correctly shows the removal of the small stall
strip on the right wing. The small rectangular indentation in the left
wing leading edge adjacent to the wing fold of the moveable wing section
is the approach light installation. The same indentation on the right
wing is the location of the gun camera. The F4U-1 birdcage did have both
in addition to the retractable landing light under the left wing. Add a
white identification light on the upper surface of the right wing in
line with and forward of the blue formation light.
Fortunately, the kit provides the wing flaps in the raised position. The
fit of the right inboard flap is not good. Careful fitting may be
required. Splitting the flap and gluing the halves to match the trailing
edges of the top and bottom of the wing may provide a better fit. The
rectangular opening (step) in the right inboard flap was not found on
any WWII era F4U-1 Corsair. Kit part D4 saves you the trouble of filling
in the step.
A characteristic of the F4U-1 was the overboard vents for the wing
tanks. These were small tubes located in the minute circular indentation
that the kit has just outboard of the rectangular hatch near the wing
tip. Even in 1/72 scale this feature is visible. See the above images of
the kit wings.
The kit does not provide the bomb racks for the outboard wing panels.
The VF-17 aircraft featured on the decal sheet most likely had these
bomb racks installed.
Engine:
The kit engine is one of the best R-2800’s in this scale. Adding
ignition wires will make this engine a rival of the aftermarket resin
engines. Aires, Vector, Engines & Things and Quickboost offer finely
detailed replacement R-2800’s.
Tires and Wheels:
The main landing gear wheels can be used as is. F4U-1 aircraft are
often shown in images with smooth contour, high pressure tires. The
tires are listed as 8 X 32. Carefully, split the tires down the middle
with a razor saw. Sand smooth and glue the halves together. Fill the
tread pattern and sand smooth.
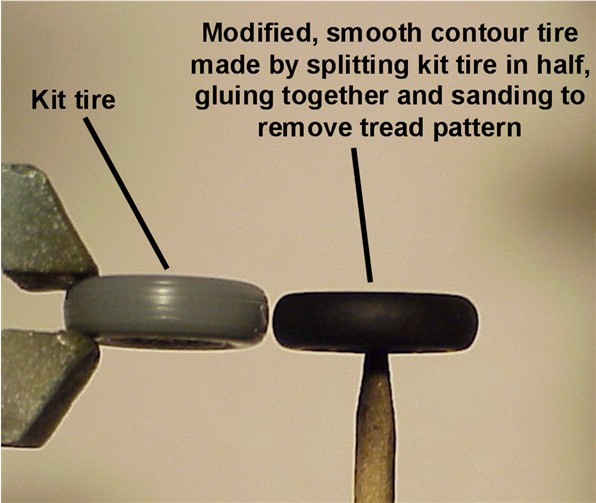
With a little work, the tail wheel assembly can be improved without
PE parts.
Fuselage:
The engine exhaust pipes are molded in the lower
fuselage. The Moskit exhaust pipes are good replacements. Use small
diameter plastic rod to replicate the “V” shaped truss visible inside
the lower fuselage window.
On the bottom of the fuselage, fill in the small, rectangular notch in
the intercooler door. Remove the small protrusion between the exhaust
pipe openings and forward of the three backfire pressure relief valves.
Also, the backfire relief valves are better represented by filling in
the oval shaped recess containing the three raised circles. Scribe an
oval and three small circles in the same locations. The valve openings
were flush with the aircraft skin.
The tail wheel well is nicely detailed. Bulkheads, trusses and other
details can be added to fill in the space. The kit instructions direct
the removal of the fairings from the tail wheel doors.
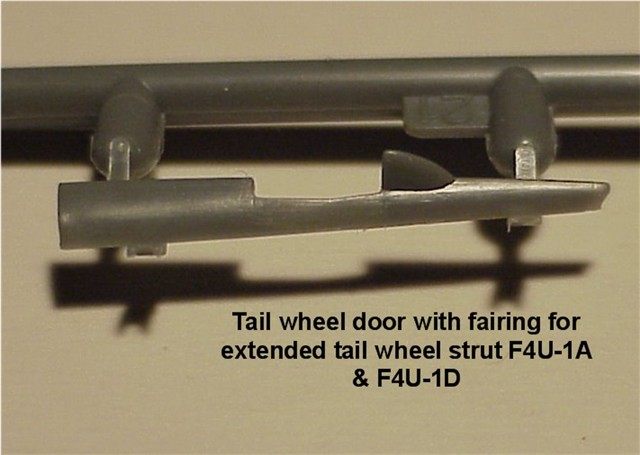
Two different types of tail wheel doors were used. If
you are building one of the VF-17 Corsair’s, you may want to look at the
image on page 58 of Styling’s “Corsair Aces of World War 2”. This
clearly shows the type of door installed on the early F4U-1’s.
Got spare parts? Have a spare F4U-1D windscreen and canopy left over
from a Tamiya/Hasegawa F4U-1 kit bash? With clear sprue “C” and
turtleback parts B15 and B16 from the F4U-1D kit, the narrow chord prop
and the short tail wheel strut, an F4U-1A, Corsair II or Corsair IV(as
an USN FG-1A equivalent) can easily be built from this F4U-1 kit.
Patience. The 1/72 Tamiya “raised cockpit” F4U-1 (or F4U-1A) is due for
a December, 2006 release.
Highly recommended.
Kit purchased with reviewer's funds.
Review Copyright © 2006 by Don Fenton
This Page Created on 31 October, 2006
Last updated 21 February, 2007
Back to HyperScale
Main Page
Back to Reviews
Page
|
 Home | What's
New | Features
| Gallery |
Reviews | Reference
| Forum
| Search
Home | What's
New | Features
| Gallery |
Reviews | Reference
| Forum
| Search