|
Westland Wyvern S.4
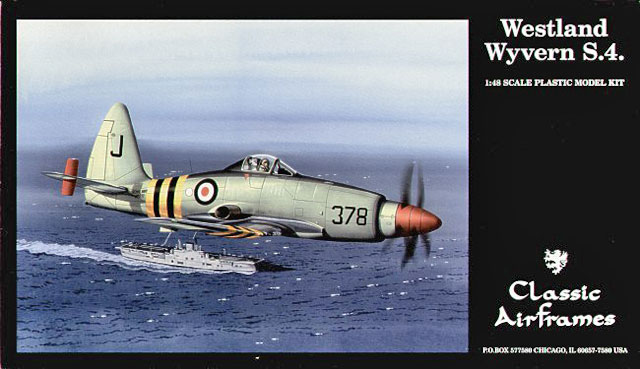
Classic Airframes, 1/48
S
u m m a r y
|
| Catalogue Number: |
491 - Westland Wyvern S.4 |
| Scale: |
1/48 |
| Contents and Media: |
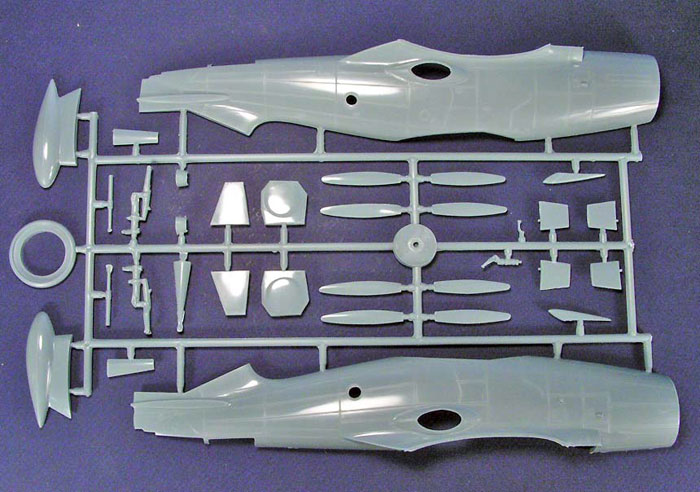
68 parts in gray styrene, 15 parts in gray
colored resin and 2 clear injection molded parts. Instructions, decal
sheet and painting guide for 3 aircraft. |
| Price: |
MSRP
USD$55.00 |
| Review Type: |
FirstLook |
| Advantages: |
Sharp panel lines, highly detailed seat,
under-wing stores and improved packaging of parts. |
| Disadvantages: |
Aligned props and “clunky” looking rockets. |
| Recommendation: |
Highly Recommended |
Reviewed by Steven "Modeldad" Eisenman

Classic
Airframes' 1/48 scale Westland Wyvern is available online from Squadron
\
Looks like I have arrived at the party as a
“Johnny-come-lately” but the party appears to be going strong. There is
a remarkable amount of interest being shown in this model of an aircraft
of which approximately 127 were built, in all variants, and which saw
limited combat.
During the Suez Crisis of 1956, Wyverns engaged in
82 missions, both in the fighter-bomber and reconnaissance roles. The
first combat mission was flown on November 1, 1956 against Dekheila
airfield. Two Wyverns were lost during this operation - one to hostile
fire, the other due to engine failure.
The first thing I noticed when I opened the box was
the packaging. The plastic, resin and clear parts were separately
packaged. This resulted in a clear part that was not scuffed. While
the two-part canopy is nicely molded, a dip in Future polish will
enhance the clarity.

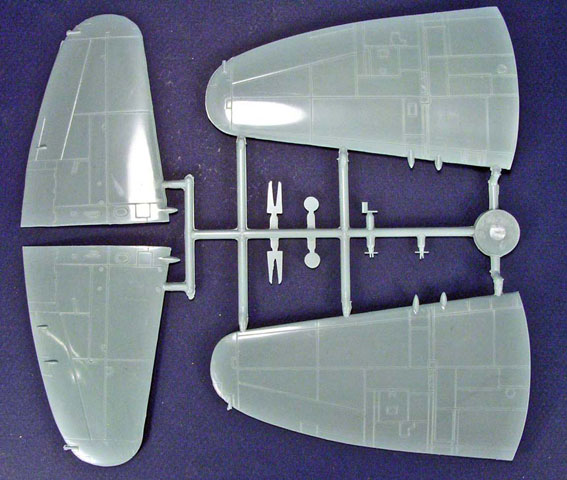
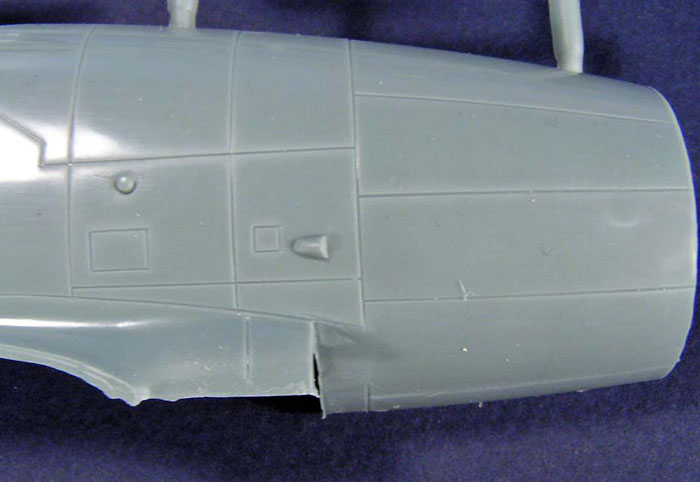
The panel lines were also notable. I don’t believe
I have seen such sharply defined panel lines on any previous Classic
Airframes kit.
I pulled out a Defiant and an F-5 just to compare,
and the Wyvern’s are quite different and distinct. I’m not sure how
much sanding will be needed in constructing the Wyvern, but in other
kits the first victim of the sand paper are panel lines. Also,
pre-shading the Wyvern may be gilding the lily a bit. I did an
experimental painting (more about this later), and the panel lines show
quite well. Even in the poor quality photos that I have in my files,
the panel lines are evident on the real aircraft.
In looking over the sprues, I noticed a couple of
other things. As in nearly all limited run, low-pressure models, some
stubs will need to be removed, especially on the inner surfaces of the
wings and tail-planes. There is also a fine rim of flash on the edges
of the wings and tail-planes. I presume this to be the minor price for
the nice trailing edges and distinct panel lines. This should clean
easily with a sharp blade and a sanding stick.
Click
the thumbnails below to view larger images:
As was the case with their F-5, Classic Airframes
provides stores for under the wings. For the Wyvern, there are a pair
of auxiliary tanks and 8 rockets on rails with separate fins. From the
little information I have, it appears that when the tanks were fitted,
only the outer pair of rockets was carried. Without the tank, four
rockets could be carried under each wing. The rockets appear a bit
“clunky’ to my eye, and I’m sure some will seek after market. Never the
less, it is nice to have them in the kit. Unlike the rockets that come
with models from other manufacturers, the tips do not have sink
marks.
The Wyvern was not limited to carrying a single
rocket on each rail. Wyverns are shown with the "over and under" rocket
arrangement on zero length stubs. These presumably could be obtained
from an Airfix F. 22/24 kit. Also, while never used in operation, the
Wyvern could carry a torpedo. There is a picture of VW867 in a test
flight with a torpedo under the fuselage and two pair of the over-under
tandem rockets on each wing. I’m not sure if the appropriate torpedo is
available from an after-market company. Finally, there were tests done
with “RATO” packs. I believe a resin set was done in 1/72, perhaps a
set will be done in 1/48.
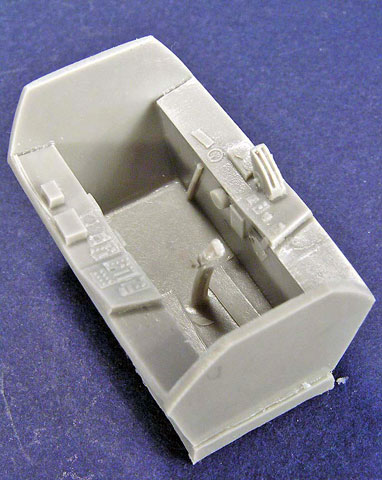
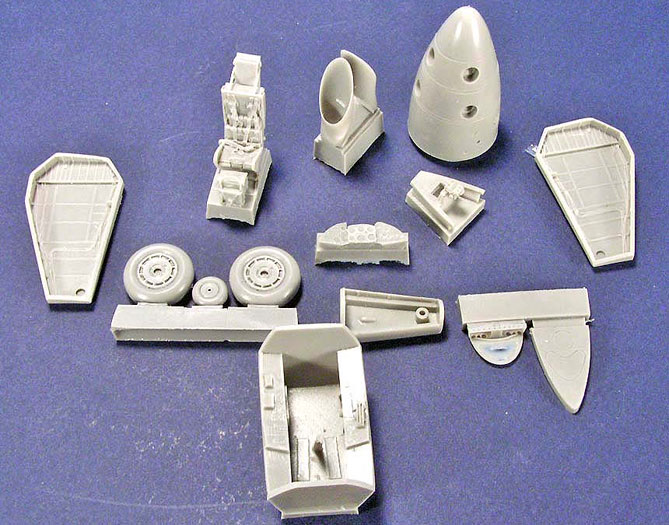
Speaking of resin, I was amazed to see the cockpit
tub. The control column was molded as an integral part of the pit! I
cannot recall seeing that arrangement before. The cockpit itself,
compared to the seat, is a bit basic and the detail is none too
distinct.
Click
the thumbnails below to view larger images:
A minor annoyance for me is the spinner. The
blades, fore and aft, are in the aligned position. With all those
blades, I would have preferred to see it arranged in the staggered
position. There is nothing incorrect about the aligned position, there
are numerous pictures, including in-service pictures on a carrier deck,
that show that arrangement. The problem is that the aligned blades just
don’t make an impact on the viewer. It can be corrected, if one so
wishes. Either one can cut the spinner and re-set it fore and aft, or
one could fill in one set of mounting holes and re drill them at the
staggered position.
The wheel wells have a very thin pour stub. It
appears they will require a little sanding at the outer portion to fit
between the wing halves.
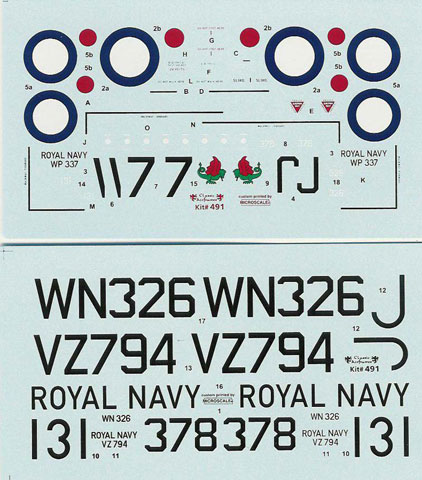
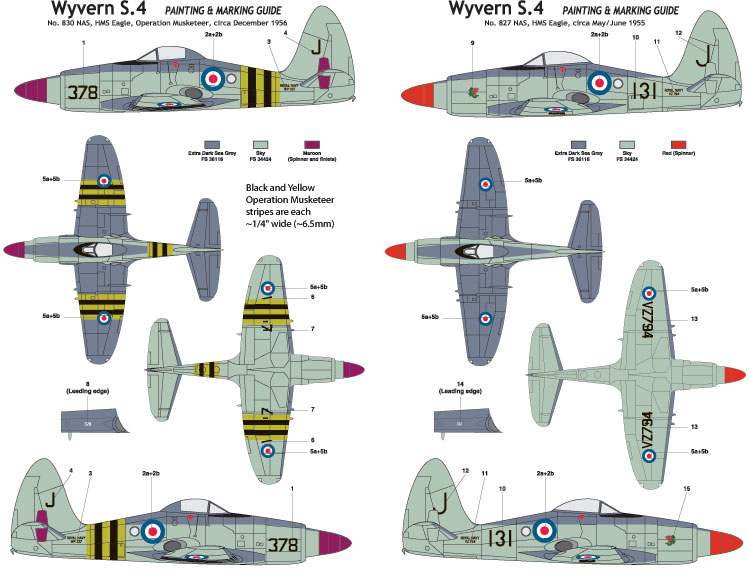
The kit contains markings for three different
aircraft and a set of stencils.
All the aircraft have the same paint scheme, Extra
Dark Sea Grey over Sky.
Click
the thumbnails below to view larger images:
The aircraft for which markings are provided are:
-
VZ794 /J /131 – No.
827 NAS, HMS Eagle circa May / June 1955.
-
WP337/J/378 – No.
830 NAS, HMS Eagle, Operation Musketeer (Suez), circa December
1956. This aircraft carries the black and yellow fuselage and wing
bands.
-
WN326 – RNAS
Stretton, HMS Blackcap, circa 1957.
Preparation and
Painting Issues
|
There has been some discussion about the nature and
cause of the shiny plastic of the Wyvern, and its suitability for
painting..
First, let me assure you that the plastic appears to be cured and
inert. Second, it seems that Classic Airframes now prefers that the
casting molds be highly polished, which leaves a very smooth surface on
the parts. This is contrary to what I understand to be the normal Czech
style of molding, which produces a slightly rougher surface with the
appearance of a flat or satin finish. Third, as in many kits,
especially resin and limited run kits, the mold is treated with a
releasing agent. This allows the resin or plastic to be more easily
removed from the mold.
I have heard of problems of paint adhering to the Defiant. I can say
that I had no such problems with that kit. With that being said, I
decided to conduct my own test of the issue.
The Test
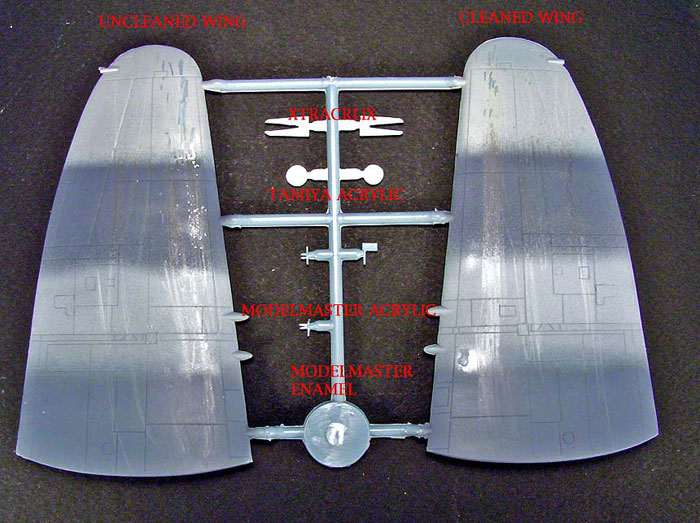
The plastic parts come
in a sealed plastic bag. I was careful not to handle the wings. I held
them only by the sprue. I cleaned one wing with denatured alcohol. I do
this on all my models before painting. The other wing was untouched.
I then applied the
following paints on the bare, unprimed plastic in bands across each
wing:
-
Xtracrylix
-
Tamiya Acrylic
-
Model Master Acrylic
-
Model Master Enamel
I made sure my airbrush
was thoroughly cleaned between each paint. I then shot some of the paint
into a paper towel before I applied paint to each wing. Note: The
paints were taken straight from fresh bottles and were not thinned.
They all shot quite well straight from the bottle.
After all paints were
applied, I waited about two minutes and dragged my finger across each
wing. Nothing of consequence happened.
I then ran my fingernail
across each wing. Xtracrylic scratched a bit on the uncleaned wing, and
less so on the cleaned wing. MM Acrylic barely scratched on the
uncleaned wing, and not at all on the cleaned wing. Tamiya acrylic and
MM enamel were not affected.
I waited five more
minutes and used Tamiya tape across all paint bands. I burnished it down
(you can see the residue) waited a few minutes and quickly lifted it
off. Nothing happened. No paint lifted from any sample.
Twenty-four hours later,
I ran my fingernail across both wings, and no brand of paint showed any
lifting or flaking.
Of course, “your mileage
may differ”. But, I believe that this simple test has reasonable
results. Now I have to clean all that paint off the wings!
From what I have seen so far, this is a great kit
of a distinctive aircraft. For those modelers who enjoy modeling a
theme, with the issuance of the Sea Hawk and Wyvern from Classic
Airframes, and the availability of other aircraft, one can do a
collection of Suez crises aircraft.
As for the painting issue, simply wipe down the
plastic with alcohol, or give it a light buffing with very fine sand
paper, if you prefer.
One final note, am I the only one to be reminded by
the Wyvern of the Convair XFY-1?
Highly Recommended.
Aircraft in Detail “Westland Wyvern”, by Sue J.
Bushell, Scale Aircraft Modelling, November 1991.
“Westland Wyvern”, by Richard Caruana, Scale
Aviation Modeller International, January 2003.
Selected Web Sites:
Thanks to
Classic Airframes for
the review sample.
Classic Airframes
kits are available worldwide through hobby retailers and from
Squadron.com
Review and Images Copyright © 2005 by
Steven "Modeldad" Eisenman
Page Created 17 January, 2005
Last updated 17 January, 2005
Back to HyperScale Main Page
Back to Reviews Page
|
 Home | What's
New | Features
| Gallery |
Reviews | Reference
| Forum
| Search
Home | What's
New | Features
| Gallery |
Reviews | Reference
| Forum
| Search